Thursday, March 28, 2013

Engraver Envelope Mini Album

This month I thought I would use the new Prima Line Engraver for my mini envelope album. I really loved playing with this album. It has so many little nooks and crannies. Below I have listed all the awesome products that Flamingo Scraps carries. So, make sure you hop on over to the store and pick up some of these goodies. Below is a link to my video if you have more questions about how to make this album. Thank for visiting us here at Flamingo Scraps and  have a Happy Easter!!


Prima Sherwood Rose Truffle
Prima Wood Icons in a Box – Typewriters & Clocks
Prima Wood Icons in a Box – Leaves & Flowers
Prima Washi Tape Rubber Stamp #2
Prima Washi Tape Rubber Stamp #1
Prima Washi Tape Rubber Stamp #5
Seam Binding – Tobacco Brown
Seam Binding – Cream
Studio Calico Wood Veneers — Triangles
Webster’s Pages Charm — Key
Maya Road Fabric Tape Solids – Eggshell
Maya Road Metal Trinket Clips Dress form
Prima Chalk Fluid Edger Dry Sand
Prima Chalk Fluid Edger English Ivy
Prima Classic Daisies Cream
Prima Engraver 6×6 Paper Pad
Prima Distressing Tool
Prima Hello Pastel Fiber Trim – 1yd
Prima Innocence 2B
Prima Mini Bouquet White
Seam Binding – Mimi Brown
Tim Holtz Distress Paints Set
Maya Road Trinket Pins Pearl Flower
Maya Road Trinket Pins Vintage Pearl
Prima SIIC Circles Clear
Prima Tiny Junkyard Findings Vintage Trinkets — Gears
Studio Calico Polaroid Frames — Card stock Colors
Teresa Collins Vintage Finds Stamps


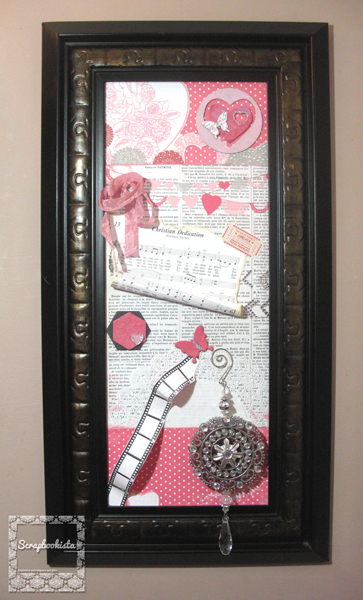
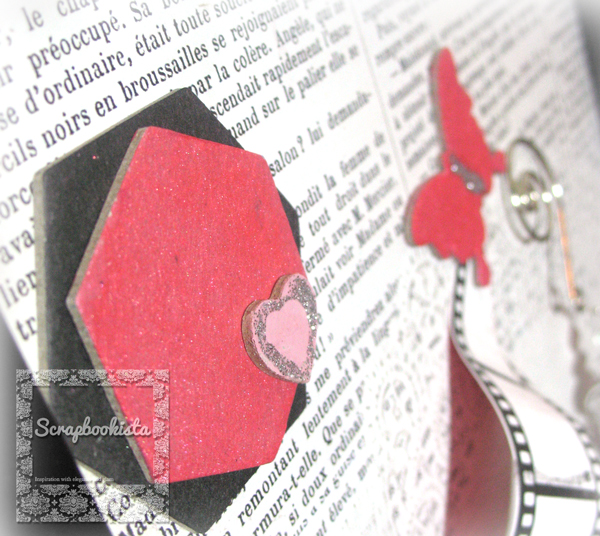
I also used a X-Cut Die Cut and Embossing folder. I love this die and it cuts like butter when used in my Cuttlebug. I so love how it looks when I layer some of the cuts together.
Here is the embossing folder-I used Vintage Photo Distress stain on this and clear embossing powder. I love how it turned out.

This is the ticket die I used with the Prima Dry Sand ink and Tim Holtz Picket Fence Paint.


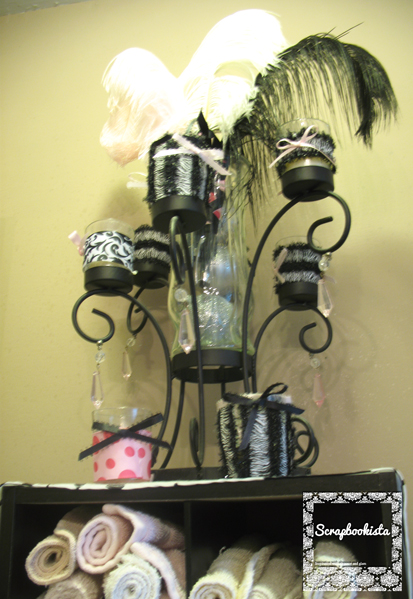
If you would like to purchase these,contact Suzanne for information regarding special orders.

Also stop by Flamingo Scraps and pick up some of these awesome products. She keeps adding more and more goodies week!!


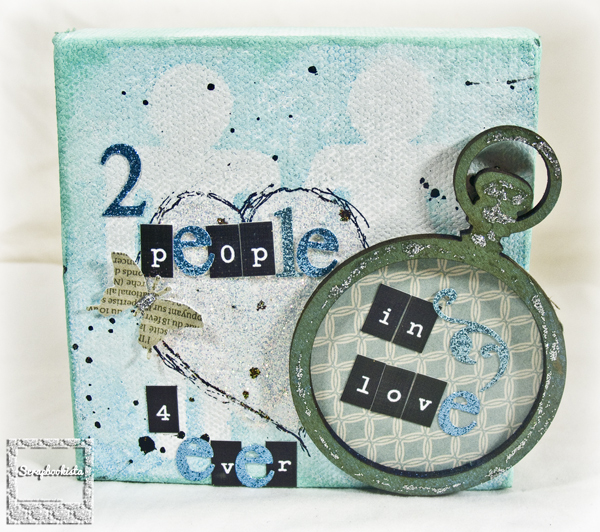
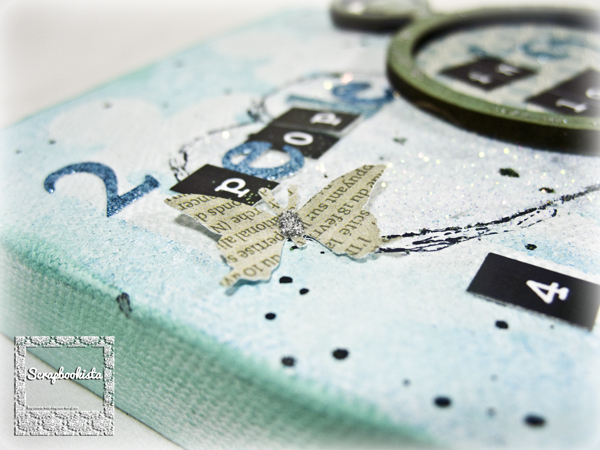
Here are instructions to make this Mini Album. I only made 4 inserts for the book. My YouTube channel. Be sure to subscribe to my channel. I will be having a giveaway soon!!

Have a scrappy Day!!
Ramona
My Blog

Wednesday, March 27, 2013

Spring is Here!

Hello Flockinistas!
Alicia here, back again, this time with a couple of easy cards that I have created for the spring from the great supplies you can get at Flamingo Scraps!


First up, I decided to use the Maya Road Fabric Tape to weave an egg pattern on a card made out of card stock.  I just drew the egg shape on the card and then cut vertical strips within the borders of the egg.  I then cut strips of the fabric tape, and weaved them in and out of the strips to create this woven effect.   I decided to try my hand at the hand stitching that is showing up here and there these days and went around the outside of the woven egg with some green twine. Finally, I created a little sentiment banner with some card stock, rub-ons, and then stamped the polka dots with one of the Prima Washi Tape stamps and Prima Chalk ink in Old Rose.

 Next up, I decided that I really wanted to use these FabScraps Pinwheels to create an adorable card for spring.  First, I used some Diamond Glaze and outlined the sections that I wanted for the pink glitter and sprinkled on the glitter.  I let it dry, then came back and repeated with the green glitter.  While that was drying, I got to work on the background of the card.  I used a watermark pen and some white embossing powder to create the cloud shapes and then ran it under my heat gun.  I then took some of the Heidi Swapp Color Shine spray in Mustard and masked off the top part of the card and sprayed where I wanted the "grass" to go.  Then, I followed up by spraying Tropicana Teal all over the front of the card, rubbing over the overlapping portion to make a more green look, and wiping the "clouds" to make sure they stayed white.  Before adhering the pinwheels, I did a little more of the hand-stitching to create the stems of the pinwheels.  The sentiment was created with some scraps and the "hello" stamp from the Maya Road Snapshot Words set (this is SUCH a great set!!) stamped with another of the Prima Chalk inks, and some random letter stamps that I embossed.

I am really pleased with how these cheery spring cards turned out and I just can't wait to send them out!  I love this time of year, and have really been enjoying the wonderful weather that we are having right now (just don't remind me about how hot it's going to be in Houston rather soon!)

Until next time!!
Alicia


Monday, March 25, 2013

My Sweet Baby Layout with Stitching Tutorial

When Catherine was 7 weeks old we had pictures taken of her in cute poses.  This was one of the gems than came out of that wonderful photo shoot.  She looks so sweet and cuddly - my sweet baby.


I used the Secret Crush papers, along with lots of other fun goodies from the Flamingo Scraps Store, like the flowers, resins, chipboard, and findings. I didn't want to cover up the wonderful hearts at the top of the page so I centered the picture and embellishments across the middle of the page.

For the right side cluster I left the chipboard plain as it blended so well with the layout already.  Don't be afraid to leave your chipboard naked.  I then added Prima flowers and metals to my cluster to finish it out.


On the left side cluster I used one of the gorgeous Prima tiles, Prima flowers, and Prima leaves, plus a little heart pearl pin in my cluster.


You can do a lot with resins, for this one I just left it plain and tied it in as the anchor holding up my picture.  Below I have layered an edge punched paper in white, a pink doily, cream colored paper with faux stitching (tutorial below), and a decorative coffee filter I sprayed with Heidi Swapp Primrose Color Shine which you can find in the Flamingo Scraps Store.

Faux Stitching Tutorial
 
1. materials needed - paper, mouse pad, paper piercer or thumb tack, and a pen.


 2. With the paper over the mouse pad pierce, the paper with your paper piercer or thumb tack around the edge of the paper.  The piercer will strike through the paper and into the mouse pad allowing a hole to form.  Your holes don't have to be perfect, some imperfection gives it a better illusion that you did the stitching on a machine.

3. Connect the dots (holes) with your pen (any color you wish).  The pen acts as your thread, so if you make some mistakes it is okay, it does not need to be perfect.


4.  When completed it gives the illusion of being stitched around the edge of the paper.


To buy most of these wonderful items seen in this layout please visit Flamingo Scraps.

Products Used:

Card stock
Patterned Paper - Pink Paislee
Flowers - Prima
Tile and leaves - Prima
Stickers
Doily
Ink - Prima
Mist - Heidi Swapp
Pen
Punch

Enjoy!!
Erin Reed

Friday, March 22, 2013

March Flamingo Four

It's time for another Flamingo Four! This month, three other designers and I worked with these products:


          1)  4x4 canvas
          2)  6x6 paper pad - Pink Paislee "Indigo Bleu"
          3)  Wendy Vecchi Art Parts - Pocket Watch
          4)  Maya Road Acrylic People key chain


Abigail's Take

I have to admit, I am not a fan of the whole potty people stick figure trend. But, wait til you see what I made with them! I was gonna give it as a gift, but now I want to keep it!

The first "challenge" with this project was that it is tiny! 4x4 inches is not a lot of space! The first thing I did was use the potty people stick figures as masks for a color mist. I laid them strategically where the man and woman were holding hands. Then I used a piece of paper as a mask and I cut a heart shape out of it. I laid that down over the canvas and used a liquid glue to cover the heart area. Then I sprinkled some translucent glitter on it to make a sparkly heart. I was a little surprised at how much the glitter covered. I was wanting the potty people stick figure's hand holding to show through a lot more.  I decided to outline the heart a little more just so it would stand out. I spattered some black ink over the canvas and rubbed some teal ink around the edges.

Scrapbookista----Flamingo-Four-March-2013---2

The next thing I did was mist the chipboard pocket watch. I used the same mist as on the canvas, but it came out a lot different because of the original color. I also added a little bit of glitter glue to the pocket watch to add some shine and glam. The paper behind the watch blends nicely with all the colors and ties things together.

Scrapbookista----Flamingo-Four-March-2013---4

I love the butterfly resting on the edge of the heart!  I made this with a punch and a sheet of printed words in the paper pack. So many cute ones to choose from but I loved this one with the text on it soooo much!

Scrapbookista---Flamingo-Four-March-2013---3


Erin's Take

When I first saw items and pondered what to do, I thought of the people as a family, so it took it from there.  I painted my mini canvas with a distressed look of paint colors (blue, green, yellow, white, and brown) with the same feel and tones as the papers I used, and them let it dry completely.

I used a green and a purple alcohol inks to color the people, making the adults more mottled looking by touching them more times with my felt dauber.


I used the same paint colors (the lighter ones) on the pocket watch as on the canvas, then used the blue distress ink over it when it dried to give it an even more distressed feel.


I then assembled the people and the watch onto the canvas (with zip dry glue), then added the family tag stickers and the twine.


I love this little mini canvas!  I now have a special place for it in my scrap room up on the wall.


Melissa's Take

When I saw this month's Flamingo 4, I immediately thought the people needed clothes, and the paper was perfect for that. The big challenge for me was what kind of clothes to make... enter my new bookshelf that I've got out wedding photo and honeymoon photo album displayed at the top and I knew immediately what to do!

I dressed the smaller figures from the key chain to look like a bride and groom, painted the pocket watch shape with some Weathered Wood Distress Paint, and backed it with paper. The canvas was painted with gesso, and a square of the Indigo Bleu paper was glued to it. I then added the Weathered Wood paint to the edges and glued the pocket watch shape down, the people on the pocket watch, and added the "est. 2003" because that's when my husband and I were married.


I really love the way I did the bride's dress, with border punched layers that I curled upwards to give dimension, and the bow tie on the groom. Isn't it just adorable?


In the end, it looked great on my bookshelf! It adds some personality to an otherwise boring arrangement, and the size is perfect!


Cindy's Take

As usual, there were some tricky components in this set of items!  The 4x4 canvas makes a natural base, but its small size means that it would be very difficult to fit the other items onto it.  But a solution came to me quickly this time.  I love when that happens!  

I cut a yellow piece of the paper to just under 4x4 then dug through my stamps.  I found a Fiskars "enjoy..." stamp and a Scenic Route "TODAY" and stamped them together on the upper left hand corner of the paper.  I used matte Mod Podge to attach the paper to the canvas. While I was waiting for that to dry, I painted the pocket watch black.


I took apart the key chain and selected the woman.  I peeled the protective film off the acrylic, then put the acrylic back on the chain for a future use.  I put spray adhesive all over the protective film and pressed it to a sheet of type paper.  Then I fussy-cut out the shape.  I pulled out two different prints - a blue for her dress and yellow floral for her hair.  I cut the hair by using a scallop circle punch, then shifting the shape and punching the other side.

 
I layered these together and let them dry.  Then I used the Mod Podge to add a few more shapes to the canvas.  When that was dry, I turned the canvas over and attached the pocket watch.

 
Here's my finished project.  Enjoy today - an important reminder for us all.  

 
That wraps up another fun Flamingo Four!  We'd love to see your take. If you make something using the same four supplies as our designers, please let us know and we'll feature it here on the blog. To find the materials we used (and so much more!) visit the store at www.flamingoscraps.com!


Wednesday, March 20, 2013

3 Wise Monkeys, Well Traveled

Good morning, Flockinistas! Melissa here, and I recently got to play with Carta Bella's Well Traveled collection, and let me tell you, I had tons of fun! I spent tons of time distressing and adding my own touches to the papers to give it my mixed media feel, and I really love the results!


If you've never had the pleasure to touch the Carta Bella paper, you are really missing out! It's a very high-quality, durable, paper. It can take the worst of your scraping, your painting, wetting, and wrinkling! I really had a lot of fun trying out tons of techniques on it. I really loved the patterns, but I'm not usually a fan of using them as a background. Most pattern papers will warp terribly when you paint over them, but not this! It took my gesso coat like a champ, and then it took a full out wet-paper-misting, crumpling, and crinkling. 

Another fun experiment was with the decorative tapes. I cut circle from a piece of paper and then striped the tape over the circle. Then I sanded the tapes a bit to give it the distressed quality of the rest of the page.


I also sanded the edges of the photo, the chipboard, and the alphabet stickers so that the distressed feel followed through every element of the page. 


I took the shot, above, just so you could get an idea of how durable this paper is. It takes a lickin' and keeps on stickin', that's for sure! 


And for my final bit for the month, I thought I'd show off one of those corners. It really was simple to get this effect. I sprayed the edges of the paper with water, enough to saturate it. Then I blotted the excess water with a paper towel (it's important to not rub, otherwise you could rub the pattern off the paper). While it's still wet, pull the paper inwards to crinkle it and crumble it to your desired consistency, and then let dry. Once it's dry, take an emery board or a piece of sandpaper and run it lightly over the creased spots. 

I adhered my background paper to a piece of solid cardstock, but you can choose to put it on another piece of patterned paper, if you like. I thought the plain black background suited this page better, though. 

Anyhow, just about everything I used on this page is available in the Flamingo Scraps store:

Thanks for checking out our blog, and be sure to check out Flamingo Scraps at flamingoscraps.com


Melissa

Monday, March 18, 2013

Pink and Bling Altered Wall Hanging

If you know me, you know I love anything sparkly and pink! So, it should be no surprise that I have my bathroom glammed out in pink! Here are a few shots of my bathroom decorations:
Altered-Wall-Hanging-Frame-2
  Altered-Wall-Hanging-Frame-4
  Altered-Wall-Hanging-Frame-5
Altered-Wall-Hanging-Frame-6
Lots of pink and black! Except for that little blue jewelry box, but that stays because it's the box that my engagement ring came in =) The beige walls are another story. Perhaps those will go soon...
I also have a frame with a picture in it that just didn't match. I love the picture, but as you can see here it just wasn't pink.
Altered-Wall-Hanging-Frame
I have been wanting to redo this picture for a while now and since I have some of the gorgeous Pink Paislee Secret Crush paper left I thought it would make a perfect addition to my bathroom!
What do you think? Pink and Bling enough?
Altered-Wall-Hanging-Frame-7
I started by taking the glass out, removed the insert and re-papered it with the Secret Crush. I used two papers and cut them down width wise to fit, then cut the pink one in half and placed it on top and bottom, finishing with the white text print paper in the middle. I inked the edges of the white paper with Prima Chalk Fluid Edger in Old Rose. I fussy cut a heart cluster out of another Secret Crush paper and added that to the top section and one half heart to the bottom. I tore a page out of an old song book that was my favorite song and I rolled it up in a scroll fashion and adhered it down.
Altered-Wall-Hanging-Frame-9
I used a chipboard butterfly and some hexagons here. The red-pink ones are misted with Heidi Swapp Sweet Cherry Color Shine and the tiny pink heart is painted with Tim Holt Distress Paint in Spun Sugar and some glitter glue.
Altered-Wall-Hanging-Frame-10
Look at these gorgeous bling arrows from Prima! Aren't they just yummy!?!? I also really love the subtle aged look that the Tim Holtz gave the torn edge of the song.
Altered-Wall-Hanging-Frame-11
I painted the larger light pink heart with Tim Holtz Distress Paints in Spun Sugar. On the smaller one I misted it with Heidi Swapp Sweet Cherry Color Shine and added some glitter glue. I then went back over it with some Tim Holtz Distress Paint in Picked Raspberry to add some 'highlights.' I used a Pink Paislee Artisan Chipboard Butterfly and left it white to add some contrast.
Altered-Wall-Hanging-Frame-12
Ah, Rose Petal colored seam binding ribbon! I love the shabby-chic softness this ribbon has!
Altered-Wall-Hanging-Frame-13
This Pink Paislee Paper Goods ticket stub was cute here next to my favorite song.
I love having this unique, one-of-kind wall art hanging in my bathroom!
Related Posts with Thumbnails