Showing posts with label Tim Holtz. Show all posts

Monday, January 20, 2014

Birthday Wishes for Aunt Darlene

Hey all!  Hope you are getting some sunshine where you are.  We finally have had a least 4 days of sunshine. It sure makes everyone a little bit happier.  It was so nice that I got to work out in my yard.  I am blessed to live where we have spring starting the end of February.  I love all the spring flowers.  The colors and smells makes my heart sing.

On my last post I made a birthday gift for my aunt.  I am doing a follow up on the January 7th post.  I have finished up the mini photo book and made a birthday card.

I had ordered Marion Smith's Garment District and hadn't gotten a chance to use it.  As you may remember I used the Mad Tea Party and Nirvana papers for the gift box along with the the mini. I used the Garment District 6 x 6 papers to make the birthday card.  I love it when you can mix and match.  Awesome!


I cut a sheet of solid color 12 x 12  card stock in half, making it 6 x 12.  I then scored it at 6" to fold in half. I distressed the edges of the paper with my Prima distress tool and Tim Holtz Distress Ink in Pumice Stone.
I layered the paper along with a paper doily. Did you notice the pretty lace and trim from my stash. I used a digi image from Saturated Canary - Maxine (colored with Copic Markers).  Maxine reminded me of my aunt in her garden. The flowers are a mix of stash flowers and Prima flowers sprayed with Heidi Swapp Color Shine.  The little butterfly on the flowers is made from the Mod Podge line and colored with Tim Holtz pens.


On the inside of the card is another 6 x 6 sheet of Marion Smith's Garment District and another digi from Saturated Canary - Tea & a Book (colored with Copic Markers).  How many of you Skype?  My aunt and I spritzen (what my husband calls it) quite often over tea or coffee.  I don't feel so home sick when I get to talk and see her.


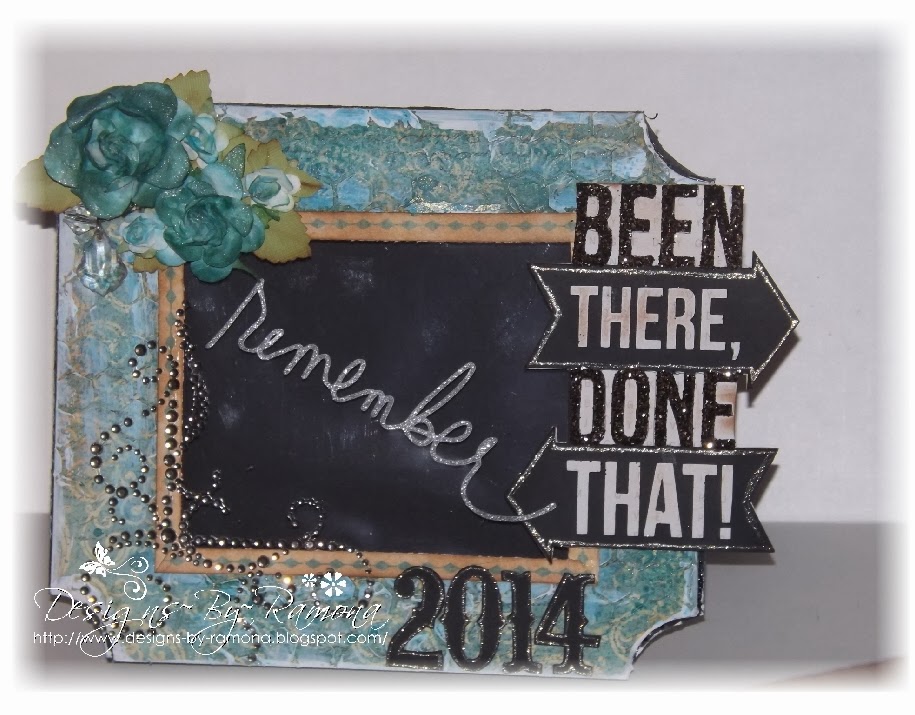
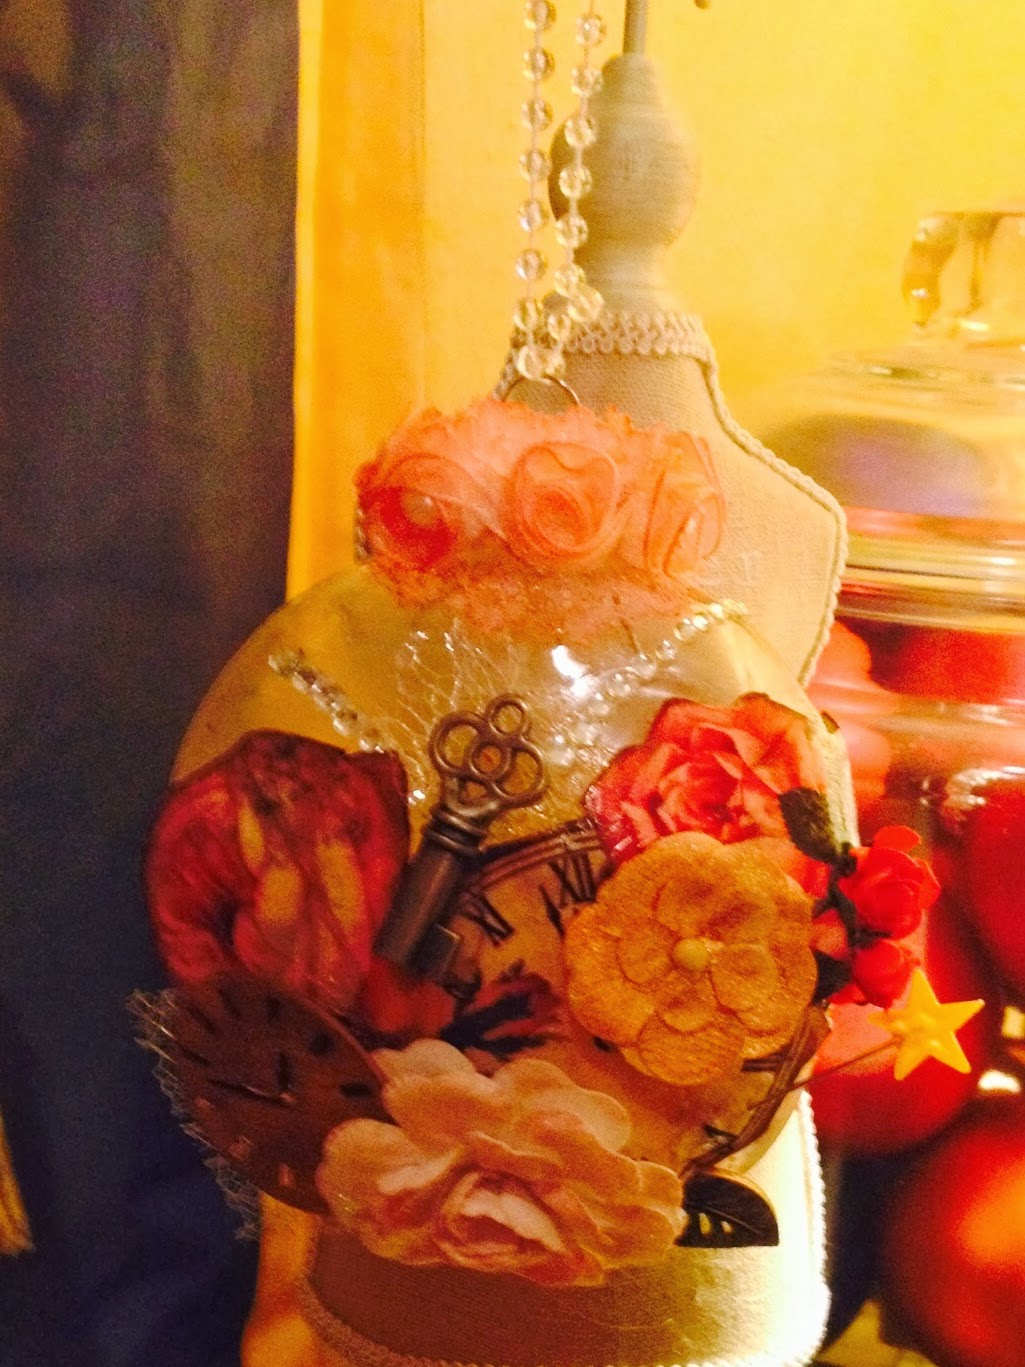
Here are a few shots of the completed mini that I promised.  Used my stash all the bling and flowers.   The little blue bird is Mod Podge colored with Tim Holtz pens.


Hope you enjoyed Aunt Darlene's birthday gift and card.  I hope she will love it.  But, most of all I hope I have given you some inspiration.  

Wishing you sunshine, warmth and flowers.

Until next time.

Luann


Tuesday, January 14, 2014

Tim Holtz ASSEMBLAGE CLOCK with Mini Album

Hello friends this months Design Team Project I decided to make myself this Tim Holtz Assemblage Clock with Mini Album. I have made several and decided it was time to make my own. This photo is one of the most special to me. It is the last photo taken of my mother and Father before my father passed away in 1981. Several of the photos in the mini album I matched up about the same age of my mother and father. I also added some with us kids and the only family photo ever taken of all of us. I used the Flamingo Scraps Warehouse Sale Box — Combination Box to create with. I also used several different pieces to create this. I made a space out of chipboard and covered it so I could install an small mini album in the back of some very special photo's for me to remember my Father, Mother and siblings. If there is anything that I used in making this...Please contact Suzanne at Flamingo Scraps and she will be able to special order it for you. Hope you like my creation as much I love having this keepsake.


Mini book in back of the clock


Products used
Flamingo Scraps Warehouse Sale Box — Combination Box
Seam Binding – Cream
Tim Holtz Distress Paint
Tattered Angel's Tattered Leather
Maya Road Rhinestone chain
Tim Holtz Alterations Misc.
Graphic 45 Papers mixed from warehouse box

And remember if you see something not sold in the store to contact Suzanne to see if she can special order it for you.

Friday, January 3, 2014

A new way to keep track of Ticket Stubs for 2014

Happy New Year all!! Getting the New Year off right I decided for this Design Team project to create a frame to keep all ticket stubs from thing I will do in 2014. I used the Frame and Easel file from the Silhouette store and added a tab at the top so that you can just drop your ticket into when you get home. This way I can look at it and think boy I sure have done a lot or I need to do more!! LOL I used Products from Flamingo Scraps Warehouse Sale Box — Combination Box. Which you may or may not get. If you can not find the embelishments in the store make sure you contact Suzanne at Flamingo Scraps to see if she can get it for you. Hope you like my creation as much as I enjoyed making it.

Here is the front view

Here is the front view with paper inserted where you can see the opening.

Here is the back with the easel bent and attached to the back of the frame

Products used
Prima Classic Cream Roses
Prima Chalks
Prima Bling
Prima Flowers
Tim Holtz Glitter- Black Soot
Flamingo Scraps Warehouse Sale Box — Combination Box
Flamingo Scraps Warehouse Sale Box — Embellishment Box

Thursday, December 19, 2013

Personalized gift for a loved one, or for one who has it ALL!

Merry Christmas to All! Donna today, sharing a photo craft I made to use as a beautiful gift for a loved one. The beauty of this craft is it's simplicity and personalization, using any photo you can copy with a laser printer, and print it to fit the size of the canvas you wish to tranfser your photo to.(or, as in my case, bring your photo to a copy center to be copied, the copy MUST be a laser print to work, home ink jets will not work) Here is the finished canvas...


I started with just a blank 8 x 10 canvas, my laser copy photo (be sure to "flip" or "reverse" your photo when printing!) and a jar of Liquitex Gel Medium, available through special order at Flamingo Scraps by contacting Suzanne directly. She will happily order any products available featured through our posts! I had excellent results with this brand of gel medium! (sorry the label is crooked, the OCD in me tried to fix it, to no avail, product is certainly unaffected!)


I am including a video tutorial on the process, as I could not explain in words better than this video tutorial shows it! After my transfer process was completed, I took Tim Holtz Black Soot Distress Paint and blended in the edges of the photo and painted the outside edges of the canvas. When the paint was dry I used a fine grit sand paper to distress the look, blending in the inherent imperfections of this technique. When finished with the distressing, the canvas was then sealed with a flat acrylic sealer to protect the entire canvas. All that's left is to wrap your gift and make the recipient wonder how you did it! This is a gift for my youngest son, commemorating a special time we had together while his three siblings were all in school, special times we will both always cherish. This photo details the imperfections that make these canvases so uniquely your own. The horizontal lines show where some of the gel medium did not transfer the photo, and to the left you can see where the distress paint was added, then distressed with the sand paper.


The Tim Holtz distress paints are also available through special order at Flamingo Scraps, you will want the entire set once you learn the beauty of these paints, I am a distress paint junkie!!!


Also, it's not too late to get in on the Tonya Live! Ustream event! Tonya is using the BasicGrey 25th and Pine kit, made available exclusively through Flamingo Scraps. Your kit will be packed full with the collection papers and ephemera. Tonya has an entire series on youtube, play lists made available weekly to hep you create your own December Daily, or just a commemorative album for the 2013 holidays. Best part, the kit is on SALE at Flamingo Scraps (kit), and to start just click HERE (tutorials)!


Merry Christmas to all of our Flock, Flock leaders, team, and to you, the readers of our posts, a happy and prosperous New Year for 2014!

As always, Scrappy Smiles! Donna Sullivan 


Wednesday, December 18, 2013

Fearless Canvases with Prima and Tim Holtz

Hi there, Flock!  Genie here today, madly crafting amidst all the holiday baking and get-togethers.  I have two more canvases that I made as gifts today.

Ok, truth:  I made the first one and loved it so much that I made a second so that I could keep it all for myself.  *blush*
These were so super simple!  I used a couple of 12x12" canvases and put down a rough base coat.  All of the paint used for this project is Tim Holtz Distress Paint in the holiday 2013 collection.  You should definitely contact suzanne@flamingoscraps.com for a SUPER deal on special ordering these bad boys.  I really love this group of colors!!  The top canvas was rough coated with pumice stone and iced spruce, and the bottom canvas painted with evergreen bough.  I wanted just a little more distressing, so I added some bubble wrap stamping; on top, in evergreen bough and the bottom in ripe persimmon.  I let that mostly dry, and then used a ruler to sketch in a 2x2" grid.  I was going for a bit of a distressed look, so I didn't worry about making the lines even widths or even when the marker went through some damp paint.  I found this awesome quote (for those that don't know, I've been a professional studio/wedding photographer for just over 13 years now) and pulled out my Prima wood icons and played with them to determine placement.  I decided on one row of different colored cameras; love the contrast.  The cameras on the top canvas were painted with pine needles and aged mahogany, and the cameras on bottom with ripe persimmon and dusty concord.


I was going for a messy, distressed look, so I didn't worry about getting the paint even or completely covering the wood.  I'm sorry that these detail shots are a little blurry.  Michigan's been in the middle of a snow storm all weekend and I wasn't able to get very good light.  The typewriter font and ink are from my stash.

Thanks for looking, and I'll be back soon!

Friday, December 6, 2013

Mad Tea Party Jewelry Hanger using Jenni Bowlin Hotel Key Holder

Ramona here sharing with you a Marion Smith Mad Tea Party Jewelry Hanger using Jenni Bowlin Hotel Key Holder. I had so much fun making this hanger with all the extra's from the paper line. The 12X12 has sold out from Flamingo Scraps. But, you can ask Suzanne if she could order some for you. I have added a tutorial at the bottom to show you how I transformed this Key Holder.

Here is the full project view
Here I fussy cut the 10/6 out and added feathers,Glossy Accents and a Webster’s Pages Heart Cameo Push Pins
Here I fussy cut and added Glossy Accents, added some chain from my stash, Maya Road Trinket Pins Pearl Flower
I used Tim Holtz Distress Glitter on this heart. I so love the way it looks.
I also added various tags to the bottom that I can change when I want to.

For this I have gone step by step showing you how I altered this project using the Jenni Bowlin Hotel Key Holder


Here is how I split up the Ruffled Bloomers
Webster’s Pages Ruffled Bloomers — Teal

And how I adhered the paper cut outs to the chipboard and making sure you add it on top of the paper to seal it.

Products used
Seam Binding – Red
Seam Binding – Mimi Brown
Seam Binding – Black
Maya Road Wood — Bird Cage Pieces
Prima Chalk Ink Edgers
Claudine Hellmuth Studio Kit: Mediums
Tim Holtz Distress Paint
Lindy's Stamp Gang Cream Brulee and Hootie Potottie Hot Pink
Studio Calico Wood Pieces
Tim Holtz Distress Ink-Vintage Photo

Some of the stuff that I used on this can be found in the Warehouse Boxes.
Flamingo Scraps Warehouse Sale Box — Embellishment Box
Flamingo Scraps Warehouse Sale Box — Combination Box

As I said above if you see something that I have used and can not find it in the store. Contact Suzanne and see if she can get it for you.

Happy Scrapping!!

Wednesday, November 27, 2013

Getting into the Holiday Spirit

Happy Hanukkah!

It's Luann in the frigid south Texas!  The cold is putting everyone in the Holiday Spirit and I hope the cold (30's & 40's) stays around 'till Christmas.

Being in the Holiday Spirit myself, I thought I would share with you a couple of Holiday ornaments.  Since it is Hanukkah, I found a dreidel that I could make out of paper.  I used the Carta Bella Winter Fun and Echo Park Paper Merry Christmas.  This would be a great project to do with kids and a way to use up some scraps.


I love decorating for Christmas (I wait until after Thanksgiving, though).  I also love to make ornaments to add to my tree and give away.  I used the plastic flat ornament for these.  The first one I started out with Marion Smith's Tea Party and fussy cut the roses and clock.  Then I layered using Prima wood embellishments, bling, and flowers.  I threw in a Tim Holtz key, May Road Star Trinket and stash ribbon.


The second ornament I used a clip art picture of Santa.  I Modge Podge the picture to cardboard.  I used the Antique Matte Modge Podge to help give the aged look.  The little tree is from Fancy Pants. Isn't it the cutest? Heidi Swapp Believe Ephemera helps with the layering. Vintage (since it's been in my stash for a while) Webster' Pages Christmas charm and ribbon add just the right touch.  I sprayed the cotton lace with Heidi Swapp Color Shine to match the Fancy Pants tree.


Ohhhh.....I forgot to mention.  Don't forget to decorate the inside.  I used some netting scraps, glitter, and sequins.  FYI:  Do not use your hot glue gun on the plastic ornaments.  I learned the hard way.


Wishing you a fantastic Thanksgiving and a safe one.  Now I'm off to get some hot cocoa to warm up.

Until next time....

Luann

Tuesday, November 26, 2013

It's beginning to look a lot like Christmas!!

Hi all Flock followers... Ramona here to share a few projects I have been working on for my Flamingo Scraps DT project. I have used the Carta Bella and Lilly Bee Design papers that we had back in July. Which now might be found in the Warehouse Boxes for sale at the store. I had so much fun creating all these projects that would be great to put in stockings or on plates for your dinner guest. The patterns that I have used are some from Treasure Box Designs and Silhouette Store and cut on my Cameo. The patterns for the Mad Hatter ornaments can be found here. I used much of the paper that I had gotten between these and the Christmas book that I made. This paper is just so awesome not to waste one inch of it. Hope you like my projects as much as I loved making them.

I used Webster’s Pages Bloomers Red Sparkle. I also used a metal technique on the small one that I learned from Tim Holtz Creative Chemistry 2.

Who would not love this little mug full of Hot Chocolate on Christmas Morning?? I used a Prima Wood icon on the snowflake.

A little tea light on your Christmas Tree??

A present that contains a gift card. I used the new Platium Stickles on this and Love it.

Another Hot Chocolate Stocking Stuffer I so love this one with the snowman soup poem as in the above Coffee cup poem.

Hope you like my creations!!

Tim Holtz Distress Paints
Prima Chalk Ink Edgers — Set of 40 Original Colors
Seam Binding – Black
Seam Binding – Red

Remember Christmas is coming soon so grab you a Warehouse Box before they are gone. They have been marked down even lower then before.
Flamingo Scraps Warehouse Sale Box — Embellishment Box
Flamingo Scraps Warehouse Sale Box — Combination Box
And if there is somehting that I have used and you can not find it in the store. Do not hessitate to ask Suzanne and she can special order it for you.

Hugs and keep Scrappin!!
Designs~By~Ramona

Tuesday, November 19, 2013

What's in the Match Box?

Hello,

It's Luann with the answer to the question you all are just wanting to know. What is in the Match Box that I blogged about on October 2nd.  Did you see the clue?
http://flamingoscraps.blogspot.com/2013/10/anyone-have-matchbox.html


Did you guess.....


Yep, bathroom tissue roll centers. (My husband kept asking why I was saving them!) Ever since I saw Arlene's Butterfly Kisses blog where she made a mini using them, I wanted to give it a try. BTW:  Who knew that they come in  different sizes?

I squished the rolls in half and used my bone folder to help crease the edges. I put them under a very heavy book for a few days.  I painted the outside and about a fourth of the way down on the inside using my Tim Holtz Black Soot Distressed Paint. I added a couple swipes of the Bronze and Broken China to break up the black.  Then I used a little Heidi Swapp in gold to make them sparkle. I also used Prima's Chalk Edger for added color.  Next came the grommets.  This was fun!


Then on to decorating the mini album.  Keep in mind that to fit in the match box you should use flat embellies.  Also, this is another way to use up your scraps.  I used the scraps from Theresa Collins Now & Then and Carta Bella Winter Fun for the background and journal cards.  For the embellishments I colored up Prima Wood Icons, Tim Holtz Idealology, Mod-Podge Molds, Prima Flowers, Cosmo Cricket Glitter Sheets (I used as the tabs for the pull out journal cards.), stash lace, binding tape, stash items, and charms. 


And here is the complete project! 


I know that my snow family is glad I got replaced the matches!


Until next time! 

Luann


Note:
Got the fun inspiration for my snow family from Bitz of Me blog (Suzanne Dean).


Related Posts with Thumbnails