Showing posts with label Echo Park. Show all posts

Tuesday, December 17, 2013

Santa's Southern Helper

Hey all!  It's Luann.  I don't know about you, but I have searching for fun and fairly easy decorations for Christmas on the internet, in magazines, and on TV.  I love to buy the special Christmas editions of magazines and wish. Today I have a decoration I was inspired to make by a Christmas oranament I purchased in July and a tutorial I saw in a magazine. 

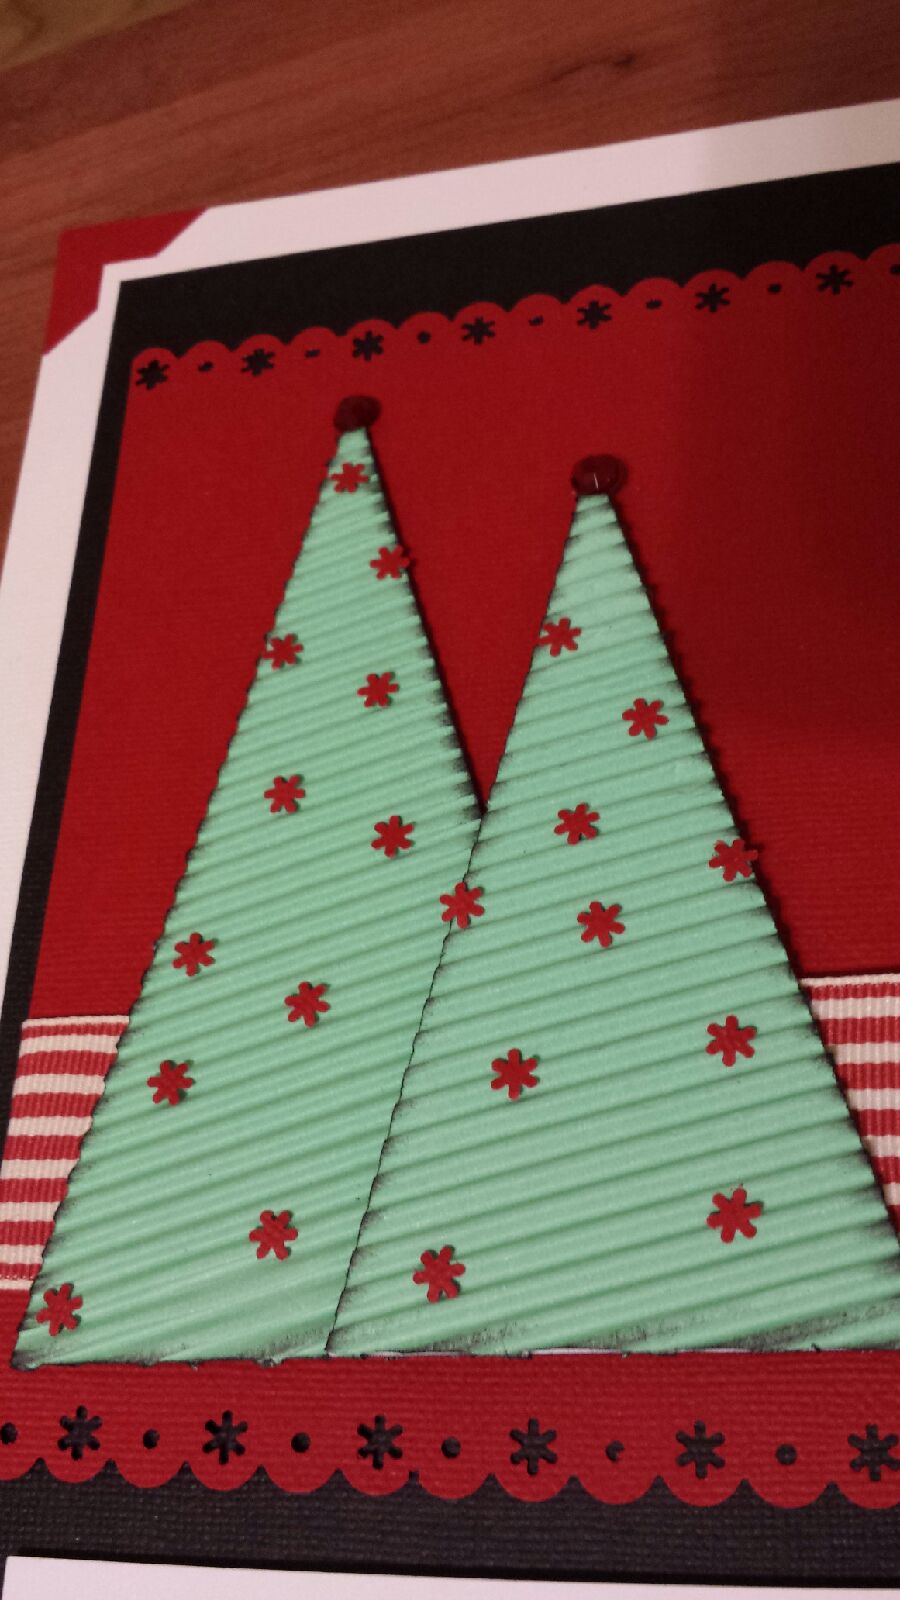
First off let's start with the magazine tutorial.  Christmas trees made from Carta Bella Winter Fun and Echo Park Merry Christmas lines.  I just love these papers for Christmas.  I found the tutorial in the December issue of Martha Stewart's Living.  For the base I used a  Maya Road wooden spool and a craft stick. Cut a circle using a punch in 3 different sizes (6", 7", 8") and cut it in half. Then spraywith Heddi Swapp Color Shine in gold and tinsel. The stars on top are Cosmo Cricket Glitter Sheets. If you love glitter and hate the mess .....you want these! 
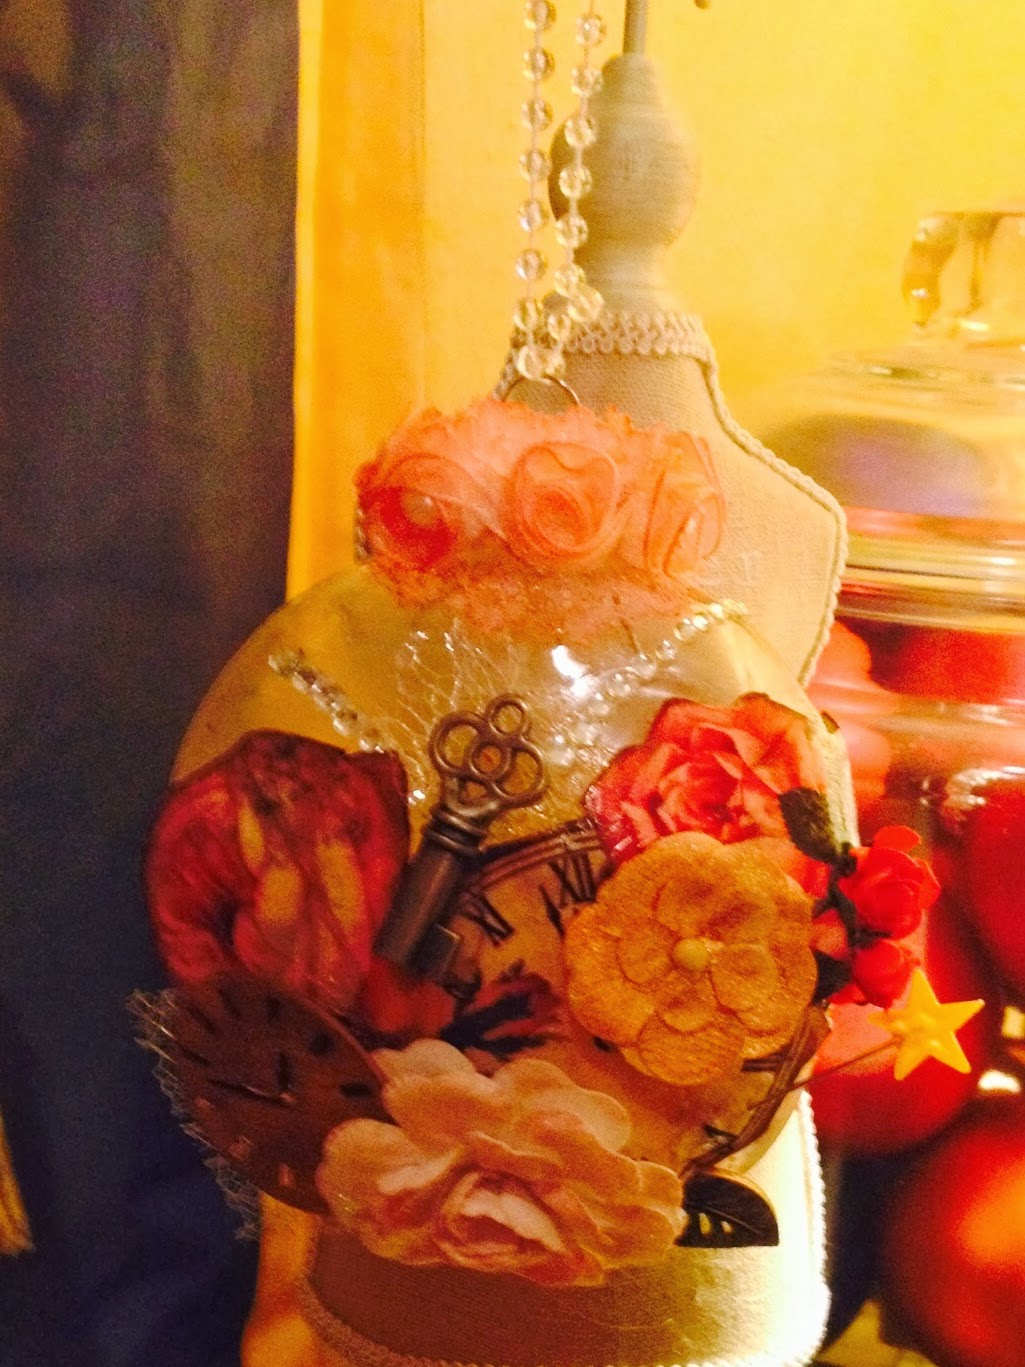
 I finally found a bell dome that would work and a plate charger for the base. Added a little moss, snow, and water (aka Cosmo Cricket Glitter Sheets).

I searched and searched around my scrapping stash and Christmas stash to find a few trinkets and Santa.  Did you see the Prima plane and camera? How about the wrapped presents? I found a tractor and a mini sewing machine to add to the presents.  The little sign is from Heidi Swapp Believe Ephermera.

It looks like Santa is getting ready to load his sleigh!  Oh!......What does my wandering eyes see?  A helper?

It's......It's......Flamingo Scraps' Flamingo - Pinky going out to deliver the Christmas goodies you ordered!


I had a wonderful time making this dome.  I hope you try your hand at one.
Here is a picture of the whole Flamingo Christmas dome.


Wishing you joy and happiness.

Merry Christmas and Happy Holidays!


XO

Luann

Friday, December 13, 2013

Chip Board Mini Album Christmas Banner

I love mini albums, but so far, I haven't been able to make one that I'd show anyone! I look at the numerous albums carried by Flamingo Scraps, wishing I could do them justice. Then, while driving, I had a brainstorm. It was so good it almost hurt. I'd make a Christmas banner for my doorway or fireplace using mini album pages! I chose the Maya Road Chipboard Mixed Scallop Triangle Banner Mini album because the openings for the rings were the right size and shape to use with a ribbon, making sure that I bought two so  more than one banner could be made, not to mention "Christmas" is a long word.


I used a wide variety of papers, inks, mists, and paints to cover the triangles with. Since I had some of the Echo Park Christmas paper leftover from my Christmas in July project and some 25th-Pine from the Ustream December kit, that's where I started. Before I forget, the Ranger Claudine Hellmuth Sticky Back Canvas and the Cosmo Cricket Glitter Sheets, which NEVER shed glitter, are AWESOME to work with. You could actually save some time and trouble by just using those. My letters are Tim Holtz grunge board and painted with TH paints. I outlined them with red and green Stickles so they would stand out.


I used red seam binding to hang my banner. My trims are from my stash, which would have come from the Flamingo Scraps Embellishment Grab Box as well as the Maya Road Scalloped Satin Trim - Cream and the Tu Tu Tulle in Cherry. I love the cream mini organza rose trims the Big Pink Bird carries, so be sure to check them out. The roses come in many colors, and they hold mists very well. Mine are green to match my holiday theme.The black and white "R" is actually the package of a Heidi Swapp epoxy sheet with Christmas buzz words if I remember correctly. Just goes to show that you can buy great things from FS and even use the packaging.


I made mini rosettes / medallions for embellishments for the bottoms of each section using the die from Tim Holtz. It's a great way to use up scraps, not to mention fun. If you need these or any other items you don't see listed in the store, contact Suzanne and she'll try to fix you up.

You could leave the letters separate and hang the them around your tree, not to mention make yo-yos out of the medallions for Christmas ornaments. Want more versatility with you banner? Make "covers" for it. Simply make triangles a bit bigger than the actual CB triangle, make a cover by stitching or adhering two of them together. Be sure to leave a little wiggle room. Decorate, then slide them over the CB shapes,use ribbon or twine looped through the holes on top, or make your own in the middle tied in a bow and you can reuse it over and over. Just slide everything off of the binding or whatever you use to hang it with.

Well, I suppose I need to get into gear and start decorating. Especially since I have all of these great projects  created with goodies from Flamingo Scraps !!

Happy Holidays from me to you !

Kathleen


Wednesday, December 4, 2013

Echo Park "Merry Christmas" Cracker Treat Box


Hi Cheryl here. Today I am taking a break from making Christmas cards and thought I would work on some gifts for my Grands to give to their classmates and teachers. Today I am going back to one of my favorite Christmas collections. It is "Merry Christmas" from Echo Park. I just LOVE these papers. I bought the complete collection during the summer and then was lucky enough to receive a kit from Flamingo Scraps this fall for our winter projects. This is one paper collection that I will never tire of. Beautiful, bright patterns and my favorite green, red, and brown colors for Christmas.

For my project I decided to make a cracker treat box. These are so cute and hold a lot of candy for the young ones or for us big kids maybe a nice piece of jewelry!  I used my "We Are Memory Keepers Envelope Punch Board" and it really did all of the work for me!


These are currently on sale at Flamingo Scraps for only $14.99!!!!!  I just had to cut the paper, tie the ends with ribbon, and then used two trees from the Fancy Pants Tiny Bottlebrush Traditional Trees as an embellishment . These are just adorable when completed and I think everyone will enjoy receiving theirs. I hope you enjoyed my project for today. I won't bore you with the measurements and details on how this was made, but if you are interested you may go to my blog for all of the details!


Thank you for stopping by the Flamingo Scraps Blog. Don't forget you can "like" their Facebook page here, and find everything I used today in their online store here.

Happy Scrappin............Cheryl

Wednesday, November 27, 2013

Getting into the Holiday Spirit

Happy Hanukkah!

It's Luann in the frigid south Texas!  The cold is putting everyone in the Holiday Spirit and I hope the cold (30's & 40's) stays around 'till Christmas.

Being in the Holiday Spirit myself, I thought I would share with you a couple of Holiday ornaments.  Since it is Hanukkah, I found a dreidel that I could make out of paper.  I used the Carta Bella Winter Fun and Echo Park Paper Merry Christmas.  This would be a great project to do with kids and a way to use up some scraps.


I love decorating for Christmas (I wait until after Thanksgiving, though).  I also love to make ornaments to add to my tree and give away.  I used the plastic flat ornament for these.  The first one I started out with Marion Smith's Tea Party and fussy cut the roses and clock.  Then I layered using Prima wood embellishments, bling, and flowers.  I threw in a Tim Holtz key, May Road Star Trinket and stash ribbon.


The second ornament I used a clip art picture of Santa.  I Modge Podge the picture to cardboard.  I used the Antique Matte Modge Podge to help give the aged look.  The little tree is from Fancy Pants. Isn't it the cutest? Heidi Swapp Believe Ephemera helps with the layering. Vintage (since it's been in my stash for a while) Webster' Pages Christmas charm and ribbon add just the right touch.  I sprayed the cotton lace with Heidi Swapp Color Shine to match the Fancy Pants tree.


Ohhhh.....I forgot to mention.  Don't forget to decorate the inside.  I used some netting scraps, glitter, and sequins.  FYI:  Do not use your hot glue gun on the plastic ornaments.  I learned the hard way.


Wishing you a fantastic Thanksgiving and a safe one.  Now I'm off to get some hot cocoa to warm up.

Until next time....

Luann

Monday, November 11, 2013

Using Leftovers

Hi guys...this is Cheryl. I am sitting here sorting through, and organizing, my leftovers of paper collections and embellishments received from Flamingo Scraps, slowly trying to go through my scrapbook room and get my beloved papers in order to make my life easier when scrapping. Of course, for me, it is the "putting back" that is the main issue. As I was going through my goodies I noticed I had several nice bits and pieces of the Echo Park Beautiful Life paper collection left from my last project. This inspired me to look for a smaller scaled project to use the rest of these pieces. I decided to attempt to make what is called a "sour cream" container. There are tons of YouTube videos out there on how to make these. I actually didn't think about looking for one prior to making mine, but afterwards I did look and found this nice one. Her dimensions and techniques are somewhat different from mine, but different strokes for different folks! That is the beauty and fun of scrapbooking. There are no rules. Just lots of sweet crafters to share their love and methods of scrapbooking.

To start off I looked through my scraps to find any papers left that could be cut down to 4.50" x 6".


From there I added Scor-tape along just one of the 4.50" edges and on both edges of the 6" sides.


I removed the backing of the adhesive from just one 6" length and from the top edge and rolled the paper up into what looked like a small tube.


From there I flattened one end of the tube, filled it with treats and then on the other edge I closed the opening in the opposite direction of what the other end was. I used my scoring tool and scored three lines on both ends. It now looks like a cute take out sour cream container! From there I punched a small hole and added a 10" piece of the Fancy Pants Seam Binding Collection in various colors to the top and then used a cute stamp and punch from my stash, inked them using Prima's dark rust chalk ink, and added them to the front of each treat container.


Just a really quick, fun way to use up those scraps that would end up being forgotten or thrown away.


As always thank you for visiting my blog. If you would like to visit the Flamingo Scraps Blog, please click here. If you would like to buy any of the papers or inks I used today, please visit the Flamingo Scraps online store here, and to like their Facebook page please click here.

Happy Scrappin! ......Cheryl

Friday, November 8, 2013

It's Beginning To Look A Lot Like Christmas!

Hi this is Cheryl. I am sitting here typing while looking out the window. It is a beautiful fall Texas day. Nice and sunny. Not too hot or too cold. Just right for open windows and a nice cool breeze to blow through the house. I made a pot of chilli this morning and it has been simmering on the stove all day. We all need to enjoy these autumn temperatures. Ol' man winter will soon be upon us.  All of our treasured fall decorations will be taken down this month and we will be soon decorating for  Christmas. I love this time of year and I love making my own cards typically in November and scrapbooking my families Christmas memories at a winter retreat in January.


Today for my project for Flamingo Scraps, I thought I would do a Christmas page. I can never have too many premade pages for all of the pictures we take each year. To start off I used a white 12" x 12" base, layered with a 11" x 11" piece of black card stock. I then added a small 6.50" x 10.75" piece of red card stock. I also used a snowflake border punch along two sides of this and added a double photo matt on the bottom that measures 3.25" x 10" and a Heidi Swapp paper frame.


Using ribbon from my stash, I tied a simple knot bow on the bottom of the red card stock and cut two trees from the Fancy Pants Corrugated Paper Collection and adhered these over the ribbon.


 I also added a journaling strip and die cut from the Echo Park Merry Christmas collection. From there I added a few Christmas diecuts and images on the page. Also, I saved the snowflake negative pieces and used these to decorate my trees and added four photo corners to the edges of my base layer. A simple, but sweet Christmas page to add pictures to later.


I hope you have enjoyed my project for today and that I have inspired you to get started on your Christmas pages.  As always I thank you for visiting the Flamingo Scraps Blog. If you would like to check out the online Flamingo Scraps store, please click here to get started shopping!

Happy Scrappin! .........Cheryl

Friday, October 11, 2013

No Scary Treats Here.....

Hi guys. This is Cheryl. I am totally loving this time of year with the leaves falling, homemade soups, and cooler temperatures. My plants and flowers act like they are on steroids and are growing like crazy. Typically we have just as many Fall, pumpkin, and Halloween decorations out at our house as we do for Christmas in December. It doesn't hurt that orange is my favorite color. My daughter's neighborhood has a yearly Halloween Trick or Treat party and cook out. The kids stay within the block safely together. Last year I had just moved here the end of September and with tons of unpacking to do, I didn't have a lot of time to make decorations or treats for the neighborhood kids.. But this year I have plenty of time and with help from my two Grands, we have already started making them. As I was doing a few I got thinking that these treat holders would be a great idea for any time during the year and a cute project for my scrapping buddies.

To get started I cut four 3.50" x 10" pieces of my Echo Park Beautiful Life paper collection. Folded the strips in half and run them through my Big Shot using a tag die from my stash. These were all scored 1" from the flat ends.


I then added a strong adhesive on the inside of the 1" scored area to one of the two coordinating pieces and adhered them together.


To decorate the front, I inked several stickers using my favorite Prima Dark Rust chalk ink from the coordinating sticker sheet of the Wonderful Life collection,


a few of the ribbons from Webster's Pages Color Sunday Picnic collection, a banner from Heidi Swapp, and a couple 5" ribbons from my stash as a closure for the treat holders.


Prior to threading the ribbons through the top, I also applied a strip of adhesive to the top layer of the two attached pieces and adhered candy to this strip.


And that is it! I thought these would be perfect for some of my scrappin' friends as a nice change from receiving so many Halloween-themed gifts.


I hope you have enjoyed my project for today. These were fun and quick to make. Now I have to get rid of these quick! It is dangerous for me to keep chocolate in my house! lol

As always thank you for visiting the Flamingo Scraps Blog. If you would like to buy any of the papers, inks, banners, or ribbons used, please visit the Flamingo Scraps online store here, and to like their Facebook page please click here.

Happy Scrappin......Cheryl


Tuesday, September 24, 2013

Happy Anniversary To Me!

It's hard to believe, but tomorrow I will be married for thirty-seven years. Thirty-seven wonderful years with my one and only. I met Rick when we both worked at JC Penney. Honest to God, the first time I saw him, I told one of my friends that also worked there that he was my future husband. Rick would come over to my department at the end of the evening and make small talk . One day he hung around after we closed and said "When are you going to go out with me?" and I responded "When are you going to ask me?" We had our first date at the end of Janauary. He asked me to marry him in May, and we married in September. I have had the most wonderful, blessed life with Rick. We both say our struggling years have given us our most happiest moments. I found a sign and we have it hanging in our living room. "If I had my life to do all over again, I would meet you sooner, so I could love you longer." 

When I saw the "Beautiful Life" paper collection by Laura Passage in the Flamingo Scraps online store, I knew I wanted to make a small mini album for our upcoming anniversary. I wanted to keep it simple with lots of room for pictures and journaling. I started with a 12" x 12" piece of designer paper and cut it down to 9.25" x 11". On the 9.25" width I scored it at 2.50" and 6.75". On the 11" width it is scored at 5/8", 7", and 7.75". After trimming away both two opposite ends on the 5/8" score line and removing both sides starting at the 7" score line to the ends, I rounded the corners of both opposite flaps and folded the center section together using the scored lines, and then brought the 5/8" tab up pressing firmly after applying adhesive.
The liners for the outside and inside cover measured 4" x 1/2", 3" x 4", and 4" x 6 1/8". 

For my inside pages, I used the coordinating solid card stock measuring 12" x 12".  I trimmed five of these to 7" x 9.25" and then scored them on the 9.25" width 2.50", and 6.75". On the 7" width at the 5/8". My liners measured 4" x 6 1/8" and followed the same instructions as the cover.

 Once assembled I used a 1 3/8" circle punch and cut a half circle out from each page for each 4" x 6" mat that was inserted into each pocket.


I inked the edges on all of the liners and mats. On each mat I used a small double hole punch and tied a bow using several pieces from the seam binding sampler. I then used my Bind It All and bound the mini with a brown coil.


I used the plentiful supply of coordinating stickers to decorate the mini using mount tape and then one magnetic closure for the cover.


This was a very easy, non fussy, non complicated, but sweet album to make. The papers were so pretty that other than inking the edges using my favorite Prima Dark Rust chalk ink, the seam binding, the coordinating stickers,  the Heidi Swapp Banners, and Fancy Pants Cork Hearts the paper collection spoke for itself.

I hope you have enjoyed visiting the Flamingo Scraps blog today. While you are here, please subscribe by email. I would also ask that you "like" their Facebook page click here, or if you are interested in buying this paper collection, or anything I used to make this mini, you can find it here in the store.
HAPPY SCRAPPIN!
 Cheryl

Thursday, September 5, 2013

Remembering Loved ones Journal Pages

I used the Echo Park Beautiful Life collection and just to show you that you do not have to only use your paper on Scrapbook pages and cards: you can also use it in your journaling. I also used one of the Prima Julie Nutting Mixed Media Doll stamps. I so love these doll stamps and you can use them for many different medias. I have done many canvas using the doll stamps and each one takes on her own personality. I also used on this Journal pages Claudine Hellmuth Studio Kit: Mediums. I love the multi-medium matte, gesso, and black gesso. Make sure you stop by Flamingo Scraps to pick up these awesome sets.

Here are both pages together. I used the Multi-Medium Matte to adhere all papers to the journal page, including the poem that I cut out from the Cameo, that way, when using the Medium, it will secure them down really well. I have tried others but always go back to Claudine's.


I used a Camera Clip from Prima and used a black sharpie marker to color it the color that would show up. The silver would not show up.

Here are some of the flower stickers from the kit that I used popped them up and glittered them. Then, I tucked a clock from the Prima Wood Icons in a Box – Typewriters & Clocksand and some Prima Vintage finds metals.

Here is the Prima Girl that I stamped the dress and hair 3 times and added layers to make her hair fuller and dress longer. I just love playing with these stamps...there are so many things that you can do to make them look different.

This last month was a difficult month for me to go through every year. I lost my father and my brother 26 years apart but they were the same age in August. I have not written what I want to on it yet, because I think that should be personal. But, feelings this last year on the Death dates has kinda made me remember all the positive influences that these two men instilled in me forever.


Other products used

Prima Tiny Junkyard Findings Vintage Trinkets — Sampler
Prima Chalk Ink Edgers — Set of 40 Original Colors
Grid Acrylic Stamp Blocks — Tim Holtz Collection
Seam Binding – Rose Petal
Prima SIIC Classic Clear Swirl
Maya Road Wood — You’ve Been Framed Pieces
Maya Road Metal Antique Music Box Keys
Maya Road Trinket Pins Crystals
Maya Road Rhinestone Trim – Iridescent Diamond
Maya Road Trim — Small Organza Rose Sky Blue
Tim Holtz Distressed Paint
Heidi Swapp Color Shine Sweet Cherry
Multi Medium Heavy Gel
Stencils

Thanks so much for looking and remember to go to Flamingo Scraps for all of the new releases and the Warehouse Sale going on right now. She has 3 different boxes to choose from
Flamingo Scraps Warehouse Sale Box — Combination Box
Flamingo Scraps Warehouse Sale Box — Embellishment Box
Flamingo Scraps Warehouse Sale Box — Paper Box
I know these boxes are going to be jam packed full of goodies.

Designs~By~Ramona
Related Posts with Thumbnails