Thursday, February 28, 2013

Film Fun

Do you remember my Flamingo Four post last week about my first time playing with an SLR? Well, I decided to make another scrapbook page with more photos from that same day. Gotta love the clothes from the 90's, lol! I started with a fabulous paper from my scrapbook-world-celebrity hero, Teresa Collins. This one is from her Now and Then collection.
Scrapbookista----Flamingo-Four-March-2013---4
I love this tab from the Pink Paislee Secret Crush collection. It adds instant fun! AND, Suzanne from Flamingo Scraps has made up a few Pink Paislee kits that include these rockin' tabs and then she deeply discounted them!
Scrapbookista----Flamingo-Four-March-2013---5
Since this was an LO about fun with a non digital camera (Remember when we actually used film in our cameras?), I thought it would be cool to use a film strip transparency. You know how some trends in scrapbooking are just so fun and you love them so much? Using film strips is that trend for me! And speaking of trends, a few big ones are camera shaped embellishments and wood veneers. I love how Prima has combined those two trends with their Wood Icons in a Box.
Scrapbookista----Flamingo-Four-March-2013---6
These tiny arrows are from the Pink Paislee Artisian Chipboard Elements. BTW, they are part of a Kit over at the Flamingo Scraps online store, AND it's on sale! They come in white, but I misted them with pink to add more color to my LO.
Scrapbookista----Flamingo-Four-March-2013---7
I love these flash cards from Teresa Collins. She always has the best sentiments and the colors on these will go with anything.
Scrapbookista----Flamingo-Four-March-2013---8
This doily was cut from a Pink Paislee Secret Crush paper. Don't forget the Pink Paislee kits are on sale at the Flamingo Scraps online store! These adorable stick pins from Maya Road add a touch of glam.
Scrapbookista----Flamingo-Four-March-2013---9
I cut the pink doily shape in two so I could get more mileage out of it and use it on two places in my LO. I used it here with a circle that I cut out of some Pink Paislee Secret Crush paper and a confetti heart from Pink Paislee.
Scrapbookista----Flamingo-Four-March-2013---10
This fun wooden ruler is just so cute and super trendy, too! The banner shapes are cut from a paper that I had left over from my December Flamingo Four project and a Heidi Swapp Book Keeping paper.
Scrapbookista----Flamingo-Four-March-2013----11
More confetti! It's a super easy way to dress up an LO. I did some inking on the edge of the Pink Paislee Secret Crush heart to add more color to my page.
Scrapbookista----Flamingo-Four-March-2013----12
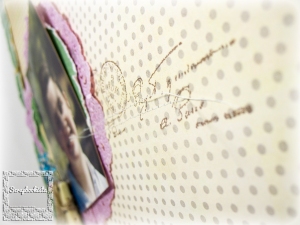
I love the Teresa Collins paper with all the yummy words! I wanted to add focus to a few words that really fit the page so I drew a box around them!
Scrapbookista----Flamingo-Four-March-2013---54jpg
Thanks for letting me share my memories of my first time playing with an SLR with you. Now it's your turn. Scrap your first SLR (it can be digital or film) memories and share them with me on my
Don't forget Monday March 4th is our very own scrapbook famous Tonya Gibbs and her Ustream which is sure to inspire you and give you tons of scrappy / crafy ideas. Check the blog tomorrow to see what her fabulous program will  be featuring.

Facebook page =)

Tuesday, February 26, 2013

Best Friends with Teresa Collins Now and Then Collection

For this project  used the Teresa Collins Now and Then Collection for a layout. The picture was taken last summer, when my friend Kathy from high school was home from South Carolina. We do not get to see each other much. But, when she comes home we always get together. I used some of the ephemera and  words from the collection pack . This line is just so much fun to play with. The collection pack offers so many papers you could easily make three layouts or more from it. I did a short tutorial on how I colored the bird which is the same technique that I used for my flowers and the butterfly.   I hope you enjoy this layout and that it inspires you to create with this line. You can get these products at Flamingo Scraps. Shop Flamingo Scraps for all of your scrapbooking needs. If you do not see something in their store please drop Suzanne an email and she will try to order it for you.


Teresa Collins Now & Then 12×12 Collection Pack

Prima Sherwood Rose Truffle
Prima Classic Light Pink Roses
Prima Melody White
Teresa Collins Vintage Finds Stamps


Prima Melody White


Other Products used and then a quick Tutorial
Grid Acrylic Stamp Blocks — Tim Holtz
Maya Road Trinket Pins Vintage Pearl
Maya Road Trinket Pins Crystals
Prima Cabachon Lace 1
Prima Distressing Tool
Seam Binding – Cream
Studio Calico Wood Veneers — Sampler 1
Tattered Angels Mist- Scarlet, Suede, Cupid.
Gesso

Here is a quick tutorial on how I used Tattered Angels Glimmer Mist


Hugs~
Ramona

Friday, February 22, 2013

February Flamingo Four

It's time for another Flamingo Four!  This month, three other designers and I worked with these products:


           1.  Heidi Swapp patterned paper - "Vintage Chic"
           2.  Webster's Pages Push Pins
           3.  Glitz Design stamps - "Vintage Blue"
           4.  a domino


Alicia's Take

I decided to pair this month's supplies with a sheet of navy cardstock to create a layout of my son in the backyard with his Fireman boots . I used the heart stamp that was in the set and stamped all over the green side of the "Bookkeeping" paper with Versamark, then sprinkled Gold Glitter embossing powder all over and then used my heat gun to set it. I also used my heat gun and embossing powders to create the "2" on the domino. For a little contrast, I stamped the heart image in navy ink and cut around it to create the heart element. Add a few alpha stamps and some thickers and I have a cute layout of my boy!


Here is a closer look at the gold embossing powder on the background.


Ramona's Take

Wow, this was a really challenging one to do!  I love these four products, but it really made me get outside my comfort zone.  I used the Heidi Swapp paper, then added Prima Romance Novel, Teresa Collins Vintage Finds and Pink Paisley Secret Crush.  I have never done this before, but I really liked just mixing and matching all the papers together.  
On the front cover, I used molding paste and Mr. Huey mask. Then I used some Tattered Angels Leather spray , Ranger Espresso, and Tim Holtz Distress ink Brushed Corduroy. Then, I stamped the Glitz Stamps rose onto the Heidi Swap paper and used water colors to color it in.  Next, I used Tim Holtz alcohol inks on the Webster’s Pages butterfly pin,  and added  Prima bling  to give them some sparkle. I  used the domino,  the alcohol inks, and stamped "Journey" from a set of Tim Holtz stamps. I added a few Prima baby roses (with white gesso on the tips), and I sprayed with Tattered Angles Old Paper to give the whole thing just a bit of a shine.


It is really fun to see the end result and just try something different. Using different manufactures together can be fun. This Fab 4 has me thinking outside my comfort zone and outside the box. You can also do this at home. Grab 4 things and just go with it and see what you come up with. Hope you like what I came up with!


Abigail's Take

There's so much to love about a Flamingo Four Challenge!  I love the element of surprise, wondering what sort of fun things I will receive to work with.  I love the creative release that I get every time.  I love the way the Flamingo Four kits are made up of elements that I would never have imagined putting together, yet they go together perfectly!

For my project, I started with a picture of my sweet friend Lea. She is one of those girls that is more a sister than a friend. I have known her for over 22 years.  She is warm, sweet, loving and genuine.  Such a beautiful person!  This picture is from a day when we were in high school. I had borrowed my older sister's, boyfriend's camera and we went to the park to take pics. This camera was the first professional style camera that I ever played with. It was an SLR, before the digital era. It was so cool! I know this isn't the best photography and I had no idea what I was doing with it, but we had such fun playing with the "professional" camera.

The Heidi Swapp paper is timeless and goes with any style of picture.

    Scrapbookista-Flamingo-Four-1   

The stamp set is so romantic and vintage!  The postage stamp part of it is so elegant and ephemeral at the same time, a truly classic look.


The rose stamp from the stamp set is soooo pretty! LOVE it!

Scrapbookista-Flamingo-Four-3

I added to the detail of this stamp by sewing over it. The straight lines leading toward the photo also subtly accentuate the face in the photo.


Again, this paper is so beautiful and timeless. I used a lot of punches to accentuate the classic beauty of the paper. This tab punch definitely caught the essence of the paper.

  Scrapbookista-Flamingo-Four 7-Feb-2013 

The gorgeous pins were just so easy to use. They are so trendy and fun and they add some glam and sparkle! The domino was a special treat as well. 

 Scrapbookista-Flamingo-Four-2 

The butterflies are made from a punch and the Heidi Swapp paper as well. I left the threads at the tail end of the butterflies to give them a sense of flight and movement.


Cindy's Take

As usual, I was stumped when I first saw the 4 items.  The paper and stamps would be easy, but the domino and stick pin were definitely a challenge for my clean and simple, lump-free style!  As I was playing around with them, I noticed that the decorative head of the flower stick pin nestled nicely with the domino.  Hmm... could I remove the flower part from the pin part?  Yes!  The domino and flower would make a nice starting place for an accent cluster.

I wanted to use the back of the domino to hold a rub-on sentiment, but I wasn't sure how it would adhere.  Since I didn't have a backup domino, I was a little nervous about experimenting, but the rub-on went on absolutely perfectly.  Hurray!    
I found an empty frame, used the dotted paper as a background, added a photo of Steve and me to the left of center, then created a cluster of papers and the stamped image on the right hand side.  Finally, I nested the flower to the domino and glued the domino to the outside of the frame.  
(Glass + shiny metal = nearly impossible to photograph well.) 
Here's a closer look at the stamped image, domino, and (former) stick pin:

 
That wraps up another fantastic Flamingo Four!  We'd love to see your take.  If you make something using the same four supplies our designers had, please let us know and we'll feature it here on the blog. To find the materials we used (and so much more!) visit the store at www.flamingoscraps.com!


Wednesday, February 20, 2013

Project Life - Flamingo Style

Hi everyone!
It's Alicia, back again with one last layout using Pink Paislee's Secret Crush line.  I thought it would be PERFECT to use for the week of Valentine's Day in my Project Life album!  In addition to Valentine's Day, we also attended a wedding, so the week was full of love!
Here is the full, two-page layout:
Close-up of the left side:
Close-Up of the right side:

I used the Pink Paislee Collection pack and the Paper Goods for most of the accents for this week.  I also used a couple of the Studio Calico wood veneers, and colored the veneer on the calendar with some Color Shine by Heidi Swapp that gives it the perfect amount of shimmer.  A last minute detail that I just love is the little Maya Road Trinket Birdie Clip on the date card.

Flamingo Scraps is having a great sale on the remaining Secret Crush items, so if you love it as much as I have, you'd better get it quick before it's gone!!  
 
Don't forget Friday with the Flamingo Four! Cindy deRosier and three of our VERY talented Flockinistas will be showing off what they created with their box of FS goodies this month !! It's sure to inspire !
 
Until next time!

Monday, February 18, 2013

Mother - Daughter Layout

Good morning followers of the flock ! This is a mother - daughter layout  I had fun making, that I'd love to share with you !
 

For this layout I used a tight to the center feeling, leaving the outside of the circle as an empty space.  All the flowers, butterflies, ribbons, doily, and cards are meant to draw your eye into the picture.


I used a digital file I had for butterflies, printed them out in various sizes, and then place a layer of crystal beads over them with Glossy accents.
I added extra Prima roses (the black ones) into the Prima vine for extra dimension and contrast.


I wanted to match the look of the "mother and daughter" note card with the stitching, but the "love" card did not have it.  So I cut it in a circle, traced the scalloped circle from the other card, and added faux stitching by punching holes in the paper with a paper piercer and connecting the holes with a pen.

Please stop by Flamingo Scraps to find a whole lot of new and trending scrapbooking goodness. You won't believe your eyes !!!

Products Used:
Cardstock
Patterened Paper
Flower - Prima
Ink -Prima
Ribbon - Prima
Butterflies
Pen
Adhesive - Ranger

Enjoy!!

Erin Reed

Friday, February 15, 2013

A secret crush on home decor!

Good morning, fabulous Flamingo fans! Melissa, today, with a fun project using Pink Paislee Secret Crush 6x6 paper pack... because it is just a cool collection to use and I was inspired when I saw the patterns!


I have a serious crush on trees... I'm pretty sure my decorative theme in my living room is pretty much trees. I collect Christmas trees, too. But, that's beside the point. I saw a tree, much like the one above, out at a store one day, and while the tree was beautiful, the price tag on it was not! Enter the Pink Paislee Secret Crush 6x6 paper pack, a Styrofoam cone, a little bit of gesso, some glitter, a Maya Road decorative pin, some sheer ribbon, seed beads from my stash, and I have one that's better than anything I could ever buy in the store!


I used my Cameo to cut all of the flowers from every sheet of the paper pack, save for 3, but you could just as easily cut them yourselves... it's a simple 2-inch circle, spiral cut and wrapped into a rosette. 


As you can see, I painted the foam with gesso, which I then sprinkled with fine glitter and let dry to give the base an appealing look, as well.  I took some seed beads and glued them into the flowers, but you could use anything you want for embellishment there, or leave blank. 


I think it looks great, sitting on my bookshelf. Don't you? 

So, there you have it! I hope you were inspired to create your own and I'd love to see what this project has inspired you to create. Be sure to check out all the new and happening trends at flamingoscraps.com . You'll be glad you did !!

Until next time...
Keep scrappin'!
Melissa
Related Posts with Thumbnails