Showing posts with label Christmas. Show all posts

Tuesday, December 24, 2013

'Twas the Day Before Christmas...

And all through Flamingo Scraps, the Flockinstas were working on holiday greetings!

Genie Smith
Erin Reed
Suzanne Pickens
Cheryl Arbo

Special Guest, Cooper Alsabrook

Donna Sullivan

Kathleen Natale

Luann Ostrom

Melissa Williams

Ramona Downing

Tonya Gibbs


Have a safe and happy holiday, from our flock to yours!

Friday, December 20, 2013

Ornament Duo

Here how to make these wonderful clear plastic ornaments in to a handmade work of art for you tree.


 The first thing you need is a clear glass or plastic ornament, then you let your imagination soar about what you create, fill, wrap, or decorate it with.


Bottle Brush Tree Ornament

In this tree I used the super cute bottle brush trees from Fancy Pants and some wonderful flowers from Prima.


First you add a tiny blob (yes that is an official term, hehe) of fast drying clear glue (like ZipDry) to the bottom of each tree and place them into the ball.  I used tweezers to help place the tree.  The trick is to let one tree dry and hold fast before adding in the second tree or anything else in the ball or they just fall over.  patience is key here.


 Now that your trees are dry I added in a bit of angel dust with make it look like the were nesteld in snow (it is like thick glitter or even glitter would work).


The I created a cluster of flowers from Prima from the wonderful Warehouse Boxes that Flamingo Scraps is offering (on sale too) and wrapped it around the top of the ball.  I then added the top hook of the ball back on (I glued it so it would not pop off and glitter would get everywhere), added a bow to cover up the topper, and strung up the top with a silver ribbon to hang on my tree.


Embellishment Ornament

Here I stayed with a single color of blue (in various hues) and created a ball of wonder, a fun little search and find ball for my kids full of odd bits and pieces from my scrapbook stash (left over from the Flamingo Scraps warehouse boxes).


Here is the stash of items I used to fill the ball.  I used buttons, flowers, charms, sequins, plastic bits and bobs, petals, and other fun items that would fit into the ball from left over projects and from Warehouse box items.


Here you an see the flower cluster I made prior to attaching it to the ball.  I took little flower buds on wire and threaded larger flowers under it.  I then took the wire stem and wrapped it around the top of the ball to secure it.


I then took ribbon and wrapped the top to cover the wire stems from the flower.  Then attached the ornament topper, added ribbon to string it up, and poof you have a wonderful search and find ornament ball.


Here you can see even more goodies, and as you shake it more items appear!


Supplies used can be found at Flamingo Scraps
Ornament ball
Flowers - Prima and other
Ribbon -Websters
Bottle Brush Trees - Fancy Pants
Embellishments  -Flamingo Scraps

Enjoy!

Tuesday, December 17, 2013

Santa's Southern Helper

Hey all!  It's Luann.  I don't know about you, but I have searching for fun and fairly easy decorations for Christmas on the internet, in magazines, and on TV.  I love to buy the special Christmas editions of magazines and wish. Today I have a decoration I was inspired to make by a Christmas oranament I purchased in July and a tutorial I saw in a magazine. 

First off let's start with the magazine tutorial.  Christmas trees made from Carta Bella Winter Fun and Echo Park Merry Christmas lines.  I just love these papers for Christmas.  I found the tutorial in the December issue of Martha Stewart's Living.  For the base I used a  Maya Road wooden spool and a craft stick. Cut a circle using a punch in 3 different sizes (6", 7", 8") and cut it in half. Then spraywith Heddi Swapp Color Shine in gold and tinsel. The stars on top are Cosmo Cricket Glitter Sheets. If you love glitter and hate the mess .....you want these! 
 I finally found a bell dome that would work and a plate charger for the base. Added a little moss, snow, and water (aka Cosmo Cricket Glitter Sheets).

I searched and searched around my scrapping stash and Christmas stash to find a few trinkets and Santa.  Did you see the Prima plane and camera? How about the wrapped presents? I found a tractor and a mini sewing machine to add to the presents.  The little sign is from Heidi Swapp Believe Ephermera.

It looks like Santa is getting ready to load his sleigh!  Oh!......What does my wandering eyes see?  A helper?

It's......It's......Flamingo Scraps' Flamingo - Pinky going out to deliver the Christmas goodies you ordered!


I had a wonderful time making this dome.  I hope you try your hand at one.
Here is a picture of the whole Flamingo Christmas dome.


Wishing you joy and happiness.

Merry Christmas and Happy Holidays!


XO

Luann

Wednesday, December 4, 2013

Echo Park "Merry Christmas" Cracker Treat Box


Hi Cheryl here. Today I am taking a break from making Christmas cards and thought I would work on some gifts for my Grands to give to their classmates and teachers. Today I am going back to one of my favorite Christmas collections. It is "Merry Christmas" from Echo Park. I just LOVE these papers. I bought the complete collection during the summer and then was lucky enough to receive a kit from Flamingo Scraps this fall for our winter projects. This is one paper collection that I will never tire of. Beautiful, bright patterns and my favorite green, red, and brown colors for Christmas.

For my project I decided to make a cracker treat box. These are so cute and hold a lot of candy for the young ones or for us big kids maybe a nice piece of jewelry!  I used my "We Are Memory Keepers Envelope Punch Board" and it really did all of the work for me!


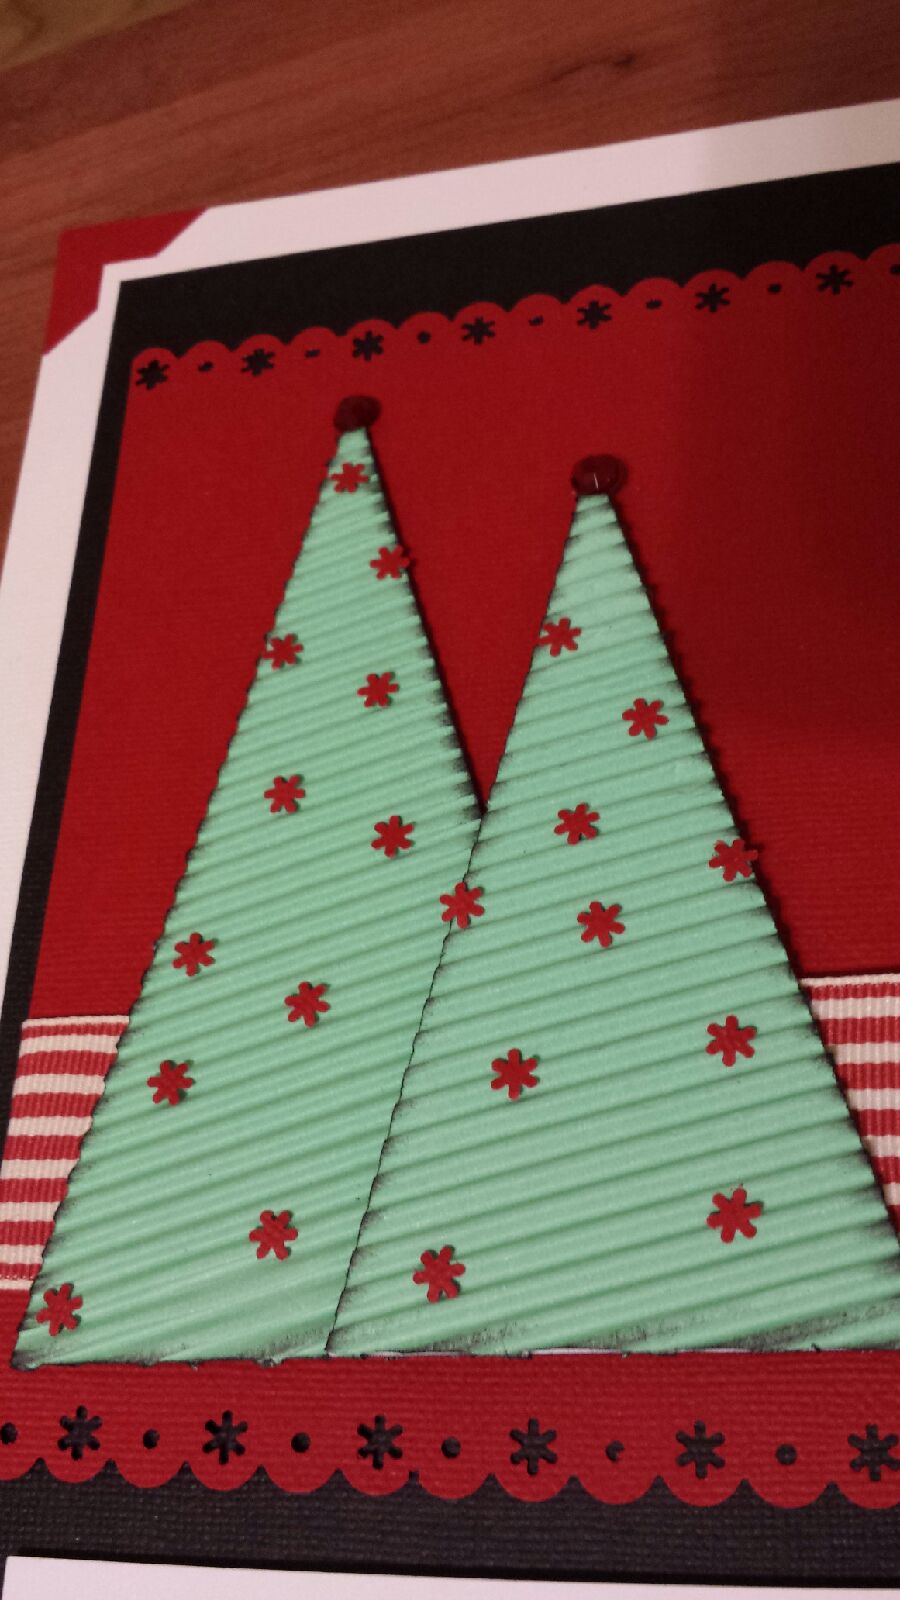
These are currently on sale at Flamingo Scraps for only $14.99!!!!!  I just had to cut the paper, tie the ends with ribbon, and then used two trees from the Fancy Pants Tiny Bottlebrush Traditional Trees as an embellishment . These are just adorable when completed and I think everyone will enjoy receiving theirs. I hope you enjoyed my project for today. I won't bore you with the measurements and details on how this was made, but if you are interested you may go to my blog for all of the details!


Thank you for stopping by the Flamingo Scraps Blog. Don't forget you can "like" their Facebook page here, and find everything I used today in their online store here.

Happy Scrappin............Cheryl

Tuesday, December 3, 2013

Merry Christmas Layout

Last December, my friend took these wonderful pictures of my boys (plus some of me, my mom, and my daughter) when they were a week away from being 3 and 7 years old.  I just fell in love with the head shots of both boys, but could never find the inspiration to create a layout with them, until now!!


Putting pictures in Polaroid frames is huge right now, so I could not resist playing around with the idea and with the Maya Road frames.  My pictures were not the correct size, so I added a paper border inside and then added their names below.  I also wanted to try out my new circle punch (it made the doilies behind the pictures).  I then added in my own layers and clusters for lots of dimension and fun.  You can also see Heidi Swapp's file folder tucked in the layers!!


Here you can see some twine looped around to make a fun flourish behind the Prima flowers.  I then added in a fun charm, which is all stacked up on top of Fancy Pants chipboard, and Basic Grey 25th and Pine die cuts and paper.


Here you can see some I stamped on the May Road Chipboard  after painting it.   You can see Cosmo Cricket wood stars, Prima lace,  and some of my paint splatters and circle marks I made with Heidi Swapp Mists (here is a link to the tutorial on how I make them).

Supplies can be found at Flamingo Scraps - head on over to see them, lots of great sales to be had!!

Supplies used


Tuesday, November 12, 2013

Beautiful Packaging for Gifts from the Kitchen!!!

I'm trying so hard to start Christmas preparations early this year!  I'd like to break my cycle of waiting too late and frantically finishing up gifts at 2am Christmas morning!!  I'm especially glad to show you this project as nearly all of the supplies come from Flamingo Scraps!!!


Here's what you will need --


In stock at Flamingo Scraps --
Special Orders from Flamingo Scraps --
  • Tim Holtz Distress Markers
  • Tim Holtz Distress Paint
  • Ranger Liquid Platinum Embossing Powder
  • Tim Holtz Distress Embossing Ink
From Your Stash --
  • Large Eyelet
  • Safety Pin
  • Charm
  • Small Paper Doilies
  • Baker's Twine
  • Cropadile
  • Heat Gun

First, trim the handles off of each chipboard jar.  Paint both sides of your jars with Tim Holtz Distress Paint in Weathered Wood -- these will dry pretty quickly.  Ink the edges with the brush end of a Tim Holtz Distress Marker in Stormy Sky.


The Basic Grey Give Credit Stamp Set is a must have -- there is a stamp for every instance from "Crafted By" to "Photo By," and they are really well made.  I used the "from the Kitchen Of" and got a really clear image every time.  I stamped each jar using Distress Embossing Ink and added the Liquid Platinum embossing powder.  A blast with my heat gun finished the label.  I then folded a paper doily  over the top of the jar, gently gathering the border.  I found it easiest to put a rubber band around the top to hold the doily in place while I tied on the seam binding.  And here's a little secret about seam binding -- the crinkly ribbon everyone loves so much -- it is seam binding that has been wadded up, slightly moistened with water, and shaken out when dry!  I like to set an eyelet at the top of the jar for the baker's twine to guard against tears and fraying.


Finish off your tag with a charm and your name!

I couldn't resist combining the mason jar tags with the Show Toppers from Cosmo Cricket for a gift that lasts after the goodies have been eaten!


Thanks so much for stopping by!  The FAB Flamingo Scraps Design Team will be posting projects everyday to inspire you to create!  And don't forget the December Daily from the Tonya LIVE!! Ustream class -- craft along with Tonya and make good on that resolution to finish your December Daily this year!!!!


Friday, November 8, 2013

It's Beginning To Look A Lot Like Christmas!

Hi this is Cheryl. I am sitting here typing while looking out the window. It is a beautiful fall Texas day. Nice and sunny. Not too hot or too cold. Just right for open windows and a nice cool breeze to blow through the house. I made a pot of chilli this morning and it has been simmering on the stove all day. We all need to enjoy these autumn temperatures. Ol' man winter will soon be upon us.  All of our treasured fall decorations will be taken down this month and we will be soon decorating for  Christmas. I love this time of year and I love making my own cards typically in November and scrapbooking my families Christmas memories at a winter retreat in January.


Today for my project for Flamingo Scraps, I thought I would do a Christmas page. I can never have too many premade pages for all of the pictures we take each year. To start off I used a white 12" x 12" base, layered with a 11" x 11" piece of black card stock. I then added a small 6.50" x 10.75" piece of red card stock. I also used a snowflake border punch along two sides of this and added a double photo matt on the bottom that measures 3.25" x 10" and a Heidi Swapp paper frame.


Using ribbon from my stash, I tied a simple knot bow on the bottom of the red card stock and cut two trees from the Fancy Pants Corrugated Paper Collection and adhered these over the ribbon.


 I also added a journaling strip and die cut from the Echo Park Merry Christmas collection. From there I added a few Christmas diecuts and images on the page. Also, I saved the snowflake negative pieces and used these to decorate my trees and added four photo corners to the edges of my base layer. A simple, but sweet Christmas page to add pictures to later.


I hope you have enjoyed my project for today and that I have inspired you to get started on your Christmas pages.  As always I thank you for visiting the Flamingo Scraps Blog. If you would like to check out the online Flamingo Scraps store, please click here to get started shopping!

Happy Scrappin! .........Cheryl

Wednesday, October 16, 2013

A Papercrafter's Christmas -- Part 2!!

Papercrafters really have an unfair advantage over crafters who have not yet discovered the fabulous products to which we have access!!  Today I want to show y'all two Christmas stockings I made combining fabric with some of Maya Road's gorgeous trims!

First is a Duck Dynasty fan's dream -- a stocking fashioned of camouflage burlap and trimmed with Maya Road's zipper trim.


It can be really difficult to make something like a Christmas stocking with a decided masculine slant.  I come from a long line of hunters and when I saw this camouflage burlap I knew it would be perfect for the gift "basket" I am making for my brother.  I also knew that the Maya Road green zipper trim would be just the thing for the border at the top!


Next up is a stocking made of batting and trimmed with Maya Road Linen Burlap trim and Linen Hearts.


For the cuff at the top of the stocking, I layered three strips of Linen Burlap Trim.  The fantastic thing about using this trim is the wide range of colors -- this shade is rustic looking, while the cream trim on the cream batting could be shabby chic at its best!


I just love these linen hearts from Maya Road.  Unfortunately, they have been discontinued, but it would not be at all difficult to cut some hearts from burlap or linen and achieve much the same look!  Another option would be using the Maya Road Burlap Roses for a frillier look!

Thanks for stopping by!
Related Posts with Thumbnails