Showing posts with label trims. Show all posts

Wednesday, October 16, 2013

A Papercrafter's Christmas -- Part 2!!

Papercrafters really have an unfair advantage over crafters who have not yet discovered the fabulous products to which we have access!!  Today I want to show y'all two Christmas stockings I made combining fabric with some of Maya Road's gorgeous trims!

First is a Duck Dynasty fan's dream -- a stocking fashioned of camouflage burlap and trimmed with Maya Road's zipper trim.


It can be really difficult to make something like a Christmas stocking with a decided masculine slant.  I come from a long line of hunters and when I saw this camouflage burlap I knew it would be perfect for the gift "basket" I am making for my brother.  I also knew that the Maya Road green zipper trim would be just the thing for the border at the top!


Next up is a stocking made of batting and trimmed with Maya Road Linen Burlap trim and Linen Hearts.


For the cuff at the top of the stocking, I layered three strips of Linen Burlap Trim.  The fantastic thing about using this trim is the wide range of colors -- this shade is rustic looking, while the cream trim on the cream batting could be shabby chic at its best!


I just love these linen hearts from Maya Road.  Unfortunately, they have been discontinued, but it would not be at all difficult to cut some hearts from burlap or linen and achieve much the same look!  Another option would be using the Maya Road Burlap Roses for a frillier look!

Thanks for stopping by!

Friday, January 25, 2013

January Flamingo Four

Ready for another Flamingo Four?  This month, three other designers and I each worked with these products:


             1. Graphic 45 patterned paper - "Well Groomed"
             2. Tim Holtz Giant Tag
             3. Pink Paislee Vintage Vogue buttons
             4. pearl trim


Melissa's Take

This month's Flamingo 4 was a bit of a challenge for me! I don't normally do the vintage thing, but I was intrigued by what I could do to make it mesh with my style, and I really love what I came up with! First, I started with just the tag. I looked up pictures of tags to gather some inspiration and found some through several sources, which brought me to create many layers, and ultimately a work of art (if I do say so, myself) that could stand well on its own.


First, I used a mask and a couple different mists to create the background. I really liked a couple of the images on the paper, but I also really liked the striped side (I normally love the B side of most Graphic 45 papers). I fussy cut the bride and groom silhouette images and punched some of the striped side, and then I ripped and teared and layered along the top of the tag for visual interest. I decided to paint some gesso along the outside edge of the tag and layer on top of it with Shimmerz paint, and then added the buttons (some of which I already had in my stash and supplemented what was sent to make the final product). Then I decided that the pearls were best used like they were laid on the tag and left there, so I used some clear liquid adhesive to get them to set just so. Finally, I added a bit of washi tape, a heart I cut on my Cameo, and stitching to add even more texture. 


Once that was completed, I loved it so much I immediately wanted to use it! I went through my wedding photos to find one I hadn't scrapbooked yet and printed it out on textured white cardstock, distressed the edges, and then added bits of paper, washi tape, the punched striped side of the Graphic 45 paper, the extra hearts I had cut out with my Cameo, some paint, some masking, and various other details to tie in with the tag. I really love what I came up with and am going to frame this in a shadow box to show off with my other framed wedding photos! 


Alicia's Take

When I saw the "Well Groomed Man" paper, it reminded me of our wedding, and how handsome all of the groomsmen were!  So I decided to make a mini-book using various elements cut from the paper, plus navy and lime green cardstock and ribbons that were actually used on items that I made for our wedding. The lace trim on the picture pages can also be found in the Flamingo Scraps store.

Here are the front and back covers to my album, using images cut from the G45 paper and accented with the button and the black pearl trim.


Here is a picture of my husband with the title "The Well Groomed Man" fussy cut from the G45 paper. 


The inner pages show my husband with his groommen.


This inner divider page uses the reverse side of the G45 paper, the top hat fussy cut from the paper and strips of cardstock in our wedding colors.


A group shot of the guys.


Here's another divider page taken from the G45 paper.


A picture of our hands during the ceremony - I thought this went well with the sentiment from the divider page. It is attached to the Tim Holtz tag, which was trimmed to fit this album. I have put two hearts cut from the same cardstock that was on the top hat page to cover the reinforced hole because it did not go with the color scheme for this album.


Ramona's Take

I chose Graphic 45 Steampunk Debutante. With this project I backed the paper cut outs with chipboard to give this the pop-up that it needed to stand out. I used Multi Mat Medium to the fronts of all the pieces and distress inked with Vintage Photo after (so it would not bleed with the multi mat medium). Then I arranged it many times to get the look that I desired. I used the bead at the edge creating a charm look. The background I used the Proper Gentleman paper and then layered the tag on top hanging over the edge. Then I took and fussy cut the hat from the printed side of the paper, crackle painted it and added it to my Heart and wings from the Tim Holtz die. I colored the gem buttons with copic markers to make them match the motif of my project. Then the black button I used acrylic paint to brighten it up against the black background. The other button I just glued a thread label from the SteamPunk Debutante collection. I am pleased with the way it has turned out. I used several different items on this anywhere from Distress stains, Tim Holtz dies, Prima metal flowers, gears from my cousin in Idaho, Tim Holtz different metals. This project was so much fun...looking forward to creating another one of these with some of the new lines coming out from CHA.


Cindy's Take

I had a lot of fun with this month's items.  I trimmed the paper and tag, did some folding, added a button, and accented with Stickles.  Then I headed out into the garage, where I put on the shop glasses, grabbed a hammer, and started pounding on the trim.  


I removed about 1/4 of the beads on each end of the trim, headed back to the craftroom, and glued everything together.  When I was done, I had this:

 
My "purse" is fully lined... with the scraps left over from December's Flamingo Four!  

 
And when you pull out the tag... it's holding a gift card.

 
So there you have it, another fabulous Flamingo Four!  We'd love to see your take.  If you make something using the same four supplies our designers had, please let us know and we'll feature it here on the blog. To find the materials we used (and so much more!) check out flamingoscraps.com!


Friday, September 23, 2011

Goosebumps


Today I would like to introduce you to a new product from Tsukineko called GooseBumps. It is a clear texture gel medium that acts as a resist while also providing an “orange peel” like texture to the surface of your project.


For my project sample I used it as a resist with a Prima mask to create a great texture on a mini notebook I’m sending to a friend.

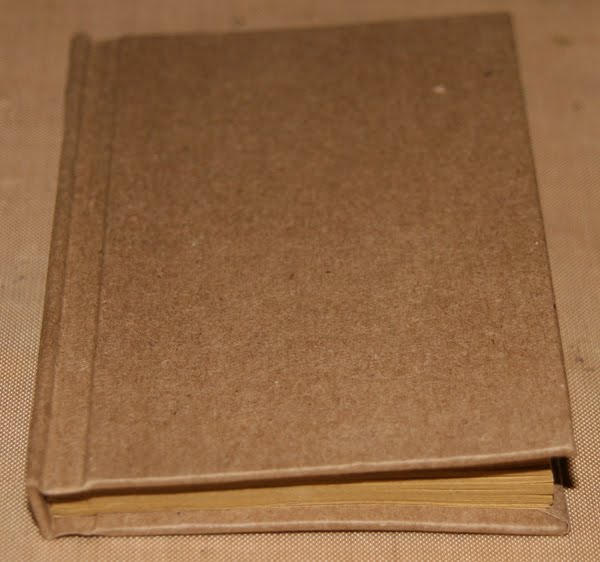
I started with a mini Kraft notebook that I got from a $1 bin at a local craft store.


I used Honey Dew Glimmer mist and Peeled paint distress inks to color the background of my album cover.


Once the base coat color has been applied to the entire surface, cover your work surface so that the over spray does not ruin your table top.


I positioned a Prima mask over the notebook cover then sprayed the GooseBumps over the mask making sure I covered the entire notebook. Immediately remove your mask and wash it with warm soapy water to remove the Goosebumps residue.

Allow the Goosebumps to dry (usually 5 – 10 mins on its own), or you can speed up the process with a heat tool.

This is what your project should look like. You can really see the resist on the project, and this would be great left as is. But adding a little more color will really help you see the texture.

I chose a heavy contrasting color – Aged Mahogany distress ink to resurface my notebook cover. I applied the color using an ink applicator tool.


Use a baby wipe to remove the excess color from the top of the Goosebumps.


You can really see the two toned effect now, and the second color enhances the texture of Goosebumps.

From Flamingo Scraps: Various Lace & Trims, Prima: Screen, Flowers; Tattered Angels: Honeydew Glimmer Mist; Ranger: Crackle Accents, Tim Holtz: Distress inks Peeled Paint & Aged Mahogany; Maya Road: Tickets.
Other: Tsukineko Goosebumps


Then I decorated the cover of the book and it is ready to send off to a friend.

I could see me using this product on frames, cards, scrapbook pages, tags, flowers, and so much more. The possibilities are endless.

Thanks for stopping by,

Tuesday, July 26, 2011

Flamingo Four: Webster's Pages Orange You Beautiful

Welcome to this month's.... Flamingo Four!!  Are you ready to see what we made?!

July's Flamingo Four items are:
1.  Webster's Pages Orange You Beautiful Patterned Paper
2.  American Crafts Textured Cardstock in Clay
3.  Cheep Trims Ivory Crocheted Trim
4.  Prima Mini Me Flowers

All items available at Flamingo Scraps (limited quantities on hand!). We all started with these supplies and the instructions to make something using all four items. Any other items could be added to complete the project.

Are you ready to see what we made?!

Jen's take:
I decided to use the chosen supplies to alter a little box that I have had sitting in my craft room forever. First I covered the outside bottom of the box with the solid colored cardstock and inked the edges. I lined the inside with one side of the pattern paper and used the other side to decorate the cover of the box. I put the beautiful lace trim on the inside of the box as well as the bottom edge of the lid. The butterflies were cut from a punch and one was fussy cut from the pattern paper. the inside of the lid as also lined with the pattern paper.


Extra supplies used: Martha Stewart Butterfly punch. Brown brads for the flower centers.


Julie's take:
I did a lot of fussy cutting from the Webster's Pages paper and I used the cardstock as my card base.  The only thing I added was pearls, white cardstock for the inside sentiment and a SRM "Congratulations" sticker :):):):):):):):) Ohhhhhh... I also used 3D dots to raise the house, tall flower and butterfly on the front :)


Suzanne's take:
I am busted!  The Webster's Pages paper just begged "PLAY with me!!!!"  So I did, just play!  I made these embellies using all sorts of techniques and mediums -- fussy cutting, paper piecing, UTEE, glossy accents in clear and sepia, Ranger Enamel, pop tape, glubers, glitter and glaze pens, inks, and stickles!  I also used some bling and Tim Holtz and spellbinder die cuts!  I learned several things -- I do not have a very steady hand as evidenced with the enamel; I need new pens; I need to remember to revisit older techniques more often; and I need practice, practice, practice!!!


But boy, oh boy, did I have a fun day!!!

So here we are at the end of another Flamingo Four and we hope you enjoyed it! We hope that we have inspired you and we'd love to see what you make if you do, so please stop by and share it with us!

Wednesday, June 8, 2011

Dressing Up a Gift Bag

I love dressing up plain gift bags.  Here's a very inexpensive gift bag from Michaels.  With a coupon, I paid under $2.00 for a pack of 10. 


I didn't like the white handle, so I gave it a quick spray with Peach Delight Glimmer Mist.  I also gave the front of the bag a light spray.  The colors matched really well, so it mostly provided a bit of shimmer.


With Key Lime Pie Glimmer Mist, I colored some ivory trim.  I used the same technique to curl the trim into vines that I did during September's Flamingo Five.   


I dug into my scraps pile and layered a green polka dot on some plain white paper.  (Actually, the white paper is the back of a very ugly pattern!)  I rubbed some Orange Peel Stickles onto a Prima flower, added a button in the center, then attached my green vines.


Here's the finished bag.  I think it's much cuter and much more personal than the original!

From Flamingo Scraps: Prima flower; Glimmer Mist; Stickles; Cheep Trims lace
Other: Michaels gift bag; Provo Craft patterned paper; unknown button

Do you dress up your gift bags?  If so, put a link in the comments so I can see what you've done!


Related Posts with Thumbnails