Showing posts with label Christmas in July. Show all posts

Saturday, July 20, 2013

Getting Sketchy with Christmas in July!

Happy Saturday, Flockinistas! Melissa, here with a simple and fun sketch for you to get some of those massive piles of Christmas photos scrapped! If you're anything like me, you put these Christmas pages off until there are no other photos to scrap (and when are there ever no other photos, am I right?) and, in the meanwhile, they collect dust.

Well, collect dust no more, Christmas photos! This fun sketch will help you use them up, because we all know that the big deal about Christmas photos is that there are usually SO MANY of them. That exact reason is why my sketch, this time around, calls for many photos -- 6 of them -- to be exact!


The nice thing about this sketch is that you can adjust the photo quantity to meet your needs, taking away some of the square photos if you have less to showcase, splitting the 4x6 photo if you have more. You could even take some of the circles in the sketch and turn those into photos as well!

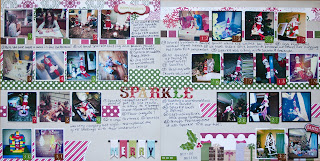
Now, I'm sure you're excited to see what's been done with this sketch, so here is my take!


So, I've already used the Christmas in July Brights kit to make a mini for December Daily with 31 pages along with several cards. Add this page to the mix, as well. These kits have TONS of mileage to them for the price. And, to give the sketch mileage to go along with the kits, here are some other takes from the a few girls on the design team:


Guest designer Genie Smith used the Christmas in July Traditional kit to expand this sketch into a 2-pager!


Our DT coordinator, Kathleen Natale, also used the Christmas In July Kit - Traditional . Although her photos aren't there yet, she has everything ready to go and will be using 2-1/5" x 2-1/5 photos on the 3'x3' mats.


Guest design team member Cheryl Arbo flipped and prepared this page for use with upcoming photos!

So, there you have it! Lots of inspiration for you to use up some of those Christmas photos from your pile! 

Keep scrappin'!
Melissa

Thursday, July 18, 2013

Fun To Make & Fun To Get Christmas Tags

Hello All!
I am back today with four different tags for our Christmas in July fun!
Up first, is a fun tag that I made using the patterned paper from the Traditional Red and Green kit, a piece of transparency and a couple of punches.  I started out by cutting the patterned paper and transparency into a tag shape.  Next, I punched out 15 green triangles and one gold star from some gold vellum that I had in my scrap pile, and glued them into a tree shape onto the transparency tag.  I cut a "trunk" for my tree from a scrap of textured brown card stock, and then added a few rhinestones that I cut apart from a Prima embellishment to act as ornaments for my tree.  To finish this tag, i just layered the transparency on top of the patterned paper and secured them together with a bit of flashy ribbon.

Next up, I cut a base of solid colored card stock and rounded the corners.  Then I stamped a lacy design and heat embossed with holographic embossing powder to give the background a little more interest.I added this great Santa card stock sticker mounted on red card stock and adhered it with Pop Dots.

 For this tag/card, I decided to make it more card-like, but instead of folding it in half, I folded it a little off of half and placed a strip of the green dot paper where it could be seen when the card was closed.  I thought this gave it a little more interest.  The sentiment on the front is a great chipboard element that comes in the pack in the kit.

Lastly, I made this quick tag using some basic red card stock, another piece of the scrap gold vellum, my Martha Stewart Stars Anywhere punch, and some more of those adorable card stock stickers that come in the kit.  
I hope these have inspired you a bit to make a few tags for those special gifts for the upcoming holiday season!!  Also, if you are interested in the Melissa Francis Floral Frog that I have used to hold the tags up for pictures, Suzanne has those available as well in the store!

Until next time!
Alicia

Saturday, July 13, 2013

Christmas in July meets December Daily

Happy Saturday, Flockinistas! Melissa, here, with a fun December Daily project that will be sure to get you in the mood for more Christmas creativity!

I have been wanting to do a December Daily for a while, now, but anytime that I really think about sitting down to prep it and get ready to take pictures every single day, it's usually prime Christmas shopping, preparation, present wrapping, time. There's just not enough time to fit it all in. So, the Christmas in July kits from Flamingo Scraps was a great prompt to get me on it before my lack of time became my excuse.

For my project, I things that are available through Flamingo Scraps:

Christmas in July Kit -- Brights
We R Memory Keepers Envelope Punch Board

And a few other things that may be available special order:
White grossgrain ribbon
Snowflake acetate shapes
Silhouette Cameo Design Cutter
Large Binder Rings

And here's what I came up with! I'm not going to show every page, because there's 31 of them, but here are a few of my favorites:


As you can see, the white grossgrain ribbon was used to keep the album shut when it's not being used. I kept the design throughout fairly clean and simple, as I knew I was going to have to put together a whole lot of pages without photos (which is a challenge for me, for sure), and I don't have hours to spend on each page. 

I made 31 envelopes for this project, in varying colors of red, white, and kraft. It didn't take much time at all with the envelope punch board! And the nice thing about using envelopes is that I will have places to hold memorabilia and extra photos as I go through and add to this album. 


On the second day, I figured I'd talk about Christmas card creation and making them. I put a copy of one of my Christmas cards in the album (from this post) so that it would be available. I figured I could additionally put whatever photo is sent in the card in there somewhere, as well, and our Christmas letter, if I type one up this year. 


I tried to keep everything flat, since much more bulk will make this album too big, so I stuck to using the sticker sheets that came with the kit and a few of the chipboard embellishments, and only a small sampling of brads. I don't want to add more because I don't know how much bulk will be added by the photos and memorabilia I add to it in December.


As you can see, each envelope is separated by a strip of patterned paper from the kit. This strip is not attached to the envelopes, so it gives me a little extra room to put things... extra photos, journaling, etc. 


To give the strips more interest, I used the stickers from the sheets in the kit and would put them off the edge. Because there was sticky parts that I didn't want to stick to the envelopes, I coated it with white chalk so that it wouldn't stick!


I also took some acetate snowflakes from my stash, pierced them in the middle, and put the brads that came with the kit through the middle. I thought it added some fun interest without too much bulk and gave me a good use for the brads. 


On some pages, I also cut the tags that came on sheets in the kit and used them to show my day. It was a cute way to add some variance to the album without adding complication. 


And, there you have it! A simple December Daily album that I put together in just a few hours, though I have a feeling that when I actually start adding content, I will probably add more to the album in terms of embellishment. But, for a prep, it was quick and easy and not overwhelming, which is how I like it. I hope it gave you inspiration to start your own December Daily album using envelopes! It sure was quick, easy, and less expensive that way! 

Until next time!
Keep scrappin', 
Melissa


Thursday, July 11, 2013

Christmas in July Mini Album

Merry Christmas in July, Flockinistas! I decided  to create a mini album using the Christmas in July Kit — Traditional. I so love this kit!!! It comes packed with all kinds of goodies to create with, as this album demonstrates. I always say I'm going to make cards, but time flies and before I know it, it's Christmas and I haven't made the cards !  So, this year, I am going to start  making a few now so I don't have to do it later. I started with this mini album using the tab file envelope and I also used the poinsettia file from Silhouette site. If you want to buy a poinsettia die, just drop Suzanne a line and she'll do her best to order it for you !

Here is the cover that I created on this mini I did the hinge binding system with 1/2 inch gullets to be able to make this mini very chunky.
                                   Up close picture of the typewriter with the Santa's list.
1-2
3-4
    Here is a closer look of how I did my poinsettias with the snow texture and a little bit of glitter.
5-6
   I used some rosette papers that I had cut out, and used it for lace. Fast and easy way to achieve a    lace without lace look. TH makes a GREAT Rosetta die so be sure to ask Suzanne about it !
                  I used textured snow on the Christmas Tree sticker to bring out dimension on it.
Here is how the file folder that I tucked behind the tree with a bow to look like a present.
7-8
9-10
11-12
13-14
15-16

Here is how I did the outside of my binding. I had this ribbon left from last Christmas and thought I would use it for a final touch.

                                     Here's a peek of how the tags come out of the inserts

Now, wasn't that easy ? Everything you need to create your own holiday minis, cards, or ornaments, with one GREAT kit fromFlamingoScraps.com. With this box of goodies, you can let your imagination run wild .  Remember you can also "alter" the stickers to make your own personal creation. I  used other embellishments from the store for a bit more flair as well.

Products used~
Christmas in July Kit — Traditional
Pink Paislee Luxe Rubons — Copper & Black Confetti
Prima Shaped Metal Paper Clips Sampler
Webster’s Pages Heart Cameo Push Pins
Prima SIIC Classic Swirl – Black Diamond
Prima Divine Cotton Lace – 1yd
Prima SIIC Circles Clear
Prima SIIC Hexagon Strips Iridescent
Prima Wood Icons in a Box – Typewriters & Clocks
Maya Road Trinket Pins Crystal Stars
Maya Road Maya Mist Licorice Metallic
Prima Distressing Tool
Pink Paislee City Sidewalks Parcel Tags

Remember to stop by Flamingo Scraps and pick your Christmas in July Kit - Traditional .Believe m ,you will love it!!!  If you see something I used, and it's not in the store, ask Suzanne if she can special order it for you .

Hugs
Ramona
Design~By~Ramona

Friday, July 5, 2013

Quick Assemble Cards!

Happy Christmas in July, Flockinistas! Melissa, here, with a few projects that will tickle your Christmas fancy and get you in the mood for that dreaded task of preparing Christmas cards.

Now, if you're like me, you wait until the absolute last minute and then end up buying cards because you don't want to spend the time making them. Who has time for that? Well, I have three different cards I made, using both of the Christmas kits available in the Big Pink Bird's Bargain Bin this month, and they each assembled in just minutes! Yes, there was a little prep work involved, but each card only contains one "fussy" item (that is an item that has to be die cut, hand cut, or has some kind of extra steps involved because it is more intricate). The rest of it is quick cuts, some inking, some adhesive, and ready to go out the door rather quickly!

Here, let me show you what I'm talking about:


This first set is fairly simple, and a more traditional card, in the sense of the stamping and the layout, but I really love how it turned out. It uses elements from both the traditional and the brights kits, some white lace ribbon (ask Suzanne about this if you're interested in it) that I soaked with a red Glimmer Mist (available via special order), a bit of green embroidery floss, ink (including Prima chalk ink in Rose Bud, available either as a set or individually via special order), and a layer of gold Stickles under a layer of yellow Stickles for the star. The stamped portion and it's mat are pop dotted off the card to give it some dimension, but it's still flat enough for a standard rate stamp. I considered my "fussy" item on this card to be two small things: the lace (because it had to dry, though the actual dying process took just moments) and the Stickled star (because I had to build up layers of Stickles to get the desired effect). All in all, I assembled five cards in about 5-6 minutes after prep work (the bow on the floss took a little extra time, but it's oh-so-cute!).

The card base for this card is 5.5"x4". The top pattern is 3.75"x3" with the bottom pattern measuring 3.75"x2.25". The mat for the stamped portion measures 4" tall, and is wide enough to give a .25" matting on either side. 


This second design uses the traditional kit only, and uses another ornament that I colored with Prima inks used like watercolors. Basically I dipped a brush in water, blotted the ink pad onto a craft mat, and picked the color up on the brush to paint the ornament with it. Because of this, my ornaments are stamped in Staz-On ink in black, so the colors won't run. I used some Stickles in Holly and glitter pens to bring more life to the ornament, and used some silver pipe cleaners that I had on hand from a previous craft project. I used my Silhouette to cut my borders, since to hand punch with my border punch would've taken longer (though not much... I've done it by hand before in the past). My "fussy" part on this project should be obvious: the ornament, which I stamped, then painted, colored, and Stickled. Once it was dry, I fussy cut it from the paper and pop dotted it to the card. All in all, I assembled five cards in about four-and-a-half to five minutes after prep work. 

The card base for this card is 5.5"x4". The top pattern is 3.75"x2" with the bottom pattern measuring 3.75"x3". The punched border is a .75" width (at the widest part).


My third card, and probably my most favorite, uses the brights kit only. It's a pretty simple design, but I really love it! It may seem like the simplest of all of the cards, but a bit of time went into the poinsettias. I used a Spellbinders Poinsettia die that *is* available for special order for those who love it as much as I do (one of my favorite die purchases of all time, other than my Silhouette), and it is more time consuming than I expected it to be, but that's mostly because I was unfamiliar with how the die actually worked when I started. So, basically, you have to run the die through once to cut the paper, and then remove the excess paper, flip over the dies, and run it through again with a self healing spacer (honestly, I just used a piece of extra chipboard and it worked just as well) to do the embossing. I did mine in four different card stocks that I had on hand: three shades of pink and a sheet of red bling, plus the green for the leaves. I curled the petals a little for added dimension and then layered them together in a specific pattern (dark to light, depending on which color was my largest petals). The finishing touches were the button for the poinsettia center, the lace, and the rub on sentiment (which is also part of the kit). The "fussy" part of this card is the poinsettia. The rest of it was fairly easy to put together! Altogether, I assembled four of these cards in less than four minutes after prep work. 

The card base for this card is 5.5"x4". The patterned paper for this card measures 5.25"x2.25"

So, if you've made it this far and don't feel overwhelmed, let me end this by explaining that, save for last year when there just was NOT time, I have assembled 50-100 Christmas cards by hand for the past 5 years or so. I generally spend a weekend on cards, and I keep my designs consistent to what I shared here: simple, with no more than one fussy item that I will prep for 5 minutes, here and there, over the course of a week. I cut all of the papers one day, then I will ink them (if I choose to do so). The next day, I create a little assembly line to put it all together. The nice thing about the assembly line is that you can get the kids involved in helping out, if yours are old enough to handle using the adhesive and sticking things to cards.

And there you have it! I hope you've found some of your Christmas spirit in this post and continue to do so as the month continues.

Until next time!
Keep scrappin',
Melissa

Tuesday, July 2, 2013

Star Light, Star Bright - Christmas in July

Hi Flock-Followers!
In honor of our "Christmas in July" festivities, I have created these great paper ornaments!  I saw these in a magazine a while ago, and loved them!  They are very easy to make, with minimal supplies, but they do take a little time to put together, primarily because of the drying time for the glue I used.


To make all three of the stars above, I only used three pieces of 12x12 card stock/patterned paper!  The first step to making these beauties is to cut your paper into squares.  Each of these require eight squares of paper to create.  For the large one, I used two pieces of patterned paper from Pink Paislee's City Sidewalks line and cut them into 6x6 squares.  The two smaller ones were made from one piece of 12x12 white card stock that I sprayed with Heidi Swapp Color Shine in Sweet Cherry on one side and Chartreuse on the other and then cut into 3x3 squares
Here are the four patterns featured on the pieces of City Sidewalk paper in the big star. .

Start off by folding your square into a triangle.

Then fold it again into a smaller triangle.

Then, on the open side of your smaller triangle, make three parallel cuts through both layers, leaving about a quarter of an inch at the end (please excuse my chipped nail polish.)

When you open up the triangles back to a square, it will look like this.  Take the inner most part, and fold the peaks to meet and glue into a tube.

Next, take the next set of peaks and fold those the opposite direction as the inner-most set and glue those sets together.  Keep alternating directions until you have them all glued together.

Here are two of them finished in each of the patterned papers.  Once everything is dry, it is time to glue them together.  Glue each of the small sides to the large side of another (see picture below).  Continue doing this until you have eight of them forming a wreath.  I held mine together at the glue points with clothes pins overnight while they dried.

Once things dry really well, I took a needle and some thread to the inner points and tied them together to ensure they they will hold the shape that I want them to have.

Here is one of the finished small ones.
  And here is the big one.
These are so pretty in person!  They take a little time to make, but are very simple and make a great impression!  My husband was amazed by them and the fact they were just made from a couple of pieces of paper!
Check out the great Traditional and Bright Christmas in July kits that Suzanne has put together in the Flamingo Scraps store and get started on your own Christmas crafts now, so you can leave the stress behind you when December rolls around!
Until next time!
Alicia


Wednesday, August 4, 2010

Christmas in July: And the winners are....

After random draw...

Cindy P is the winner of the altered crate!

And Julie Tucker-Wolek is the winner of the stamped dress form!

Congratulations Cindy and Julie!!!

Please e-mail Suzanne at flamingoscraps@yahoo.com with your mailing address to claim your prize!

We are well on our way to achieving our goal of 500 friends on Facebook...but have not quite reached that number yet!  So those of you who participated by inviting your friends were entered  in the above drawings instead!!  When we do hit that 500 mark on Facebook, we will do a random draw from all of our followers on both the blog and Facebook, so keep sending those invitations!!  And yes, you get two entries if you are a follower both here on the blog and on Facebook!!

Thank you so much for all the love and support -- we love our friends, followers and customers here at Flamingo Scraps!!
Related Posts with Thumbnails