Showing posts with label Basic Grey. Show all posts

Tuesday, December 3, 2013

Merry Christmas Layout

Last December, my friend took these wonderful pictures of my boys (plus some of me, my mom, and my daughter) when they were a week away from being 3 and 7 years old.  I just fell in love with the head shots of both boys, but could never find the inspiration to create a layout with them, until now!!


Putting pictures in Polaroid frames is huge right now, so I could not resist playing around with the idea and with the Maya Road frames.  My pictures were not the correct size, so I added a paper border inside and then added their names below.  I also wanted to try out my new circle punch (it made the doilies behind the pictures).  I then added in my own layers and clusters for lots of dimension and fun.  You can also see Heidi Swapp's file folder tucked in the layers!!


Here you can see some twine looped around to make a fun flourish behind the Prima flowers.  I then added in a fun charm, which is all stacked up on top of Fancy Pants chipboard, and Basic Grey 25th and Pine die cuts and paper.


Here you can see some I stamped on the May Road Chipboard  after painting it.   You can see Cosmo Cricket wood stars, Prima lace,  and some of my paint splatters and circle marks I made with Heidi Swapp Mists (here is a link to the tutorial on how I make them).

Supplies can be found at Flamingo Scraps - head on over to see them, lots of great sales to be had!!

Supplies used


Monday, December 2, 2013

Ustream Tonight - December Daily Part 2

Set your alarm clocks because tonight is Part 2 of the December Daily Ustream  at 8:30 p.m. est.  We are going to begin construction of week 1, and start building a few embellishment clusters that will be used in future days.  Each week I will do a post on my blog and the Flamingo Scraps Facebook wall  showing what I did for the week. This will make it easy for you to follow along.

Links you need to follow to keep up:
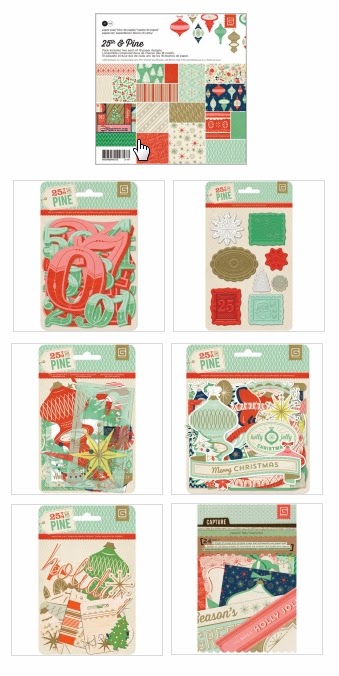
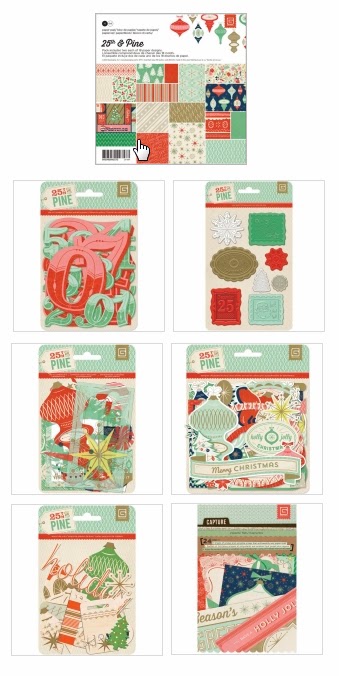
We are using the beautiful 25th & Pine from Basic Grey for this year's journal. Kits are available at Flamingo Scraps  for $29.99.

http://flamingoscraps.com/product/tonya-live-ustream-class-25th-pine-december-daily-kit/


If you missed the November Ustream, make sure you watch the recordings. We built our covers in that class.  I have added them plus a few extra video tutorials to a YouTube play list for easy reference.  Be sure to check this play list for new videos each week. 

> Click here to begin watching.

As always we will do our best to record  the live shows. 

Hope to see you there!

Tonya
http://www.psychomomscrapbooks.blogspot.com


Friday, November 22, 2013

November Flamingo Four (F4)

Happy 4th Friday Flock Followers! Our Featured Flocksters, Genie, Donna, Ramona, and Cheryl, have some great ideas to share with you this month. The surprises pack this month included : 

1) A piece of heavy chipboard
2) Stackable flowers
3) Lace
4) Rose cameo

Hi Flock, Genie here! 

Christmas gifts are still on my mind, so when I pulled out my Flamingo 4 bag this month, I immediately thought of a little door sign. I started out with the heavy chipboard and began layering the stackable flowers over it, using Mod Podge to glue everything down. I finished it off with the lovely lace, both as a hanger and ruffled along the bottom, and the cameo as a topper. I added a letter and a little paint from my stash.  I have three nieces with the first initial "A", so I'm sure I'll find a good home for it. Thanks for looking!


Hope you enjoy my take on the items we were given to play with.Happy Scrapping! Donna 

My first project is a sepia laser copy of a print that I put onto the heavy chipboard, then inked the edges. The flowers were misted with water, rolled into a ball, flattened, then misted with Glimmer Mist. The lace is ruffled onto to the back of the CB and attached it to a canvas board.Once the canvas was painted, a criss-cross design stamp was used for some background effects around the edges. I distressed the board to reveal some white and dabbed the edges with distress paint. The flowers are attached with a button brad from my stash and dabbed with paint. After inking some seam binding, it was then sprayed with Glimmer Mist. Prima Say It In Crystals is the frame highlighting the section with my Grandmother and her brother. Distress markers to added the color to their clothing and hair. 
My second project is just a simple little hair clip for my Granddaughter to match a dress I just purchased for her, I touched the edges of the cameo piece with Distress paint, Pumice Stone, then glued the Webster's tutu trim silver. When dry, I adhered it to a hair clip 


RAMONA'S PROJECT :


For this Flamingo 4 project I did a wall hanging. Using my Crop-a-dile to punch another hole to place the lace to make a hanger.  I used the Damask Stencil from Prima Mixed with molding paste and applied directly to the surface. I also altered the cameo by using Tim Holtz Distress Paint Wild Honey and some gesso.  I cut the title out of black card stock from my Cameo, and used the ephemera to make my flowers by cutting into them and wetting them down and crinkling them up.  I so love how these flowers turned out!!  I hope you like my creation as much as I had fun making it!


CHERYL'S PROJECT :

Hi, Cheryl here.For this project I started with out a light blue modeling Modellier Cream and brushed a base coat on. I then used a small stencil and again using my brush I put the cream over the stencil, carefully lifted it off, and let it dry. I adhered two of the whimsies on the surface and attached the flower.
On the opposite side I used the packaging from the whimsies and used it as a paper ledger. Taking one of the whimsies I used a 1/2" punch and punched out numbers from one of the whimsies and adhered it to the packaging,, and added a few more at the bottom. The lace is attached through the hole in the top corner. Since the packaging has a plastic surface, you can write on it with a dry erase pen when you need something to make notes on. 


Don't forget to follow Tonya's Ustream tutorials. On  December 2nd, Tonya will be coming to you live with part 2 of the December Daily. She will be using the beautiful 25th - Pine from Basic Grey for this year's journal. Kits are available at Flamingo Scraps  for $29.99. If you missed the first one, or need to recap, follow any of the links below.
Thanks for stopping by. Have a great weekend from The Flock !!


Thursday, November 21, 2013

December Daily Ustream Recap

In our November 4, Ustream I told everyone that we would work on our December Daily Journals TOGETHER.   To catch everyone up to speed, we created our covers.  The back covers are plain at this point, I may get inspired to add to them as we go. Here is a photo of the front and inside covers.


I have created a play list on my YouTube channel titled December Daily 2013 that includes tutorials, and the Nov. Ustream recordings.  Hopefully, this Play list will provide an easy reference for you to follow along. 

> Click here to begin watching.

As a recap - we are using the beautiful 25th & Pine from Basic Grey for this year's journal. Kits are available at Flamingo Scraps  for $29.99.

http://flamingoscraps.com/product/tonya-live-ustream-class-25th-pine-december-daily-kit/


In our December 2 Ustream, we will begin building week 1 of the journal and I will show you how to do some fun tags for your daily numbers.  Follow me each week on my blog, and the Flamingo Scraps Facebook page, for weekly updates as I create my own journal.  Hopefully it will help inspire you to create your own.

Thanks for stopping in today,

Tonya
http://www.psychomomscrapbooks.blogspot.com


Tuesday, November 12, 2013

Beautiful Packaging for Gifts from the Kitchen!!!

I'm trying so hard to start Christmas preparations early this year!  I'd like to break my cycle of waiting too late and frantically finishing up gifts at 2am Christmas morning!!  I'm especially glad to show you this project as nearly all of the supplies come from Flamingo Scraps!!!


Here's what you will need --


In stock at Flamingo Scraps --
Special Orders from Flamingo Scraps --
  • Tim Holtz Distress Markers
  • Tim Holtz Distress Paint
  • Ranger Liquid Platinum Embossing Powder
  • Tim Holtz Distress Embossing Ink
From Your Stash --
  • Large Eyelet
  • Safety Pin
  • Charm
  • Small Paper Doilies
  • Baker's Twine
  • Cropadile
  • Heat Gun

First, trim the handles off of each chipboard jar.  Paint both sides of your jars with Tim Holtz Distress Paint in Weathered Wood -- these will dry pretty quickly.  Ink the edges with the brush end of a Tim Holtz Distress Marker in Stormy Sky.


The Basic Grey Give Credit Stamp Set is a must have -- there is a stamp for every instance from "Crafted By" to "Photo By," and they are really well made.  I used the "from the Kitchen Of" and got a really clear image every time.  I stamped each jar using Distress Embossing Ink and added the Liquid Platinum embossing powder.  A blast with my heat gun finished the label.  I then folded a paper doily  over the top of the jar, gently gathering the border.  I found it easiest to put a rubber band around the top to hold the doily in place while I tied on the seam binding.  And here's a little secret about seam binding -- the crinkly ribbon everyone loves so much -- it is seam binding that has been wadded up, slightly moistened with water, and shaken out when dry!  I like to set an eyelet at the top of the jar for the baker's twine to guard against tears and fraying.


Finish off your tag with a charm and your name!

I couldn't resist combining the mason jar tags with the Show Toppers from Cosmo Cricket for a gift that lasts after the goodies have been eaten!


Thanks so much for stopping by!  The FAB Flamingo Scraps Design Team will be posting projects everyday to inspire you to create!  And don't forget the December Daily from the Tonya LIVE!! Ustream class -- craft along with Tonya and make good on that resolution to finish your December Daily this year!!!!


Monday, November 4, 2013

Ustream Tonight!

Hi everyone, I hope you had a great weekend.  December is right around the corner, and I know everyone is going to get BUSY!   So tonight we are starting our December Daily journals early.

I hope you can join us at 8:30 p.m. est. on Ustream.

This month we are going to feature the 25th and Pine line by Basic Grey.

http://flamingoscraps.com/product-category/basic-grey/

We decided to break this project up into sections so that we can cram as many techniques and details as possible, without feeling rushed.  Tonight's class is going to focus on making our covers, and perhaps a few embellishments. 

Then, on December 2nd, we will focus on making our embellishments and parts of our book.  Each week, I will feature my pages from the week on my blog at http://www.psychomomscrapbooks.blogspot.com  so you can follow along through the entire month of December. These blog posts will also be posted to the Flamingo Scraps Facebook page.  Don't forget to sub to both so you don't miss the weekly tutorials!

Pinkie is trying to put together a mini kit for the covers, but you can still follow along. Make sure you purchase the 25th & Pine collection so you get it before the December Class! We would love to see how your books look.

We hope to see you there!  As always, we will do our best to record for those who can't make it live. 

Tonya Gibbs
http://www.psychomomscrapbooks.blogspot.com

Friday, October 25, 2013

4 Products + 4 Designers = The Fantastic Flamingo Four !!!

It's that time again ! Time for the FANTASTIC Flamingo 4! I love to see what everyone comes up with each month. I call this the "bonus blog" post because you get four great new creative takes all at one time. For the October F4 , our designers, Erin, Melissa, Luann, and Cheryl were given these four items to get down and scrappy with.
1)  Prima "Rondelle" Designer Paper
2) Prima Banner Clip
3) two Prima flowers
4) Manila Tag (small)

Enjoy the creative journey, and let us help inspire you on your next crafty endeavor.


Luann’s Project


When I saw all the lovely papers I thought instantly that they would make pretty barrettes. I was right! I got out the barrette supplies and Mod Podge matte finish.  I cut the paper a little larger than the barrette so I could fold under. Slather the Mod Podge front and back.  While it was still tacky to touch I sprayed with Heidi Swapp Color Shine in gold or mustard.  Using a flower punch I made little flowers to go with the F4 flowers and I had to give them a little spray of Heidi.  I used my Prima Edgers for a highlight colors.  .


Originally, I thought about using the tag as flowers.  Then inspiration and I started playing.  I love humming birds and flowers.  Don’t you just the dimensional of the flowers?  Again, I used my flower punch with scraps from the barrettes.  I attached the cute paper clip and I will use it for the sediment.

I hope you like my challenge project with F4 items. Hope you will give making the barrettes a try.


CHERYL'S PROJECT
Hey guys...this is Cheryl. Today on the Flamingo Scraps Designer Team, there are four of us all working hard using the same scrappin goodies and doing our own thing making something pretty! We were given a generous supply of Prima "Rondelle" Designer Paper, a Prima Banner Clip, two Prima flowers, and a small manila tag to create our project. Our challenge was to see how each one of use uses the same materials. At first I debated on making a card, but having all of these nice papers, I wanted to create something where I could show off several of these pretty papers. So, I decided to make a A2 size card portfolio.


I started off with a piece of black 12" x 12" card stock, trimmed it down to 8.50" x 11".  It was scored at 5.25" and 5.75" on the 11" width and 6" and 6.25" on the 8.50" width. I trimmed away the 1/2" middle section from the bottom short end up to the top score line.

Using an assortment of patterns from the Prima Rondelle collection, I cut two at 5" x 5.75", two at 2" x 5", and one at 1/4" x 5.75". After inking all of the edges using Prima's Black Coal Chalk Ink, adhesive was applied to the back of each piece and adhered to the front cover and inside flaps.


Turning it over, I marked a 2.25" line above the top score line along the 11" width. From there I added a strong adhesive along this drawn line and then after folding a 30" piece of ribbon from my stash in half to find the center, I laid the center of a ribbon on the 1/2" area and attached it to the front cover of the portfolio.

At this point I creased my score lines and from the inside I brought both flaps forward and secured the outside edges with a tiny brad as a closure.

I covered the tag with another paper piece of the paper, and then cut two additional tags out from the collection, along with two other papers for two additional mats on the cover, and then tied some ribbon from the Seam Binding Sampler on the tags and used the Prima flowers to embellish the cover and I was done.


This was a fun project to make and a great gift idea to hold four handmade cards. This was a lot of fun and hopefully I have inspired you to make one for your cards.

As always, I appreciate subscribers of my blog, here. Also, like and subscribe to Flamingo Scraps on Facebook here and  be sure to visit the Flamingo Scraps store. Check out all of the latest products from Pink Paislee, Heidi Swapp, Fancy Pants, and Basic Grey.....just to tease you with a few!!
Happy scrappin!.......Cheryl

Erin's Project

I am always in need of cards, for lots of various reasons.  Right now it is a thank you for my son's teacher to show her how thankful we are to her (and the school) about his rough transition since the move.  They are helping him in so many ways, and we are grateful that they are supportive to his needs.


I used 3 different sheets of Prima paper and cut them into 1.5 inch squares.  I then inked and arranged them as seen in the pic.  I matted them onto black, then another Prima patterned paper, then on the card base of kraft paper.    I cut the tag down to make room for the stamp sentiment, which I added the clip and a punched out butterfly from another sheet of the Prima paper.  I added a couple of extra flowers to bulk up the Prima flowers from the kit, then added in the buttons.  I created the leaves and you can see the tutorial I made in a post from last week.

Melissa's Project

This month's Flamingo 4 came so easily for me, and for that I am thankful! I have been scrapping out of a suitcase for about a month now, as my family and I are preparing to sell our house and move to a new one soon. I didn't need much extra to complete this project! All I used in addition to what was sent was a single piece of Kraft cardstock, a couple of stamps from my stash, a Threading Water punch from Fiskars, some Prima black chalk ink, and Tim Holtz distress paint in black soot, available in the Flamingo Scraps store via special order.


I decided to make a non-folding card with a pocket for the tag. The sender could write on the back side of the card, or pull the tag out and write on the back side of it, or tuck a piece of paper in with the greeting to send their own little note! I painted the tag black with the distress paint and then adhered paper to it. I also punched the bottom of the tag with the threading water punch. For the cardstock tag that I added, I stamped it with a flourish stamp at the bottom, and then also punched it. The pocket on the tag is a single piece of patterned paper from the pack, adhered on three sides over another piece of patterned paper I cut to size. I used one flower on the little flourish in the corner of the paper and another on the banner paperclip.


Here's what each piece look like individually:


What awesome projects from four amazing designers! Be sure to follow the Flamingo Scraps blog and "like" our  Facebook page . Don't forget Amazing tutorials from Tonya Gibbs on the first Monday of each month at 8:30 p.m. EDT.You can also follow the link to Tonya if you missed and Ustream shows. They are recorded for those who missed them.  Thanks for visiting, and check out all of the great products in The Store. You'll  be tickled pink!!

Wednesday, October 23, 2013

Fall cards with Basic Grey Persimmon

Good morning, Flock!  Genie here, and today I have a trio of fall-themed cards using the new Basic Grey Persimmon.

For the first, I used a sheet from the Basic Grey Persimmon 6x6 Paper Pad.  I chalked the edges and added a sticker.  I used a piece from the Basic Grey Persimmon Die Cuts and Transparencies pack for my sentiment, and finished it off with a couple of houses from my Prima Wood Icons Sampler and Jenni Bowlin Vintage Feather Tags.

My next card uses several scraps from the 6x6 Paper Pad, some old bling and letters from my stash, another piece from the Die Cuts & Transparencies pack, and a heart from Fancy Pants Cork Shapes, Hearts and Stars (there are also arrows!).

Finally, I made a cute thank you card, using another sheet of the Persimmon 6x6 paper and some Tim Holtz Distress Ink.  I chalked the edges of the wooden Studio Calico Wood Veneers -- Triangles and added a Maya Road flower from my stash.

Thanks for looking, and I'll see you soon!

Monday, October 21, 2013

Gift Card Holders With Basic Grey 25th & Pine, and Persimmon

In this day and age, everyone is always on the go and time is more of a luxury than a given. Gift cards are on the rise as the "go to" choice of gifts. I LOVE gift cards, especially if it's a Flamingo Scraps card! My only problem with them is that I don't like the dull card holders I see in the stores, not to mention the cost! I'd rather give more money on the gift card than pay $4.00 for the holder. My solution? Make my own, and the new lines from Basic Grey, 24th & Pine a Christmas line, and  Persimmon, which can be used on anything. Be sure that you check out the entire line, which includes transparency shapes, chipboard letters and numbers,  wood veneers, and much more.

 Shown from the top : Gift card holder for the guys in your life, Christmas gift card holders,the second, third,and last. Middle card on the bottom is a house warming gift card holder. The burlap trim, ruffled fabric trim, and flower on this card are from the Maya Road Trims collection , the burlap trim and flower are in the shade of sunset and the scalloped trim was misted with Heidi Swapp Color Shine, Georgia Peach. Wood veneer leaves are from the Prima Wood Icons, leaves in a box

.

Here I used Basic Grey 25th and Pine for the Christmas gift cards. I cut my paper to measure 6 x 12, folded it in half to 6 x 6, then cut it again, to make two 3 x 6 card holders. This is a great size and it conserves paper as well. You can make any size, but this is what worked for me. The papers in the link are 6 x 6, and that's even better if you make this size because it's one fold and no cutting. I love the little brown paper bag on the left one ! All the tags inside are adhered in a manner that allows you to insert the gift card under any of them.


Sometimes guys can be all whiny about getting cards that are mushy or look girly, so the Persimmon worked for both genders here. I made the cards a bit bigger since they will be used for Birthdays, something I consider a bit more personal than Christmas since it IS for the recipient's special day.The bottom photo is the inside of the house warming card. Follow the links for more goodies from this line, in the way of, transparencies, mixed brads and tags, and my fave, the wood veneer tags.


I hope that you were inspired by this quick and easy gift giving solution. Don't forget to make your cards even more special by making personalized envelopes using the WRMK Envelope Punch Board available at Flamingo Scraps.


Don't forget to check out the Flamingo 4 post this Friday where four of our designers create a unique project using the same four materials. It's amazing how different every one's take is.

My next project will be an an awesome cute holiday fish tank (I hope the fish feels that way !) so be sure to stay tuned !!!

Until next time,

Kathleen

Be Happy & Stay Scrappy !!

Thursday, October 17, 2013

Fabulous Fall Fun with Persimmon

Hello Flock! Genie here today with a super cute layout of my littlest niece. :) I played some more with the new Basic Grey Persimmon collection--I really love these patterns and bits and pieces. I love the color combo best, I think--that blue is such a great accent for all these lovely fall colors.
I started with a metallic copper sheet of cardstock that has, literally, been in my stash for EIGHT YEARS.  Talk about hoarding! I used some chalk ink and a Heidi Swapp mask to put a little fun on the background (Flamingo Scraps can special order a lot of these masks that I love to use--just ask!). I cut strips from the 6x6 Paper Pad and turned those into arrows. Then I mixed in a border sticker and a die cut from the Die Cuts and Transparencies. 
 I used a couple more pieces from the Die Cuts and Transparencies package in the bottom left, and then used a piece from the 6x6 Paper Pad to mat my two photos.  Finally, atop the bottom, I added a couple of Maya Road Burlap Roses in Lemon and Sunset and tucked in a few leaves from the Prima Wood Icons collections--you can find them in Leaves and Mushrooms or get a variety of all the wood icons in the Sampler.  All of the leaves were inked with chalk ink (the Prima Chalk Ink Edgers would be great for this!!)
I hope you enjoyed my cute niece...erm....I mean my cute fall layout.  Until next time, Flock...thanks for looking!

Thursday, October 10, 2013

Basic Grey Persimmon Wood Veneer Mini Album

This month I decided to use this Beautiful Autumn Collection By Basic Grey, "Persimmon." I seen that I had the Wood Veneers and was looking at them and then it came to me use this pack of the Basic Grey Persimmon Wood Veneer Cards. So, this is what I did. First, I found the Tag-like veneer and marked each one with this top shape so that when I bound it with the seam binding I would have room for all of it.


On the front I decided to use some hinges to adhere a card for extra pictures or journal area.


Here is the rest of the mini album from inside to back.


I used the following supplies on this project.
Basic Grey Persimmon 6×6 Paper Pad
Basic Grey Persimmon Die Cuts and Transparencies
Prima Chalk Ink Edgers — Set of 40 Original Colors!!!
Seam Binding – Cream
Prima Wood Icons in a Box – Birds & Owls
Maya Road Metal Antique Music Box Keys
Maya Road Trinket Pins Crystals
Maya Road Trinket Pins Hearts & Pearls
Maya Road Metal Trinket Clips Dress form
Maya Road Burlap Trim Cream
Heidi Swapp Color Shine Georgia Peach


Other products used:
Tim Holtz Distress paints
Rhinestones from my stash
Tim Holtz Vintage Photo Distress Ink
EK Success 5 petal Flower Medium and Small punch
Pink Paislee Luxy Hearts that could possibly be found in the
Flamingo Scraps Warehouse Sale Box — Embellishment Box

Also check out the other Warehouse Boxes that can be found here:
Flamingo Scraps Warehouse Sale Box — Paper Box
Flamingo Scraps Warehouse Sale Box — Combination Box

Also stop by Flamingo Scraps for all your scrapbooking needs. Hope you like my project and have a great week!!!

Designs~By~Ramona


Related Posts with Thumbnails