Showing posts with label love. Show all posts

Friday, April 15, 2011

Flamingo Four: Fancy Pants Aged Florals

We're back with one of our favorite columns.... Flamingo Five Four!!  You aren't imagining things... we talked, plotted, went back and forth.... finally deciding that we wanted to give this feature a fresh face with our new guest design team so we changed it to Flamingo Four!  The only change?  Four people, four products.... everything else is the same.  Are you ready to see this month's Flamingo Four?!


April's Flamingo Four items are:
1. and 2. Two sheets of Fancy Pants Aged Florals collection patterned papers
3. Kaisercraft Pearls - White Strips
4. A grab bag of white Prima E-Line flowers

All items available at Flamingo Scraps (limited quantities on hand!). We all started with these supplies and the instructions to make something using all four items. Any other items could be added to complete the project.


Are you ready to see what we made?!

Janie's take:
Other Supplies: Maya Road Canvas Dressform

I began by cutting alot of mini circles from the papers then I cut the circles in half. I then flared the ends of the half circles to give a curl and dimension to my project. I started attaching every half circle seperately in a pattern that I thought looked good. I took the Kaisercraft pearls and strung them on a diagonal on the dressform. Next, I sprayed the dressform and the prima flowers with Copper Glimmer Mist and attached the flowers to the dress with a generic orange brad. Thank you for allowing me to show you this project today I had so much fun with and I hope I inspired you to try something new as well!

Sara's take:

My photos were from a photo booth my son and I visited on our 'Date Day'. I used one sheet of the Fancy Pants Aged Florals paper as my back ground and the second sheet as my light green strip that I decorated up with a border punch. I used some of the 12-inch pearl strips to accent the ends of pattered paper. Lastly, I took glimmer mist to some of the great white prima flowers and add blingy middles to them. This was a fun challenge for me, it really pushed me outside my box!

Suzanne's take:
Other Supplies:  Sizzix dies -- tag, large daisies, butterfly and firefly; pearls edged ribbon, Old Lace Glimmer Mist, Pink Cat's Eye Ink, pop dots, misc. Happy Easter sticker

I inked the edges of all paper pieces and Prima flowers with pink ink, layered the sizzix daisies and Prima flowers with pop dots for dimension, pop dotted the butterfly and dragonfly, used Prima flowers to fill in around the diecuts, used pearls in centers of Prima flowers and for spines of butterfly and dragonfly, misted the finished tag with Old Lace Glimmer Mist and tied on the ribbon!

Amanda's take:

As we rapidly approach the ten year mark together this fall, this mini album documents our first five years my husband and I spent together. It's a quick picture story of our travels, our celebrations, our marriage, in just one small little mini! If you'd like to see a picture of each page, you can check it out on my blog.  I used the patterned paper, along with the other patterns in the collection, to cover my chipboard album.  For embellishments, I used my distress inks to cover chipboard pieces, and various laces, ribbons, and trims.  On back cover, some Prima flowers and a few pearls in the center was the perfect finish to my mini album!

So here we are at the end of another Flamingo Five Four and we hope you enjoyed it! Please come back and join us on the 15th of next month to see what we made with a new batch of four goodies from Flamingo Scraps! We hope that we have inspired you and we'd love to see what you make if you do, so please stop by and share it with us!

Tuesday, March 1, 2011

Layout: Life is Beautiful

Hope no one is getting sick of all the cosmo cricket 1934 layouts!  Here's one more:

From Flamingo Scraps: Cosmo Cricket 1934 collection patterned paper; Pink Paislee Parisian Anthology Flower Darlings
Other Supplies: Bazzill Basics kraft cardstock; Stampin' Up! Satin Ribbon, Red Glimmer Paper and Small Heart Punch; sewing machine + thread

So I owe all of you, our followers & blog readers, as well as our GDT applicants an apology... I've been a little burned out the last week or so and I'm still putting together our offers to our GDT.  Stay tuned... they'll be out tomorrow and we will reveal them later this week -- you're going to love them!! :)

Friday, February 25, 2011

Four years ago... I fell in love with Prima!!

Happy Friday!! I took a break from scrapping to go to my first book club meeting last night!!  We read a great book that I'll share about on my blog next week. :)  I didn't have a chance to get good pictures of my last three layouts so I thought it would be fun to share an older layout from my books that feature what I fell in love with Prima for -- flowers and bling!! :)

From Flamingo Scraps: Prima bling and flowers
Other Supplies: Bazzill Bling cardstock; Basic Grey Lily Kate patterned paper, Deja Views Rub-On

Hard to believe that I made this layout almost four years ago!  I still love it!!  It has hidden journaling too:


Betcha didn't expect that!!  There are these fabulous little Basic Grey magnets underneath the photo and hidden underneath the cardstock.  Just click on the picture if you want to read what it says. 

Have you ever hidden journaling on a page for someone to discover some day?

Have a great weekend -- we're expecting snow here tomorrow.  Snow!!  At sea level in California?!  It's unheard of.  Rare.  I'm so excited!!  And yes, I'm already charging the camera and crossing my fingers that it actually does snow here!! :)

Tuesday, February 22, 2011

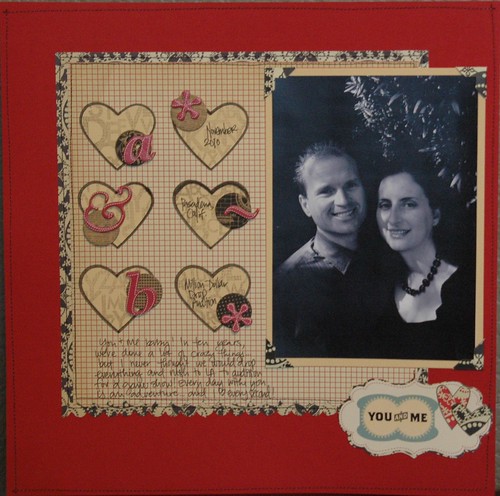
Layout: You and Me

Here's the first of seven layouts I made using Cosmo Cricket 1934!

You and Me
From Flamingo Scraps: Cosmo Cricket 1934 collection patterned papers and cardstock stickers; Graphic 45 chipboard buttons
Other Supplies: Bazzill Basics cardstock, Martha Stewart photo corner punch; Stampin' Up! heart punches and scallop border punch; American Crafts Thickers; Studio Calico Stamp; sewing machine + thread

I scraplifted this layout by Stephanie Howell that I loved and made a few tweaks to her design along the way and love how quickly this cute layout came together!

Tuesday, February 15, 2011

Instant Love

I guess this is a week of love here on the blog! :)  I'm having fun scrapping pictures of my niece, but I need more pictures to choose from... all I have are from the first week!!
From Flamingo Scraps: Pink Paislee Sweetness Collection patterned paper and Cushies (alphas)
Other supplies:  Stampin' Up! very vanilla cardstock, border punches, heart punches, and linen thread; Making Memories Je t'adore patterned paper (pink polka dot); pink fine point sharpie; Studio Calico Polaroid Stamp

I keep seeing border punches to layer monochromatic strips of cardstock - been on my mind to try lately!  So I did that to make a full background as a base for my layout.  I fussy cut out the flowers from one of the Pink Paislee Sweetness patterned papers to use on the corners. 

I also ran out of the letter "s" and had to improvise by trimming the number "8" a bit.  I think it turned out okay, though I'm tempted to buy another set of that alphabet and replace it... I won't but I'm definitely tempted! ;)
Have you done anything like this with your border punches?!

Monday, February 14, 2011

Happy Valentine's Day!!

In honor of today's holiday, I thought I'd share a page about love today.... puppy love! :)

From Flamingo Scraps: Basic Grey Curio Patterned Paper and mini mono stickers
Other Supplies: October Afternoon Campground Patterned Paper; Sassafrass Lass Entwined Blooms (Rosey); Making Memories Je t'adore Patterned Paper; KI Memories Hot Strips Over the Rainbow border stickers; KI Memories 3x3 pockets; Stampin' Up! Black Journaling Pen; Stampin' Up! Scallop Border Punch; Studio Calico Love Stamps (January 2011)

This is my Scarlet with her boyfriend, Mr. Clark Kent.  They are too cute together!!  I used this week's sketch from Sketchy Thursdays - love it!! 

Happy Valentine's Day!! ♥

Friday, January 28, 2011

Guest Blogger Heather Landry: Pink Paislee Cupid!

Heather is no stranger around here at Flamingo Scraps!! While we have been busy getting ready for CHA, Heather's been busy scrapping!! She sent us these fabulous projects she recently created with items she bought at Flamingo Scraps!!

From Flamingo Scraps: Pink Paislee Cupid Collection (patterned papers, brads, stickers, rub-ons), Fancy Pants Wishful Thinking Collection (patterned papers); Maya Road Maya Mist (Metallic Red); Prima E-line White Flower Grab Bag; Tim Holtz distress ink 


We thank Heather for joining us yet again to share even more of her fantastic work with us!!  To view more of her layouts and read about her adventures of three adorable kiddos, please check out her blog

Friday, January 21, 2011

Guest Blogger Jeana O'Laughlin-Pigott: Teresa Collins Stampmaker

Please welcome Jeana to the blog today -- she was our lucky winner of the Teresa Collins Stampmaker back in October!!   We invited her to share her experience with the machine and her super cute card she made with her stamp!! :)

It was about 5 a.m. I don’t remember why I was up that early but I was, so I logged into Facebook only to see the final prize for Flamingo Scraps 2nd anniversary celebration giveaway. The Teresa Collins Stamp Maker Machine, and who had won!? I had!! I could hardly contain my excitement; I literally had to keep myself from screaming out loud and waking the whole house haha. Once I received the machine I was quite intimidated by it. I read over the instructions, multiple times, and finally got up the gumption to try it out.

First I tried to make one of the stamps that comes with the machine, I followed the directions to a T. And…. Nothing. It turned into a big hard rectangle. So I tried to make some expression stamps and while you could make out the expression, they weren’t deep enough to actually stamp with.

After many, trials of leaving the stamp under the UV light for different amounts of time, and going through almost all of the Stamp packs that came with the machine I decided to call it quits for the day and try another time.

This is what I learned, pay attention to the directions!! When I tried again and left the stamps in for the amount of time recommended (3 minutes) they came out perfect!!! So here are some tips for you when using the machine:
  • Make sure if you are printing out your own transparency, that it is completely black EVERYWHERE except what you want the stamp to be ( I tried preserving paper/ink and trimming it down and the stamps do not come out nearly as nice!!)
  • Definitely do not leave the stamp pack under the UV light for more than 3 minutes as it will harden the entire stamp pack.
  • Larger images are much easier to make than small words or expressions!!

Here is the first project I completed with one of the stamps I made!! It is a simple Valentine’s card for my hubs. Hope you enjoy and thank you again Flamingo Scraps for the amazing prize!! Be sure to check out their store, they have incredible prices and beautiful stuff!!


We thank Jeana for joining us and thank her for sharing her work with us!!  To see more of her work and read about her life as a stay at home mom and army wife, please visit her blog!!

Monday, September 6, 2010

Blog Facelift and a Layout....

Have you seen our new blog pages?  Make sure you come by the blog and check them out.  We are still updating a bit, but we hope you like it! :)

This weekend, I got a few layouts done... and here's one of them!
From Flamingo Scraps: Pink Paislee 365 Degrees Collection (die cut circle, tag), 7 Gypsies date sticker
Other Supplies: Martha Stewart doily punch  & Hearts punches, American Crafts felt thickers, Imaginesce black rub-ons with bling

I was so frustrated with this one... a little mishap with the rubon sheet left a flower petal on my forehead... literally.  I had to go get the picture reprinted.  sigh.  There was no getting that off... and boy did I try!!  Have you ever had a rubon mishap?  Were you able to get it off?  I'm just wondering if there is a way.... there has to be... please let me know if you have been able to solve that mystery!!

Monday, July 12, 2010

Looking Back: Amanda

We have been busy the last few weeks reviewing all the new products and deciding what to carry in the store. So many beautiful new Primas, fabulous new papers and we still have yet to see everything. It has not left us with much time to hit the scraproom!

So today, we will take a walk back in time by featuring a look back at my style and how it has evolved over the years. I often say that I started scrapbooking back in 2005, after we got married. But actually, I rediscovered my very first mini album recently... from 1997!  A cute altered Disney photo album about a trip I went on in high school.  I had so much fun celebrating my 17th birthday with my friends!

Nothing but stickers, markers, pics, some ephemera and those Crayola stamp pens (anyone remember or still have those?!)

I kinda skipped the scrapbooking in college and stuck with putting photos in albums.... but as soon as I was out of college, Brian and I went on our first trip together - Disneyworld!  And they were selling scrapbook kits.  They had a cool album, some plain colored paper and stickers.  Scrapbooking circa 2002! :)

2002-2003:
The Brown Derby at MGM Studios and....
Topiaries at Epcot.  The entire album looks like a set of decorative edged scissors attacked!! :)

2003-2004:
I spent the first half of the year continuing to make slow progress on the Disneyworld album and the late part of 2003 and most of 2004 working on our album of pictures for our trip to Maui.  Disneyworld?  Still incomplete... Maui?  Done, but no titles or journaling!  Anyone else have albums like that?!

2005:
Spent most of the year planning our wedding, which included 80 of these.  I made them... designed, printed, handcut the red paper from huge sheets of cardstock from Aaron Brothers, hand stamped and embossed the vines on the top, tied the ribbon on and assembled.  whew.  And it included an rsvp card and this:
Front of directions card and....
Back of directions card.  And I hand drew the map, added the text markers, printed and then...
hand colored the maps on 80 of those.  Did I mention I also had a custom stamp made for the addresses on the envelope?  Or hand made 150 thank you cards (including embossing)?!  Not much time for scrapbooking that year!! :)  At least someone got use of the maps.... the owner of the bed & breakfast we got married at liked the map so much it's still on her website!

2006:
Made for my good friend Sarah in a swap.  Yes, my prima addiction has officially begun!

2007:
I still loved lots of flowers!! This is still one of my favorite layouts today.

2008:
My favorite layout of our furbaby to date!

2009:
One of my prior Scrapthatlon layouts and my first use of Flamingo Scraps products... the lace trim and butterfly!

2010:
And finally, one of my favorites so far this year.  Read more about this layout here.

It was fun looking back over the years.  I have to say I don't think my style has drastically changed.  I see a lot of similarity between the layouts.  And I love the flowers!!

Have you taken a look back lately?

Saturday, July 10, 2010

Scraptathlon Week # 9

Week # 9 at Scraptathlon - just one more week to go and guess what?  Amanda is tied for third place!  Way to go A!!!

Here were our instructions from our hostess Kia:
It's use your STASH week here at Scraptathlon. Our victim this time around is BUTTONS! I have drawers full of buttons, I don't know why, but, I need to get past using one or two in a LO and USE some of the zillions that I have. So, for this week, your challenge is to use heaps of bountiful, bodacious, beee-yoo-ti-ful buttons as possible on your LO.

Here is Susan's take on the challenge:
This was a fun week on Scraptathlon!  And boy did we need it after Kia's Crazy Eights challenge last week!  I love buttons and I used a mixture of old and new on my layout.  I found some old photos of my kids on Cinderella's Carousel at Walt Disney World.  I fussy cut the banner to go across the top of the layout from Fancy Pants Wishful Thinking collection papers.  A little Glimmer Mist behind the photos and I even found a Carousel charm to use.  I used some Prima Pearls and Prima's Donna Downey Canvas Buttons.  The Webster's Bloomers even got some buttons glued in the middle!  Sorry for the poor photo - my scanner is on the fritz!
From Flamingo Scraps:  Fancy Pants Wishful Thinking patterned papers; Prima say it in pearls bling swirl, flowers and Donna Downey canvas buttons; Websters bloomers in Aqua and Tattered Angels Glimmer Mist
Other Supplies:  Carosel charm, Martha Stewart loopy punch, buttons from the stash, cardstock

And here's what Amanda did for the Buttons challenge:
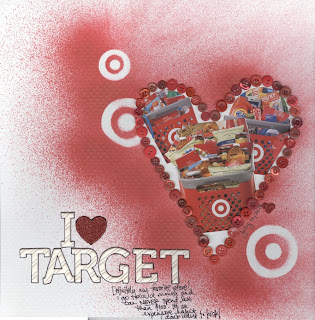
I waited until the last day... I was totally lost in search of inspiration!  And then I remembered the topic challenge from the These are a Few of my Favorite Things blog right now... favorite stores!!  (If you haven't seen this topic challenge blog, check it out -- I'm always inspired!! Hi Julie!!)  Of course, I'm on the Target bandwagon.  I created a few quick Target logo masks using an ad we got in the mail, a heart mask I cut freehand, taped them down with temporary adhesive and misted the background.  I then removed my masks and filled my masked heart with some cut outs from the same Target ad.  I added a title, some glittery foam hearts and BUTTONS!!!   Whole layout came together in 30 minutes. 

From Flamingo Scraps: Cherry Metallic Maya Road Mist, Pink Paislee Artisan Alpha
Other supplies: darice foam hearts, black sharpie pen, miscellaneous red buttons, and a Target ad

Only one week left of our challenge!!  We hope you enjoy your weekend!!

Saturday, July 3, 2010

Scraptathlon Week # 8

This week's challenge was a doozy!  Since it's the 8th week of the 8th season of Scraptathlon, Kia went CRAZY EIGHTS!!!  The song inspiration was "Figure Eight" from Schoolhouse Rock and here are her instructions to us:
Like I could do something else for the 8th challenge of the 8th Scraptathlon. Here's the challenge:
Eight letters in your title
Eight fasteners that are visible
Eight pieces of ribbon or fiber
Eight pieces of paper in your LO (not including pics)
Eight pictures
Eight words in your subtitle or journaling
Eight different colors identifiable
and you must use a handcut 8 somewhere on your LO.
Digi is not okay, for obvious reasons and you can do up to 2 pages for this challenge.


Here is Susan's Layout and her take on the challenge:
Yikes!  I had taken a progression of photos of my nieces fighting over the wishbone from the Thanksgiving turkey.  I knew I had at least eight photos.  The word "Wishbone" has eight letters so that would be my title.  Now for the layout......can you say symmetry?  It really did come out very symmetrical.  I'm not sure this is a layout I would have done on my own but it met the criteria of the challenge so I went with it!  The eight fasteners are married with the eight pieces of ribbon.  I used Pink Paislee Cork Buttons and layered them with Bella Brads.  The ribbons are between the brads and the buttons.  I used Pink Paislee's Queen Bee Collection papers and my eight colors are:  Black, White, Brown, Gold, Green, Yellow, Grey, and Beige.
From Flamingo Scraps:  Pink Paislees' Queen Bee Collection, papers, die cut sheet, cork buttons, and Bella Brads.  Other items used:  Thickers and Ribbon

And here is Amanda's layout and her take on the challenge:
I spent a ton of time on this and then missed uploading the layout by 20 minutes. :(  Total bummer.  My layout ended up being two pages of some wedding pictures.  I love how it turned out!!  And Susan's right, eight of everything made it hard not to do a symmetrical layout.  :)
From Flamingo Scraps: Prima Say it in Pearls & Flowers bling, fairytale roses and white innocense flower, white lace trim, Maya Road Noah Chipboard alphabet, Charcoal Maya Mist (used to cover alpha letters)
Other supplies:  brown bazzill cardstock, Basic Grey Urban Couture patterned papers, black satin ribbon, white satin ribbon, Fiskars threading water punch, black doodlebug simply sweet rub-ons, making memories bling brads and photo turn brads, sewing machine + thread, Martha Stewart butterfly punch     

I think Amanda and I are both hoping for an easier challenge for Week # 9!  Thanks for playing along

Tuesday, June 29, 2010

Quick Summer Cards

Now that summer is finally here (yay!), I wanted to make a couple of quick cards using some of my pink paislee scraps to celebrate. 

Up first, a card to say..... hello!

From Flamingo Scraps: Pink Paislee 365 Degrees collection patterned papers, Black Diamond and Stardust Stickles, Prima e-line bling
Other supplies: Fiskars threading water punch, Martha Stewart butterflies punch, American Crafts alpha stamps

Next, a card to say.... celebrate!
From Flamingo Scraps: Pink Paislee 365 degrees collection patterned papers, Stardust Stickles, Ranger Fired Brick Distress Ink
Other supplies: thread + sewing machine, Creative Cafe sentiment stamp, Imaginesce octopus stamp, Fiskars water wave edge punch, colored pencils, white cardstock


And finally, a card to say.... I love you!
From Flamingo Scraps: Pink Paislee 365 degrees collection patterned papers, Xmas Red Stickles
Other supplies: thread + sewing machine, 3Bugs in a Rug sentiment stamp, white cardstock

Just a few quick cards to add to the stash for later and a great way to use up scraps!  What's your favorite way to use up scraps?  We'd love to see!
 
Related Posts with Thumbnails