Showing posts with label G45. Show all posts

Thursday, September 26, 2013

G45 Easel Album

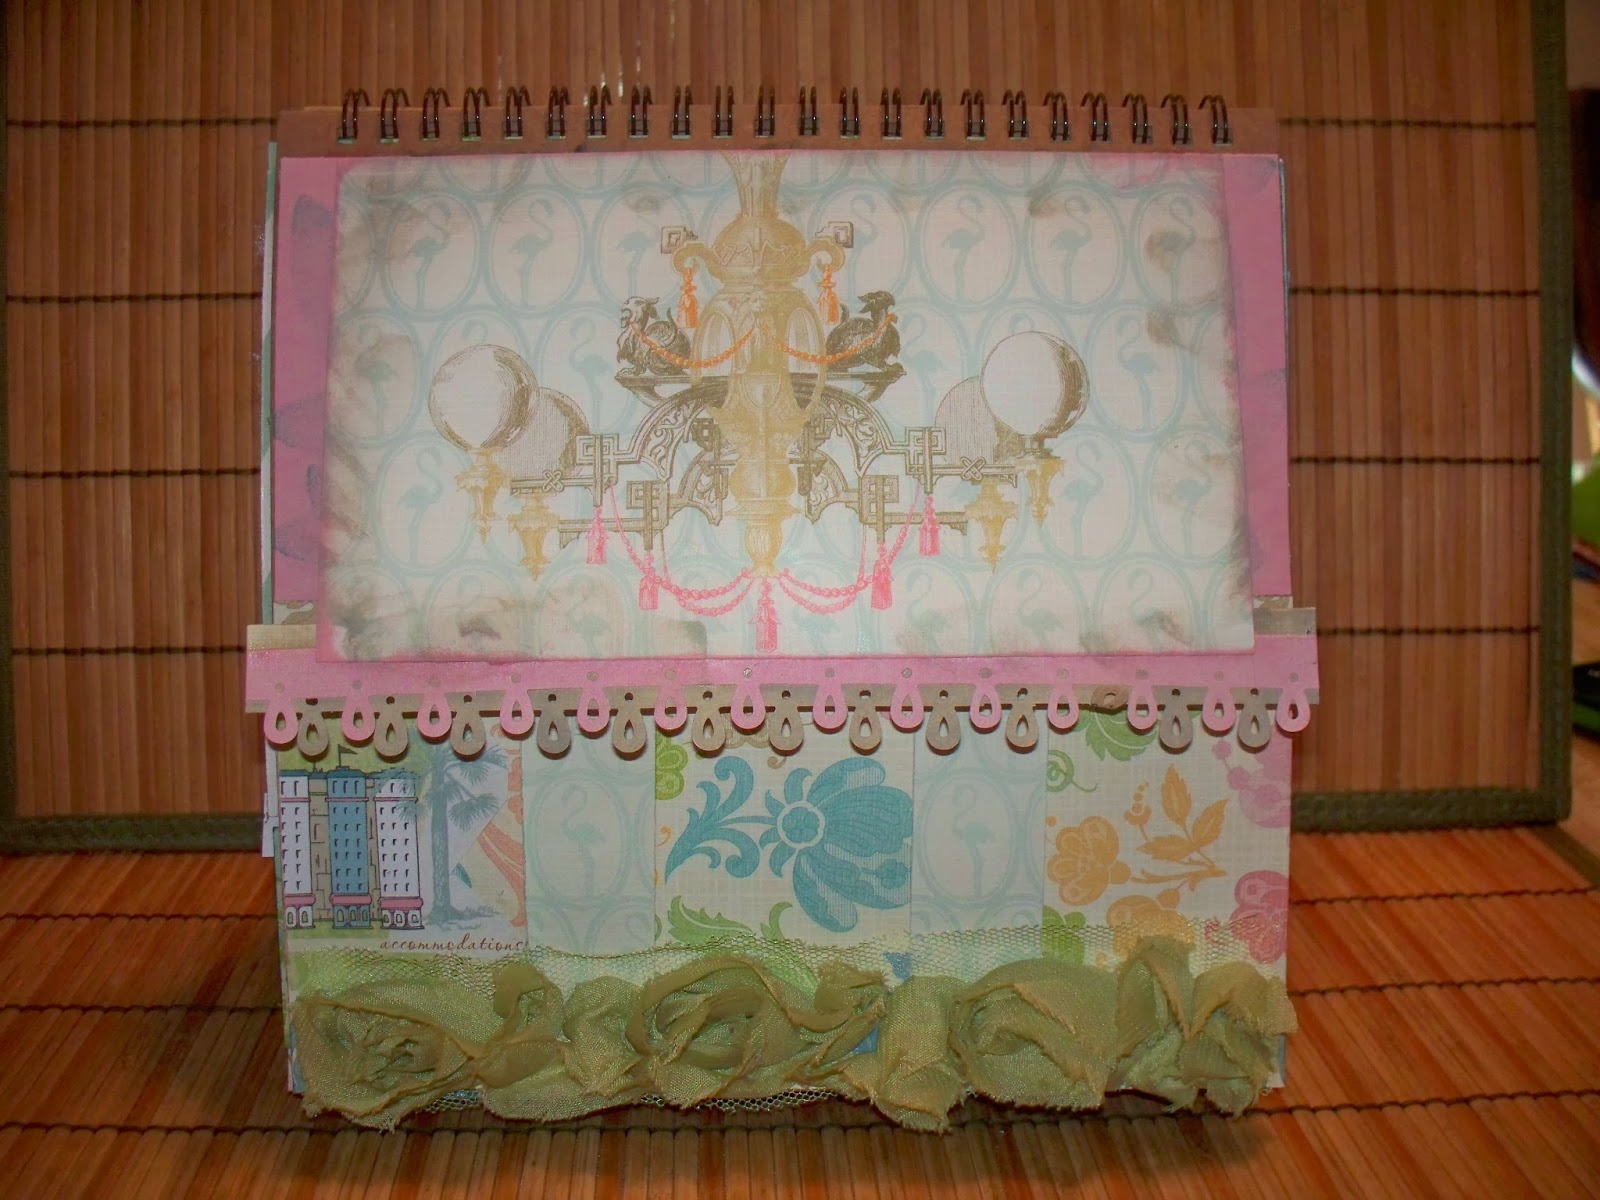
I love to display our vacation photos every year, but I get tired of the same old frames. I decided to mix it up a bit and do something more creative and fun. Not to mention, it's a lot easier to swap out my photos from year to year.

Using a G45 Easel Album I had and some GREAT items from my Flamingo Scraps Warehouse Embellishment Box, as well as the paper box.


 I LOVE the Websters Bloomers, and the Maya Road TuTu Tulle products. Here I just had to use the Flamingo paper from the Websters Palm Beach collection from my warehouse box. I created a pocket that will hold a photo or a journal tag from the sheet of bathing suit squares.


 Every vacation has a beautiful sunset that you just have to show off. My letters are from Maya Road, the Lisa Lowercase collection, the wood veneer scallop trim is Prima and I used Prima Chalk Inks, for added color to my paper.


Lots of fussy cuts give me several options for photos, journal tags, or mementos from a trip. I made a slit in the paper before attaching it to the album so that I could slip in an extra tag. I have lots to say!


I LOVE this paper from the PB Collection. I will use it for the photos of the hotel or any architectural wonders we might see. I used a paper border punch for the trim under the chandelier.


This is the inside of the above page with three rectangles of paper to slip photos behind and I can also add a photo to the floral part on top. The Bloomers used here are Happy Green.

I hope you enjoyed this project that was actually quick, and very fun to make. New items are rolling in daily at the store http://www.flamingoscraps.com. Some of the manufacturers you can drool over are Cosmo Cricket, Fancy Pants, Marian Smith, and Prima - just to name a few! Don't forget to join us tomorrow for another surprise project from the Flamingo 4 (F4) as four of our fabulous designers show you what they made using four like items from the Flamingo Scraps cache of goodness. It's amazing to see how everyone interprets the use of products. Also Tonya will be live on Monday, October 8th at 8:30 p.m. with another Ustream tutorial that's sure to be awesome!

Until next time!
Kathleen

Friday, April 26, 2013

April Flamingo Four

It's time for another Flamingo Four!  This month, three other designers and I worked with these products:


                   1) Pink Paislee 'Parisian Anthology' Corrugated Alphabet
                   2) Prima Raja Sequin
                   3) Maya Road Kraft Mini Calendar
                   4) Graphic 45 Metal Clothespin

This is my 7th time doing the Flamingo Four and I am definitely used to working with challenging items.  But my fellow designers and I agree that the metal clothespin in this month's Flamingo Four has been the most difficult item to date by far.  Let's see what everyone made using these tricky items!


Alicia's Take

I was really stumped on how to bring these items together (especially that clothes pin... man is that thing solid!)  But the sequin centers reminded me of the hand-beaded flowers that my husband's Aunt Carol made for my wedding bouquet, so I thought I would put together a little frame with our last name, and one of the little calendars with our anniversary circled to help my husband remember the important date.  I used some inks and colored the letters and arranged them on some cardstock to fit the frame.  I then added the sequin centers as accents to the letters and nestled that calendar in.  Because of the heft of the clothes pin, I just adhered it into the corner so the frame itself could help support it, with the sentiment "Remember" facing outward.


Ramona's Take

This set of items was extremely hard for me.  I knew I wanted to make something about how the months roll past so quickly, so I made a canvas with the months flying.  After going from dark to light, I needed to brighten it up, so threw on some purple Tattered Angels…still not bright enough…Tim Holtz Seeded Preserves Distress Paint….then some distress ink….nope…that did not do it.  I picked the brightest turquoise I could find, and using a stencil just started dabbing paint. Then I thought, "What if I outlined it with a black sharpie?"  That was the look I was trying to achieve in the first place.   I am thankful that Suzanne pushes us with the Flamingo Four… because this one did push me to my limits!

Here's a closer look:


How did it get so late so soon?
It's night before it's afternoon.
December is here before it's June.
My goodness how the time has flewn.
How did it get so late so soon?
― Dr. Seuss


Erin's Take

My son Brandon is three, and three is hard.  I'm not sure why they call it the terrible twos since three is worse.  Brandon's life changed a lot at three: he got a new sister and Daddy is in Afghanistan.  That is a lot for a little guy to deal with... or, should I say for Mommy to deal with!

The picture was taken at a Chuck E. Cheese photo booth, and I thought it was just too cool to not do something with it.  I created this layout to remind me of how chaotic his life (and our whole family) is at age three.


I used all the supplies given to us, including the packaging.  Here you can see them in their final form up close.  I used the monthly cards and cut out letters to create the new words of his name and of his life.  I used the box, string, and alpha chipboard (in 2 ways) for background, texture, and for the word three.  The sequin gems were used for texture and the metal clip was used as an addition to the words to describe my son.


Cindy's Take

Right away, I knew that the clothespin would be the hardest item for me, so I did some experimentation.  If I put paper over it, could I do a rubbing and get a decent print of the engraved word?  Nope.  If I inked the clothespin and treated it like a stamp, would the word show?  Nope. What would happen if I took the clothespin apart? Hmmm....

While I mulled over possibilities with the clothespin, I got right to work with the rest of the supplies.  I decided that I was going to use the packaging from the alphabet as the base of my project.  The clear window would be perfect for a picture, so I printed out one of my new niece, Allison and inserted it behind the window.  The box would be ideal for holding those little momentos that don't fit in a photo album, like her hospital bracelet.  

Next, I chose one of the round calendar shapes, then punched a circle from black cardstock.  I selected an A from the corrugated letters, covered it with lavender ink, and then brushed gold ink over the top.  I pulled out two of the sequins.

When I layered them all together, it looked like this.  

 
Here's the finished project:

 
Did you notice the clothespin?  I ended up dividing the two halves and gluing them toward the bottom of the box.  With the weight cut in half, the pieces weren't too heavy for glue to hold.  


That wraps up another fun Flamingo Four! We'd love to see your take. If you make something using the same four supplies as our designers, send us a picture and we'll feature it here on the blog. To find the materials we used (and so much more!) visit the Flamingo Scraps store!


Friday, January 25, 2013

January Flamingo Four

Ready for another Flamingo Four?  This month, three other designers and I each worked with these products:


             1. Graphic 45 patterned paper - "Well Groomed"
             2. Tim Holtz Giant Tag
             3. Pink Paislee Vintage Vogue buttons
             4. pearl trim


Melissa's Take

This month's Flamingo 4 was a bit of a challenge for me! I don't normally do the vintage thing, but I was intrigued by what I could do to make it mesh with my style, and I really love what I came up with! First, I started with just the tag. I looked up pictures of tags to gather some inspiration and found some through several sources, which brought me to create many layers, and ultimately a work of art (if I do say so, myself) that could stand well on its own.


First, I used a mask and a couple different mists to create the background. I really liked a couple of the images on the paper, but I also really liked the striped side (I normally love the B side of most Graphic 45 papers). I fussy cut the bride and groom silhouette images and punched some of the striped side, and then I ripped and teared and layered along the top of the tag for visual interest. I decided to paint some gesso along the outside edge of the tag and layer on top of it with Shimmerz paint, and then added the buttons (some of which I already had in my stash and supplemented what was sent to make the final product). Then I decided that the pearls were best used like they were laid on the tag and left there, so I used some clear liquid adhesive to get them to set just so. Finally, I added a bit of washi tape, a heart I cut on my Cameo, and stitching to add even more texture. 


Once that was completed, I loved it so much I immediately wanted to use it! I went through my wedding photos to find one I hadn't scrapbooked yet and printed it out on textured white cardstock, distressed the edges, and then added bits of paper, washi tape, the punched striped side of the Graphic 45 paper, the extra hearts I had cut out with my Cameo, some paint, some masking, and various other details to tie in with the tag. I really love what I came up with and am going to frame this in a shadow box to show off with my other framed wedding photos! 


Alicia's Take

When I saw the "Well Groomed Man" paper, it reminded me of our wedding, and how handsome all of the groomsmen were!  So I decided to make a mini-book using various elements cut from the paper, plus navy and lime green cardstock and ribbons that were actually used on items that I made for our wedding. The lace trim on the picture pages can also be found in the Flamingo Scraps store.

Here are the front and back covers to my album, using images cut from the G45 paper and accented with the button and the black pearl trim.


Here is a picture of my husband with the title "The Well Groomed Man" fussy cut from the G45 paper. 


The inner pages show my husband with his groommen.


This inner divider page uses the reverse side of the G45 paper, the top hat fussy cut from the paper and strips of cardstock in our wedding colors.


A group shot of the guys.


Here's another divider page taken from the G45 paper.


A picture of our hands during the ceremony - I thought this went well with the sentiment from the divider page. It is attached to the Tim Holtz tag, which was trimmed to fit this album. I have put two hearts cut from the same cardstock that was on the top hat page to cover the reinforced hole because it did not go with the color scheme for this album.


Ramona's Take

I chose Graphic 45 Steampunk Debutante. With this project I backed the paper cut outs with chipboard to give this the pop-up that it needed to stand out. I used Multi Mat Medium to the fronts of all the pieces and distress inked with Vintage Photo after (so it would not bleed with the multi mat medium). Then I arranged it many times to get the look that I desired. I used the bead at the edge creating a charm look. The background I used the Proper Gentleman paper and then layered the tag on top hanging over the edge. Then I took and fussy cut the hat from the printed side of the paper, crackle painted it and added it to my Heart and wings from the Tim Holtz die. I colored the gem buttons with copic markers to make them match the motif of my project. Then the black button I used acrylic paint to brighten it up against the black background. The other button I just glued a thread label from the SteamPunk Debutante collection. I am pleased with the way it has turned out. I used several different items on this anywhere from Distress stains, Tim Holtz dies, Prima metal flowers, gears from my cousin in Idaho, Tim Holtz different metals. This project was so much fun...looking forward to creating another one of these with some of the new lines coming out from CHA.


Cindy's Take

I had a lot of fun with this month's items.  I trimmed the paper and tag, did some folding, added a button, and accented with Stickles.  Then I headed out into the garage, where I put on the shop glasses, grabbed a hammer, and started pounding on the trim.  


I removed about 1/4 of the beads on each end of the trim, headed back to the craftroom, and glued everything together.  When I was done, I had this:

 
My "purse" is fully lined... with the scraps left over from December's Flamingo Four!  

 
And when you pull out the tag... it's holding a gift card.

 
So there you have it, another fabulous Flamingo Four!  We'd love to see your take.  If you make something using the same four supplies our designers had, please let us know and we'll feature it here on the blog. To find the materials we used (and so much more!) check out flamingoscraps.com!


Tuesday, November 27, 2012

Dec. 3 Ustream - Place In Time Calendar

I hope you can join us on December 3, at 8:30 EST on Ustream as Tonya Gibbs creates this Graphic 45 Place In Time Mini Album.  This album is designed to highlight a memory or important photo for each month for a year. At the end of 2013, you will have an entire year documented.

Ustream Channel:   http://www.ustream.tv/channel/gibbst

 
Here is a glimpse at one of the spreads. 


Kit includes:

1  Graphic 45 A Place in Time 8x8 Paper Pad    
1  Graphic 45 A Place in Time 12x12 Sheet Cardstock Stickers   
1  SRM Calendar Numbers Small    
1  SRM Calendar Months Sleek Small  
12”  Maya Road Small Organza Rose Trim Black  
12”  Maya Road Small Organza Rose Trim Sand 
12”  Maya Road Small Organza Rose Trim Cream 
12”  Maya Road Small Organza Rose Trim White 
12”  Maya Road Small Organza Rose Trim Sky Blue 
12”  Maya Road Small Organza Rose Trim Pink  
12”  Maya Road Small Organza Rose Trim Light Pink  
12”  Maya Road Small Organza Rose Trim Brown  
2 Sheets Graphic 45 A Sophisticate 12x12 Paper   
1 Prima Bretton Purity Vine  
1 Yard Prima Cabachon Lace  
1 Prima Wood Clock Face 
TOTAL       $31.99*


*We figured the price of the kit to offset the cost of the shipping, since the new store will not allow us to include shipping in the price of individual items!


Additional Items needed to complete this project:

Available at Flamingo Scraps

8 Sheets 12x12 Black Cardstock    (In Stock  $5.49)
Bind It All and Spine OR 3 Binder Rings (Binder Rings In Stock $.99)
Tim Holtz Alterations Die Pocket Envelope  (Special Order- $21.99   30% off)
Matte Medium, 8oz. (In Stock $10.99 30% off)
Flowers

Other
Tim Holtz Movers & Shapers Cargo Numbers 
Black Chipboard
Border Punch


Related Posts with Thumbnails