Friday, January 31, 2014

Felt....Hearts.....Kewpie

Hey all, it's Luann.

I was picked to do the January Flamingo 4 Challenge and boy was it a challenge. We received buttons, twig heart, little orange bird, and a die cut wheelbarrell.  I enjoyed every minute of all the creative process.  I tried two other projects that just didn't work out like I visioned.  Then I was thinking of Mom, remembering  all the little things she made for my sister and me. The memory of Valentine's Day and the year she made us (including Dad) a heart shaped pillow to meet our personalities.  I still have mine.  Then I thought about elementary teachers. How they dress for each  holiday season. Here is the outcome of my creative process.


I cut out heart shapes out of felt using pinking shears.  There are some fantastic colors and designs on felt now.  Then I got out the embroidery thread and stitched two heart pieces together. (Don't forget to stuff with cotton balls or fiber before stitching closed.)


I attached the buttons from my challenge package with hot glue (or sew them on) as you see on the blue heart.  On the pink heart....I attached the
gesso, painted with Tim Holtz Paints, and Heidi Swapp sprayed vine heart. Glued the little orange bird at the top of the heart and attached a flower from my stash.  On the back is a large saftey pin so it can be used as a pin.

Do you remember Kewpies by Rose O'Neill?  I always wanted to find one in my yard. I found this one on Pintrest.


I call this my Kewpie pillow since it is a little large to use as a pin.  I colored the wheelbarrell with Tim Holtz pens.  Prima has this cute wood mushroom embleshment colored with Tim Holtz paint.  I stamped the Kewpie and flowers on felt.  I then used water and Tim Holtz pens to color the flowers and outline Kewpie.  The butterfly was from my stash.

Sometimes simple is just better.  Don't you think?  This would be a fantastic craft for kids. (Using glue or kid friendly needles.)

I hope you enjoyed my Flaming 4 creative process and results.  I also hope you will give it a try.  The possiblities of all the items you could use to decorate your heart are endless. Just look around or look to memories for a little inspiration.

Until next time. 

Luann

Thursday, January 30, 2014

Made with my "own two hands"!

With Valentine's day just around the corner, I wanted to send my granddaughters each some love from their Grammy and Poppy. This kid's craft (<---- click here for original card) was my inspiration. Instead of a child using their hands, I traced my own, which ended up slightly larger than a child's hands!!!
Using paper from Marion Smith's Mad Tea Party collection, left over from my Alice's Memory Box.


I traced my left hand, cut it out, reversed it and traced again for the right hand, so they would match when folded up. I measured the "palm" of the hand and cut out two strips, 2" x 12", scored at 2' intervals and accordion folded each strip. Overlapping two ends to make one long strip, I inked the edges with cranberry ink from my stash. Using Scor tape, I adhered each end piece to the palm of each hand. (I had to trim off one two inch panel in order for it to open correctly)
After choosing my phrase, I adhered the chip board letters, then painted them with the dabber tip from Tim Holtz Distress paint, Picked Raspberry. A cork heart, also painted with the same paint & faux stitched, I added Maci's name to the heart in "bubble" letters. (to insure they would stay put, I also used matte gel medium) To add a little sparkle and shine, I topped each letter and the heart with Tim Holtz Rock Candy Stickles.


My hope, one day, my granddaughter, Maci, will cherish having something made with Grammy's own two hands! This was a fun and simple card to make, whether you choose to use your own hands, or those of a child's, the recipient will always have a special memento to hold on to, "hand" made! Depending on your paper (uses just one sheet of double sided paper for an adult's hands, much less for a little one's) this little card of love can be transformed to any special occasion, or just because.

Supply list
Marion Smith's Mad Tea Party collection
Tim Holtz Distress Paint, Picked Raspberry
Tim Holtz Stickles, Rock Candy
Claudine Hellmuth matte medium
Fancy Pants cork heart

From my stash
Cranberry ink
Alpha stickers
Scrappy Smiles! Donna Sullivan

Wednesday, January 29, 2014

Variation on Tonya's Santa's Helper Organizer

Hello All! Donna today, my first post of the New Year, hope you are all having a great start to a great year!
During the holidays our very talented Tonya Gibbs posted a Santa's List Holiday Organizer she made using a small 6 x 9 binder. I immediately thought of my husband using a book like this year round to organize his many notes, phone numbers and such which he gathers during every day life. Using the collection from Pink Paislee, Hope Chest, possibly tucked into one of the great Warehouse Combo boxes available in the Flamingo Scraps online store. Although Hope Chest has many florals, it also has a rustic feel to it, with some masculine graphics mixed into the rust, teal and weathered white ledger papers. Along with the paper, there were journal blocks in this collection and many paper tags and stickers. And very pretty butterfly clips, which I didn't think I needed to include in the hubs book!
I took quite a few photos to show the many elements included in this organizer! I'll start with the cover. Added to the Hope Chest paper pack, I had one clear mylar sheet with black graphics that I strategically cut to add, starting with the cover. It added a bit of continuity to the book, along with the one roll of green wood grain washi tape (my first jump into the washi tape world!), and helped transform the florals a little more. The cover sheet was cut to highlight the dog in the Hope Chest papers, as my husband adores our dog, I thought it was a great piece for the cover. In my stash I had some copper alpha/numeric pieces that blended well with the color scheme, used to add 2014. Centered on the cover was also a blank space which one of the stickers from the Hope Chest collection fit into perfectly, bracketed by copper pieces from the same set. The paper is tucked behind the vinyl cover and protected from daily use. The copper numbers and brackets are adhered with matte medium on the outside of the protector


Close up of the sticker sentiment .


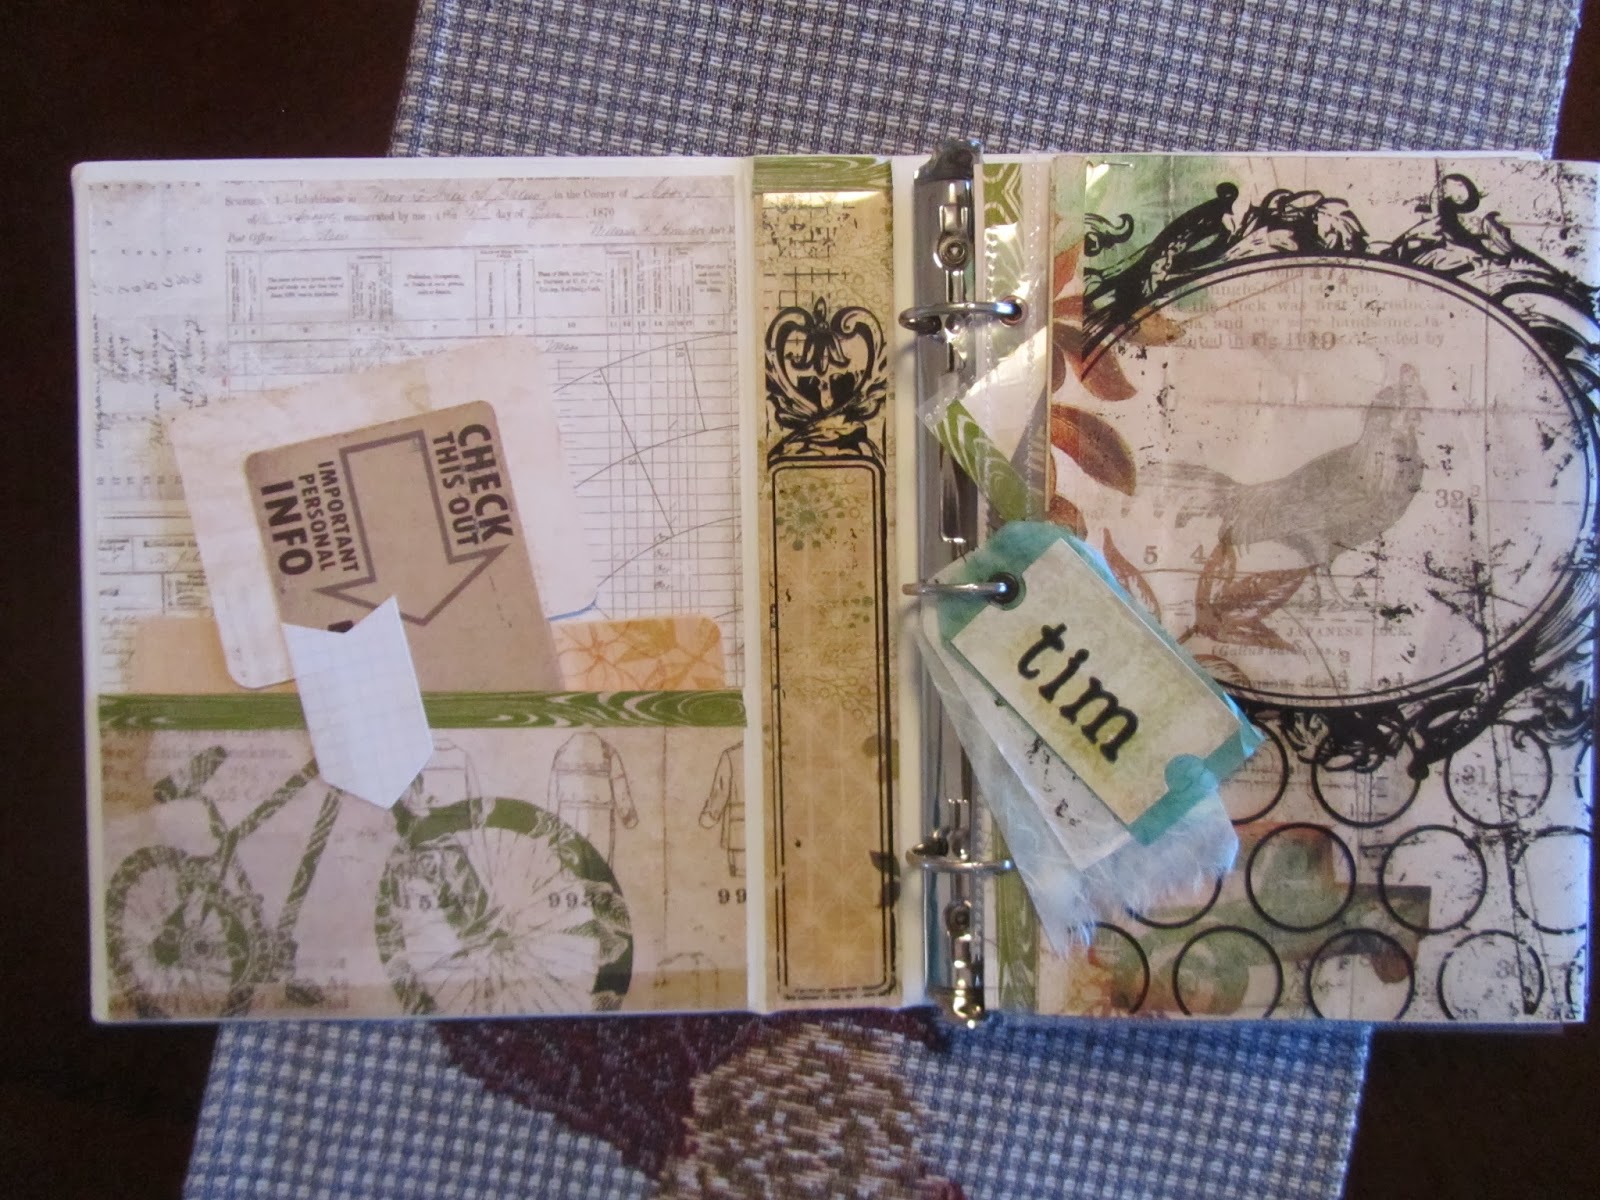
This is the inside cover, showing the vinyl pockets, covered by paper, adhered with double sided Scor Tape, available by special order through Suzanne, just contact her by clicking on her name!
This pocket holds his contact info, along with some blank journaling cards to add throughout the book. The inside spine is covered with paper and a piece of the mylar graphic sheet over the top, left open at the sides to add to the blank text space. There are a few kraft journal cards from my stash, added as prompts to "get his book going".


A photo can also be place under the oval in the mylar sheet, or leave the rooster as is.


One additional mylar sheet added to a page protector, which I sliced off 1/8" to allow me to slide a piece of cardstock, then fold over to make an interactive page. Just to the right of the paper clip (from the collection, minus the butterfly) I used my Tim Holtz Tiny Attacher to hold the paper in place. He can slide a special photo into the page protector.


This is a view of the fold out page and the next pocket page, made easily by scoring a 12 x 12 paper down the center at 6", turn paper, score at 4", fold four inch fold up, then fold in half. Your pockets can be on the inside or the outside, depending on which way you decide to fold. Cutting page protectors to clip onto two rings to use as pockets (shown in another photo), I had a piece of protector let that I used to add as an additional element, adding journal blocks and prompts, this page highlighting Sunny, our dog, and a pocket to store his immunization and registration papers, and vet info.


On the reverse side is a pocket to store a to do list or receipts yet to be filed. I added a tag for interest. The Alphas used for Tim's name, Sunny and to do are from Tim Holtz Alpha elements, another item you could request from Suzanne for special order. Using the dividers made for this notebook, I covered the front and back with patterned paper, it also gave them added strength.


This page shows the cut page protector on the left to use as a pocket or add a photo. A tag made with some newly found mulberry paper tags, found when I moved, and added a little scrap of the same mylar sheet.


The remaining photos are variations of the above pockets/pages. In the first photo you can see where I added the washi tape on each page, adding strength to the binder holes during use.


Into one of the full sized page protectors I added a 2014 weekly planner he can grab on the go for making future appointments and avoiding conflicting dates. I used the packaging page with the grid of all the papers included in the pack to coordinate with the organizer. For photography purposes, I left the lined notebook paper out, as we all know what that looks like! It allowed me to photograph back and fronts of the dividers without the lined paper interfering. I inserted tabs into the dividers by covering strops of paper with the washi tape, pulling that theme throughout the book further. I titled the tabs House, Doctor, Bank, Family (for addresses and phone numbers he may not have in his phone) and Photos. 


Product list:
Flamingo Scraps
Warehouse combo box
Pink Paislee Hope Chest paper collection
Pink Paislee Journal Cards
Pink Paislee Label Stickers

Special orders from Suzanne
Tim Holtz Alpha Parts, Newsprint
Claudine Hellmuth matte medium adhesive
Scor tape (worked great for adhering paper to vinyl!)

Office Supply store
Avery 6" x  9" three ring binder with front/back view vinyl cover
Avery dividers & page protectors sized to match
Avery lined notebook paper to match (not photographed)

From my stash
Copper numbers and alphas (2014 and brackets)
Kraft Journal prompt cards
12 x 12 mylar sheet with black graphics
roll of green woodgrain washi tape
mulberry paper precut tags


Hope you enjoyed my version of Tonya's Organizer, be sure to check out more of her videos on her YouTube channel, she has some amazing tips and techniques, and is fun to watch. Flamingo Scraps is lucky to have her as our lead educator! Don't miss her December Daily, which had a coordinated (sold out!) kit for sale at Flamingo Scraps, and follow her week by week journey throughout November/December! She has endless energy and loves to share with all of us, special Ustream events 1st Monday of each month, link is always posted on her FB page.

Don't forget to check out the sales going on at the Flamingo Scraps store, and if you don't see what you need, Suzanne with do her best to get what you're looking for!

Scrappy Smiles!!! Donna Sullivan

Monday, January 27, 2014

Attempting a Tag

Hi this is Cheryl. Today for my post for Flamingo Scraps I decided to attempt to make my very first tag. On Saturday I went to the Rubber Stamp Show here in Plano and the last booth that I visited was the one for Ranger. I could have camped out all afternoon, but I had my very tired Grand with me and she was ready to go. So I hung around as long as I dared and watched bits and pieces of a project or two and then we left. I love Ranger products and love Wendy Vecchi's line most of all. Her products are totally earthy and feminine, but the type of projects she makes are totally foreign to me. I am a card maker first and then a scrapbooker second.  Making tags, 3D projects, and Mixed Media is totally out of my comfort zone. But, I took notes, picked up a few things, and took a shot at it. I really don't know what anyone does afterwards with these tags. Maybe use it for a book marker? Do people collect these as someone would a ATC card? Oh well, here is my tag. There were many steps to make this, but it was really a lot of fun too! It has me wishing I had a small piece of canvas to play with now. I might get to like this! Enjoy!


Thank you for visiting Flamingo Scraps Blog today. We have a lot of fun here as we adventure with our inks, stamps, and papers.

Happy Stampin.........Cheryl

Friday, January 24, 2014

Foxy

I used some fun pictures of myself that I took for a new head shot for postings, these were my favorite.


Sadly this is my last F4, so with that in mind I had a bit of fun with my items.  We got vintage buttons in mint, purple, and black, a chipboard wheelbarrow, a little range bird, and a wooden heart.  I used the little bird on a nest of burlap fibers, ribbons, and flowers and anchored it in the paint splatters from Ranger Distress stain applicators and the title (tutorial below) - because I am such a fox, hehe.


In my cluster next to the picture I used many of the buttons from the pack (one of each), the wooden heart, and the chipboard wheelbarrow tucked in under the flower and ribbons.


Enjoy!

Wednesday, January 22, 2014

Merry Christmas Elf Shoes

Hi guys, this is Cheryl. I am hoping every one had a great Christmas. We did at our house. It was just wonderful! We put our tree up the Saturday after Thanksgiving and it seemed like we baked and made handmade gifts throughout the month. It was non stop in December at my house. Next year I plan on starting a month earlier. Just too much going on to wait to begin in December.

For my project today I used the Echo Park Merry Christmas papers. This by far is one of my most favorite collections this year. It is a simple A2 size card and the one my two Grands gave out to their teachers and close friends at school this year. I thought they are just adorable. I found this idea from one of my favorite ladies on YouTube last year. You can go to Dawn's video here to see how this was made.


Thank you for visiting the Flamingo Scraps blog today. 

Happy Scrappin............Cheryl


Monday, January 20, 2014

Birthday Wishes for Aunt Darlene

Hey all!  Hope you are getting some sunshine where you are.  We finally have had a least 4 days of sunshine. It sure makes everyone a little bit happier.  It was so nice that I got to work out in my yard.  I am blessed to live where we have spring starting the end of February.  I love all the spring flowers.  The colors and smells makes my heart sing.

On my last post I made a birthday gift for my aunt.  I am doing a follow up on the January 7th post.  I have finished up the mini photo book and made a birthday card.

I had ordered Marion Smith's Garment District and hadn't gotten a chance to use it.  As you may remember I used the Mad Tea Party and Nirvana papers for the gift box along with the the mini. I used the Garment District 6 x 6 papers to make the birthday card.  I love it when you can mix and match.  Awesome!


I cut a sheet of solid color 12 x 12  card stock in half, making it 6 x 12.  I then scored it at 6" to fold in half. I distressed the edges of the paper with my Prima distress tool and Tim Holtz Distress Ink in Pumice Stone.
I layered the paper along with a paper doily. Did you notice the pretty lace and trim from my stash. I used a digi image from Saturated Canary - Maxine (colored with Copic Markers).  Maxine reminded me of my aunt in her garden. The flowers are a mix of stash flowers and Prima flowers sprayed with Heidi Swapp Color Shine.  The little butterfly on the flowers is made from the Mod Podge line and colored with Tim Holtz pens.


On the inside of the card is another 6 x 6 sheet of Marion Smith's Garment District and another digi from Saturated Canary - Tea & a Book (colored with Copic Markers).  How many of you Skype?  My aunt and I spritzen (what my husband calls it) quite often over tea or coffee.  I don't feel so home sick when I get to talk and see her.


Here are a few shots of the completed mini that I promised.  Used my stash all the bling and flowers.   The little blue bird is Mod Podge colored with Tim Holtz pens.


Hope you enjoyed Aunt Darlene's birthday gift and card.  I hope she will love it.  But, most of all I hope I have given you some inspiration.  

Wishing you sunshine, warmth and flowers.

Until next time.

Luann


Tuesday, January 14, 2014

Tim Holtz ASSEMBLAGE CLOCK with Mini Album

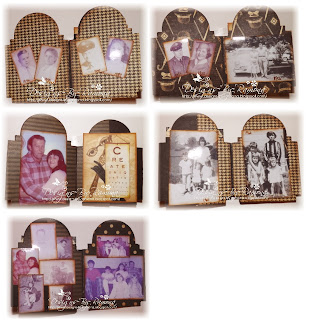
Hello friends this months Design Team Project I decided to make myself this Tim Holtz Assemblage Clock with Mini Album. I have made several and decided it was time to make my own. This photo is one of the most special to me. It is the last photo taken of my mother and Father before my father passed away in 1981. Several of the photos in the mini album I matched up about the same age of my mother and father. I also added some with us kids and the only family photo ever taken of all of us. I used the Flamingo Scraps Warehouse Sale Box — Combination Box to create with. I also used several different pieces to create this. I made a space out of chipboard and covered it so I could install an small mini album in the back of some very special photo's for me to remember my Father, Mother and siblings. If there is anything that I used in making this...Please contact Suzanne at Flamingo Scraps and she will be able to special order it for you. Hope you like my creation as much I love having this keepsake.


Mini book in back of the clock


Products used
Flamingo Scraps Warehouse Sale Box — Combination Box
Seam Binding – Cream
Tim Holtz Distress Paint
Tattered Angel's Tattered Leather
Maya Road Rhinestone chain
Tim Holtz Alterations Misc.
Graphic 45 Papers mixed from warehouse box

And remember if you see something not sold in the store to contact Suzanne to see if she can special order it for you.

Monday, January 13, 2014

Cupid's Calling!

Hi there, Flock!  Here's my first chance to wish you all a Happy New Year :)
 
Today, I've got a sweet little layout using Pink Paislee's Secret Crush line, with pins from Maya Road and flowers from Pink Paislee and Prima.  The ink is Heidi Swapp, and the doily is from my stash.  You may find many of these items in a Flamingo Scraps Warehouse Combination Box.  :)
 
 
Here's a close-up of the layering at the bottom: 
 
 
This is my oldest daughter, Evelyn.  She turned 10 last August.  I had almost forgotten how very round her sweet little face was as a baby.  :)
 
Happy scrapping!!

Tuesday, January 7, 2014

I must!...I must!...I must! Use my all my crafty stuff.

Happy New Year!

Do you make New Year Resolutions?

I did this year.  I, Luann, resolve to use all my crafty stuff that I have horded.

With that said, I have a mini album and a little wood box that I would like to share with you.  I have wanted to embellish this wood box for over three years.  My inspiration was my aunt who dearly loves hot tea, roses, and her birthday this month.  Flamingo Scraps carries the Marion Smith's paper lines Nirvana and Mad Tea Party and match made in Wonderland was made.


First, I gave the box a coat of gesso.  Then painted with a rose chrome metallic paint.  To give the some depth I used Ranger Gold Acryilic Paint and dabbed it on with a piece of towel. I cut the paper to fit by using the box as the guide.  I used Mod-Podge to glue the paper and let it dry over night.  I then gave the paper a top coat of Mod Podge and let it dry for a couple of hours.  I did use Tim Holtz Distress Inks in Vintage Photo and Vintage Jeans to finish the edges.

I used Prima roses, fussie cut a picture from Graphic 45 Ladies Diary paper line and the corset stamp on the Nirvana paper.  I sprayed the blue rose with Heidi Swapp Teal Color Shine for a pop of color.  I just love the way it turned out!


Now the what to in this little box?   I could put in some Rolo's candy (my aunt was telling me about a Rolo Cheesecake she is going to make for her birthday). However,  I went with the orginal idea - mini  


It is a mini 2 3/4" x 2 3/4" .  I used the cardboard I saved from my new 2014 calendar for the center.  I cut the Nirvana and Mad Tea Party papers to size and glued to the cardboard. The edges were distressed with my Prima distresser and inked with Tim Holtz Distress Inks.  I had a Prima Treasures window that just fit. I found a cameo in my stash.  Don't you think it looks like the girl is looking out the window? The clock charm is from my stash.  I'm going embellish the other pages after I find the photo's I want to use.  I'll give you a look when I'm done.


Let's see!  I did keep to my resolution. I used a few things that I had for a time.  I did use some new papers, Marion Smith, which I love. 

If you can't find some of the goodies in the Flamingo Scraps Shop that I used, drop Suzanne a e-mail.  She is awesome locating items for her customers.

Here's to keeping your resolutions and a fantastic 2014!

Until next time.

Luann

Monday, January 6, 2014

Ustream with Tonya has Moved to Tuesday

The Ustream has been rescheduled for TUESDAY, January 7, 2014.   We will begin our broadcast at 8:30 p.m. EST.   Make sure you join the crowd early: http://www.ustream.tv/channel/gibbst

This class is going to be a free spirit, grab your mediums and have some fun kind of night.   I will create a mixed media project filled with techniques using some of my Favorite products from 2013. 

I hope you guys can join us Tuesday night, but if not, we will do our best to record. 

Tonya

Suggested Supply List
  • Ranger:  
    • Distress Paints:  Antique Brass, Walnut Stain, and Antique Linen
    • Archival Inks:  Coffee, Black (You can substitute any permanent ink in black and dark brown.
  • Marion Smith Designs
    • Garment District
    • Nirvana
  • Crafter's Workshop
    • Brick Stencil
  • Faber Castell Design Memory Craft
    • Gelato - Gold
    • Grease Pencil
  • Golden
    • Gesso
    • Matt Medium
    • Modeling Paste
  • Misc.
    • Stamps
    • Chain
    • Locket
    • Vines
    • Flowers

Friday, January 3, 2014

A new way to keep track of Ticket Stubs for 2014

Happy New Year all!! Getting the New Year off right I decided for this Design Team project to create a frame to keep all ticket stubs from thing I will do in 2014. I used the Frame and Easel file from the Silhouette store and added a tab at the top so that you can just drop your ticket into when you get home. This way I can look at it and think boy I sure have done a lot or I need to do more!! LOL I used Products from Flamingo Scraps Warehouse Sale Box — Combination Box. Which you may or may not get. If you can not find the embelishments in the store make sure you contact Suzanne at Flamingo Scraps to see if she can get it for you. Hope you like my creation as much as I enjoyed making it.

Here is the front view

Here is the front view with paper inserted where you can see the opening.

Here is the back with the easel bent and attached to the back of the frame

Products used
Prima Classic Cream Roses
Prima Chalks
Prima Bling
Prima Flowers
Tim Holtz Glitter- Black Soot
Flamingo Scraps Warehouse Sale Box — Combination Box
Flamingo Scraps Warehouse Sale Box — Embellishment Box

Related Posts with Thumbnails