Friday, May 6, 2011

Friday Finds: Reverse Applique, Adorable Disney and a Beautiful Spring Card!

It's been a few weeks since our first installment of this series... a few things have caught my eye since then!


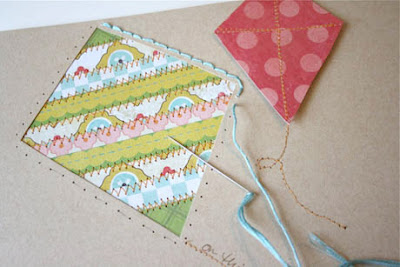
Love this brilliant idea for using reverse applique on a layout!  Especially given my recent, hopeless addiction to my We R Memory Keepers Sew Easy tool (seriously, just ask Susan and Suzanne!)... now I want to try this technique!


What can I say, I'm a sucker for mickey punched heads (evidenced here!) and this adorable layout on the Pink Paislee blog makes me want to scrap some more Disney layouts!

And last, but certainly not least....


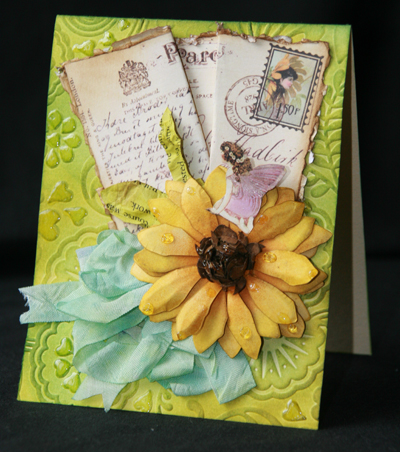
Check out this beautiful card by Legend of the Flock, Diana Fisher!  I'm totally in love with it!!

Hope everyone has a fabulous weekend... do you have scrappy time planned for National Scrapbook Day?!

Wednesday, May 4, 2011

In the Details

The difference between a flat store bought card, and a hand made card is in the details. The personal touch of a handmade card, screams I loved you so much, I spent some time on just you! When I receive a hand made card from someone (no matter the age), I treat it like a painting from a museum. It gets proudly displayed in my craftroom, much like Christmas cards adorn your home during the holidays. I NEVER toss them out!

I love the details that can be created on such a small canvas.

From Flamingo Scraps: Graphic 45 Once Upon A Springtime Woodland Fantasy; Ranger Glossy Accents; Tim Holtz Distress Inks in Crushed Olive, Mustard Seed, Wild Honey, Walnut, Tumbled Glass, and Vintage Photo.

Other Products: Provo Craft Emossing Jacket; Tim Holtz Tattered Florals Die, Martha Stewart Hydrangea Punch, Gelly Roll Clear Star Pen; Seam Binding Ribbon, Zutter Distress It All.


I created this card with the Graphic 45 Once Upon A Springtime Pixie Post papers. Look at the details closely.

The embossing and coloring of the card's background give depth and texture. They take you straight to the tropical rainforest. The tattered post card that is dressed, bent and folded looks like it has been tossed around by the wind.

Notice the postage stamp on the postcard.


Yes, the flower used as an accent piece is colored just like the one in the postage stamp on the postcard. This is a very small and hardly noticeable detail, but it was definately. The Fairy sitting on top of the daisy is similiar to the one in the postage, and she is positioned like she is reading the card. The coloring and folding technique of the daisy gives the flower texture and depth like a real flower. But the best detail of all, is the sprinkles of glossy accents around the card to give the effect of rain drops or dew.

I don't know if I am more excited to create one of these masterpieces for a special someone, or to receive one. How 'bout you?

Tuesday, May 3, 2011

My Scrapping Process

I'm fascinated by the process that other people use to scrapbook.  Everyone does things so differently!  Here's my process:

1) I always start with the photos.  I spread all my photos on a sheet of either white or cream cardstock, then start arranging and rearranging.  I crop photos some down.  Eventually, I settle on which photos I'll be using and where they will be on the layout.


2) Next, I choose my patterned paper.  This is usually the step that takes me the longest.  I agonize over what to pick.  This time it was actually very fast, as I knew I wanted a green, orange, and blue palette, and these Fancy Pants papers had just arrived from Flamingo Scraps!  Perfect!


3)  Next I decide which color will be my background, which will be the photo matte, which will be an accent, etc.  This often takes me a long time too.  I almost always walk away from a layout at this stage and come back to it the next day or so with a fresh eye.  Sometimes layouts stay at this stage for weeks or even months!


4) Next, I decide where my title and journaling will go.  This is sometimes a problem, as I rarely leave enough space for both a title and the amount of journaling I want to do.  Usually, I come up with a solution, but if I don't, then I'll look for a sketch.  I try to find one that matches what I already have- in this case, a vertical block of photos and a horizontal band of color.  Here's what I found:

Sketch from Scrapbooks Etc., October 2008.

It looks very similar to what I already had, though both reversed and flipped.  Looking at the sketch, I realized I could crop my top photo and create a journaling block from the extra space.

5) Once I know where my journaling and title will go, I use random chipboard letters to check that I like the title placement.  I don't put too much effort into finding the correct letters- as long as they have the same basic shape, it's good enough. 


6)  My next step is to adhere the photos, patterned paper and title to the background paper.  I leave the journaling block loose.  I place embellishments where I think I might want them. 


7)  The last thing I do is journaling.  I don't usually pre-plan what I'm going to say, so I'm lucky that it usually works out and looks good! 

From Flamingo Scraps: Fancy Pants patterned paper
Other: Fiskars border punch; Queen & Company flowers and brads; Paper Company cardstock


Monday, May 2, 2011

Getting to Know Jeana & Heather!!

Please join us in welcoming our May Guest Design Team -- Jeana and Heather!!   Heather will be here on Tuesdays and Jeana will be here on Thursdays this month.   So we asked them both to answer a few questions so we could all get to know them a little better...

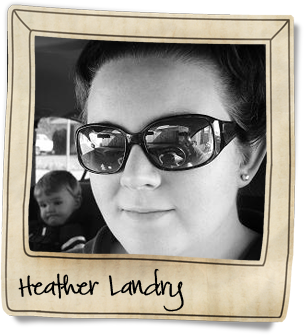
My name is Heather Landry, and I am from Southern Louisiana. I am a total country girl at heart. I love everything about Louisiana except for the heat and mosquitoes. I have been married for ten years now to a hilarious, annoying, wonderful man. I have three kids: Alexis Ariel (7), Jordan Jasmine (5), and Brandon James (2). The girls chose their own middle names when we adopted them. They both wanted to be princesses!  (I’m pretty sure that makes me the queen right?) Brandon messes up the scheme of things name wise! Being the mother of two special needs kids is always an adventure, one of my favorite things to tell my husband is, “scrapbooking is cheaper than therapy”! I’m not sure he’s buying that anymore though. 

Why do you scrapbook?
I love telling the story of our lives on my scrapbook pages. That’s really what it’s all about for me.

What is the one scrappy item you just can't live without?
I can't live without a great trimmer that cuts clean, even lines. I finally found one that works for me and it makes my heart happy!

If you were a crayon, what color would you be?
Lime Green! Kinda bright, artsy, and totally funky!

Do you like your handwriting and do you use it on your layouts?
I've learned to like it because I know how important it is to pass down to future generations. I have cards from my grandmother who passed away that are absolute treasures of mine.

What is your favorite item in the Flamingo Scraps store today?
The Cosmo Cricket Salt Air line. Hands down! It is absolutely adorable. You'll be seeing some of it on my upcoming layouts for my guest design stint here!

More of Heather's work can be seen here on her blog!


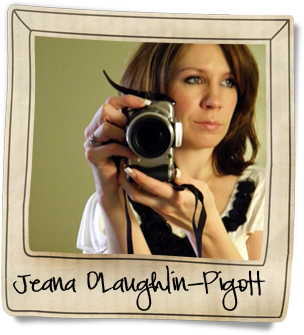
I am a SAHM of 4 wonderful children, Mason (4) Kira (2) Frankie (2) and Tre (17 months) so it gets a little crazy around the house sometimes, but I wouldn't have it any other way :D. I am also a proud Army wife to an amazingly kind, understanding, gorgeous husband!! The kids and I currently live in Las Vegas, NV where my husband and I have both lived for most of our lives. We are all excited for the adventures that being an Army family will bring, and I am extremely happy that I have crafting to keep me sane along the way LOL!!!

Why do you scrapbook?
It started out with making cards (way back in 4th grade with my bestie Tiffany Solorio Morgan) haha, who knew we would be the scrappers we are today!! Mostly I scrapbook because 1) it is relaxing for me and 2) I love being able to give  people things that were personally hand crafted just for them.

What is the one scrappy item you just can't live without?
Well, anyone that has seen my scrap space would know this one, fibers!!! I am a fiber addict; be it ribbons, lace, twine, you name it I love it!!

If you were a crayon, what color would you be?
I guess I would be my favorite color! Deep olive green (is that even a crayon color hahah!?) because it's flexilbe. It can be subtle or bold, compliments pretty much anything, and is always calming.

Do you like your handwriting and do you use it on your layouts?
I do like my handwriting, and I use it in my layouts quite frequently as I like how versatile it can be (we all know it can change from day to day!!)

What is your favorite item in the Flamingo Scraps store today?
Oh gosh, this is soooo hard for me to answer, there are so many gorgeous things!! I would have to choose the Fancy Pants line Wishful Thinking, I can't get enough of it!! It is so girly, and can be used for girls of all ages!! I love that it's a mix of sophistication and whimsy ♥

More of Jeana's work can be seen here on her blog!


Please join us this month to see their fabulous work... we can't wait!!

Guest Design Team Summary: Janie & Sara

We're scrambling today to catch up from our scrappy vacation at Flamingo Scraps!!  Last month, we really enjoyed Janie & Sara's blog posts and we hope you did too!! Each month, we post a summary just in case you missed anything and to thank these talented ladies for all their fabulous work!! Up first this month is Janie:

During April, Janie inspired us to break out our distress inks with her 1st Birthday layout, shared her experience at Scrapfest, made a beautiful canvas tribute, and for April's Flamingo Four she made a fabulous decorated dress form!

More of Janie's work can be seen here on her blog!

This month Sara inspired us to use Maya Road Bottlecaps (so cute!), made a gorgeous layout using Websters Spring Market, taught us how to make a border with flowers and, for April's Flamingo Four, she made a super cute layout about her dates with her son!

More of Sara's work can be seen here on her blog!

So we really hope that you enjoyed what Janie and Sara shared with us during April as much as we do!  Please go leave them some love if you haven't already!!   Later today, we will be back to introduce our May Guest Design Team!! :) 

Guest DT Sara Zenger: Flower Borders

If you are like me when flower were first introduced to the scrapbooking world you bought them all!!! Now more embellished and detailed flowers on the market (and they are beautiful!) but don't give up on your original flowers yet, here is a unique way to put them to use!

From Flamingo Scraps: Prima flowers

This is a gift card holder I made and but I want to show you how to create the flower border so you can replicated it on a layout, card or any other project! Its easy!


Select your flower (the amount will depend on the size of your flower and the length of your boarder). I have chosen 2 colors and I will alternate them.


Fold your flower in half.


Fold your flower in half again.


Glue dot your folded flower to the back side of your boarder.


Repeat this process until your border is full!!


And their you have a fun new border!

Enjoy!
More of Sara's work can be found here on her blog!!

Gone Scrappin'....

So sorry we've been MIA for a few days... we've been scrappin' and laughin' and having a good old time in Michigan!  We're back now and we will catch up the blog later today...  which means a few more posts today.  :)  We also have a few layouts to share with ya... and this picture:


Aren't Susan and Suzanne too cute?!  :)

Thanks for understanding and we hope you enjoy all the posts! 

Wednesday, April 27, 2011

One Sketch, Two Looks

I love working with sketches.  Before I tried them, I used to think that they would limit my creativity, but in fact, the opposite is true.  Sketches often take me out of my comfort zone and challenge me to work with shapes or layouts that I wouldn't typically come up with on my own.

This is a sketch by Rebecca Peck:


It's really simple, which I like.  I decided to see if I could make two cards, both based on the sketch, that look completely different from each other.

For my first card, I used Prima's Rebellious collection.  It follows the sketch fairly closely.  I didn't want to cover up the cute bird paper with a solid circle, so my solution was a semicircle of Stickles dots, connected with a pen. 

From Flamingo Scraps: Prima patterned paper; stickles
Other: Bazzill cardstock; Fiskars border punch; Zig pen

For the second card, I used Prima's My Mommy and Me collection.  I love the embossed leaf paper and didn't want to cover it with a solid circle either!  I laid out a piece of embroidery floss with the intention of hand-stitching a semicircle, but I couldn't get it to lay flat to see if I liked the design.  Then I realized the curvy floss would make such a cute balloon string!  In the end, I used a pen to draw the string and ditched the floss (and the semicircle) altogether. 


From Flamingo Scraps: Prima patterned paper
Other: Bazzill cardstock; Fiskars border punch; LePen marker; vellum; ColorBox ink; Hero Arts stamp


This sketch was so much fun!  As far as making two cards that look completely different from one another... mission accomplished!

Sunday, April 24, 2011

How I Use a Frisbee When Scrapping

Yes, I regularly use a Frisbee while I'm scrapping!  The inside of a Frisbee makes a perfect paint palette.  It's a nice large work surface, I can mix colors easily, the lip contains the paint, and it's very portable.  But the best part is that clean-up is so fun and easy:


The paint literally peels up from the surface of the Frisbee!  It is so cool!  I've even cut the peeled pieces into shapes.  I've never actually done anything with those shapes, but one of these days I'll do just that.  :)

Flamingo Scraps carries so many great products just waiting for a coat of paint. My favorites are the wonderful chipboard pieces from Maya Road.  I love to give the chipboard a base coat of paint and then a quick spritz of Glimmer Mist.

Anyone else use something really unusual when you scrap?

Saturday, April 23, 2011

Weekend Whimsy: Easter Bunny Framed

With Easter this weekend, I thought it would be great to share with you a little Easter Bunny Story.


From Flamingo Scraps: Fancy Pants Paper - Happy Together - Cheerful.


My family is very close. Holidays are filled with family, laughter, and LOTS OF FOOD. My Daddy has spoiled us for every holiday occasion for as long as I can remember. He delivers candy on Valentine's Day, plays Santa Clause at Christmas, and yes – we are all now aware that he IS the Easter Bunny.

Easter was the first holiday after I said "I Do". Kenny and I had a huge argument just before bed when I asked him if the Easter Bunny was going to come see me. He told me that I needed to grow up and went on and on about how I was "Spoiled".

Later that evening...around 2 a.m.

We were SOUND asleep in our little tiny efficiency apartment. The alarm from the main house was blaring, and all of a sudden lights were everywhere. Within minutes the police were there. Yelling "FREEZE".

Then I hear a humble knock at the door. SCARED to death, I waited for my "new" husband to answer the door. It was my sweet Daddy standing there with the BIGGEST Easter Basket I have ever seen. Right behind him was a police officer. He wanted to know if we "knew" the Easter Bunny.

I believe that was the last time the Easter Bunny visited me at my own home. Oh – I still get an Easter basket filled with toys and candy, but now I have to retrieve it from my Parent's home.


Friday, April 22, 2011

My Easter Basket

When I was a little girl, my brothers and I had  Easter baskets that we used year after year.  Now I am not such a little girl anymore, but I still have my Easter basket that I use year after year!  Yes, the very same one -- now officially an antique and the colors faded from egg hunts in the Florida sunshine!  It was a really big deal every year for us to decorate our Easter baskets.  We would go to the Tulley's dime store and get ribbon and those fuzzy and feathery chicks and roosters and craft away in preparation for the arrival of Easter Sunday.  After church and a family lunch at my grandparents' house, we would hunt for eggs hidden among the azaleas and border grass and coontie fern and birds of paradise!

This is my Easter basket --

and this is a picture, ca. 1961, of me (on the left), my brothers Joe and Bill, and my cousin Jan on Easter Sunday at my grandparents' house -- see my basket!!!!


This year, I decided to decorate my Easter basket once again -- using wonderful Prima flowers and some bright ribbon.  And, of course I had to have a feathery chick!


And the eggs??  Yes, many many years ago, the Easter bunny left them in this basket!

Have a Blessed Easter filled with love, and family, and traditions!

Thursday, April 21, 2011

Guest DT Sara Zenger: Webster's Spring Market

Today I come to you with a fresh new layout thanks to the great new collection Spring Market from Websters. I love this collection because its colors are brighter than many of the other Websters collections. My favorite paper is the Market Menu as it has so many cute little signs and advertisements to use up.


Be sure to check out the Flamingo Scraps Store to get your Spring Market supplies!


More of Sara's work can be found here on her blog!!

Tuesday, April 19, 2011

Guest DT Janie Boots: Let Your Spirit Soar Canvas

Happy tuesday everyone. Today I wanted to share with you something I created in memory of my precious son Alexander. His birthday was April 7 and he would have been 19 years old. I decided to alter a canvas and Alex was my inspiration.


I stamped an image onto the canvas in black ink then I took scotch tape and put it over the image. I then took my electric blue glimmer mist and spritzed the canvas. I let it dry. Then I sprited my cranberry zing glimmer mist over top of the blue but not as much. While it was still wet I took a small paint brush and blended both colours together. I let it dry. Then I took my Tumbled Glass Tim Holtz Distress Ink and ran it over the entire canvas.

Once the canvas was dry, I removed the scotch tape from my image and I started painting it with acrylic paints, I let the canvas dry once again. Then I dipped my paint brush into the electric blue glimmer mist and painted around the stamped image to give it a sky feeling. When it was dry I doodled on the canvas in pencil firt and then traced over it in gold stickles, I also added gold smooch ink to the unicorn image. When everything was dry then I added butterflies and other chipboard embellies, I also added some of the Kiasercraft Pearls that were part of my Flamingo Four package from Flamingo Scraps. I finished the project up by using Jenni Bowlin Alpha stickers and thickers for my title. The Canvas is called " Let Your Spirit Soar" in honor of Alex.

Thank you for allowing me to share some of my world with you this month and I hope I have been able to inspire you all.

Monday, April 18, 2011

Altered Frame

You could hear me scream for miles when Marion Smith, Educator and Designer for Prima Marketing, asked me to design something using her vintage trinkets line. I felt so honored, and wanted this to be perfect.
I decided to create this beautiful frame.


From Flamingo Scraps:  Prima Reflections Paper, Vintage Trinkets, Frame, and Flower; Tim Holtz Walnut Distress Ink; Cinnamon Stickles.
Other Supplies: Tim Holtz Broken China Distress Stains, glass beads.

I started with a simple wooden frame, and painted the base using the Tim Holtz Broken China stains, then edged the sides with walnut ink.  I chose my favorite Prima paper from the winter 2011 release – “Reflections” from the Reflections Collections to cover the frame.


With a second sheet of paper, I fussy cut the butterflies and flowers. This gives the paper a 3D effect, and really calls attention to this beautiful paper.


Then I framed the opposite edge with Marion’s vintage flower trinkets, Cherry Blossom Vines, and a few vintage Prima flowers. For an added "WOW factor, I cut a few petals from the large Vintage Trinket Flowers, strung some glass beads for the center and this beautiful butterfly was born.

Marion said "it's awesome", and that was all I needed to hear!
Related Posts with Thumbnails