Tuesday, September 10, 2013

Travel Photo Box

While attempting to clean my scrapbook room this past week I discovered several photo envelopes, filled with random pictures from several of our beach trips, just thrown in a drawer.  Needing to get them organized, I decided to recreate a project that I taught from my weekly card class. For my Design Team project today with Flamingo Scraps, I decided I would make a travel photo box. Inside the box are six file folders to keep track of your trip highlights.

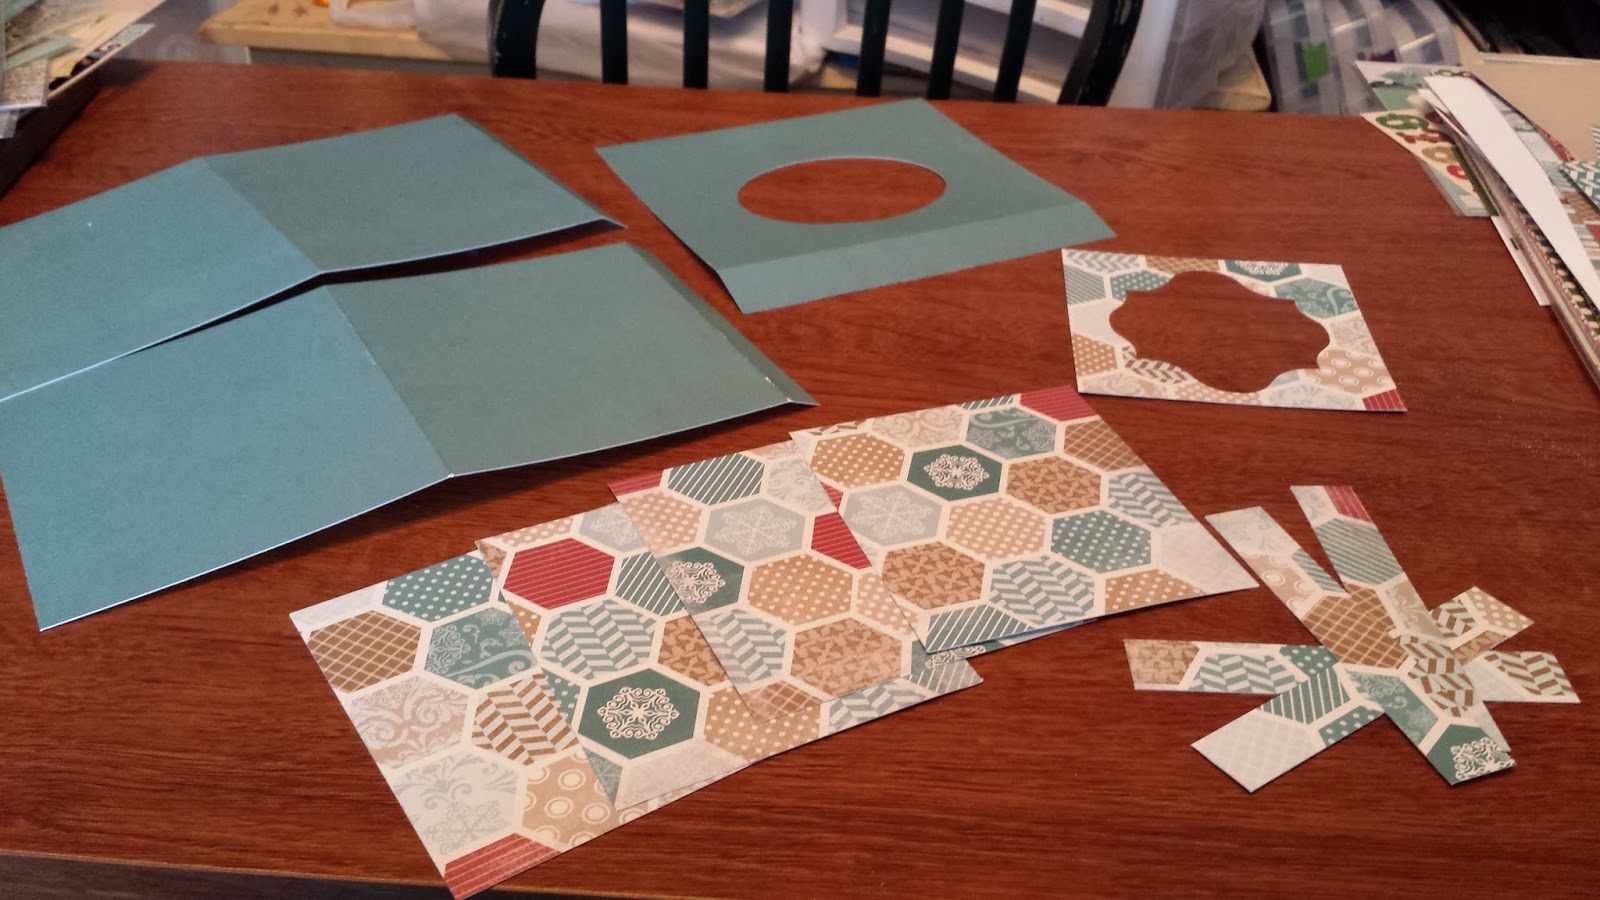
For the box, I started with a 12" x 12" piece of black card scored at 4 1/2" x 7 1/2". Turn the paper and score again at 3" x 9".  Crease and enforce the score lines.


 The box base is then assembled and the sides secured with a staple on both sides.


For the lid I used another piece of black card stock cut to 8 1/8" x 5 1/8" and scored at 1" on all four sides. The four corners were cut, tapered, adhesive was applied, and then the tabs were folded and secured to the inside of the lid.

I cut two 2-3/4" x 4-1/4" and two 4-1/4" x 5-3/4" panels of the Well Traveled paper collection from Carta Bella. I inked the edges with the Prima Dark Rust chalk edger and adhered them on the box bottom and then two 3/4" x 2-7/8"inked strips, two 3/4" x 5-7/8" inked strips, and one 2-7/8" x 5-7/8" inked panel. I added adhesive and adhered them to the lid.


I inked, layered, and applied several of the element stickers to the front of the box.


 For my file folders, I cut six 9" x 5-1/2" pieces of black card stock. Scored and folded each one at 4-1/2" and layered six inked 5-1/2" x 4-1/8" panels and adhered them to the front of each folder. I then used my We Are Memory Keepers Envelope Punch Board on the top edge of each six pieces of black card stock to create the file folder effect.


Here is my finished travel box. Making this was so much fun.


You could also use this to store your 4" x 6" photo's, A2 cards, or maybe as a recipe card organizer. Lot's of creative ideas. If you have any questions, please let me know.

Check out and "like" Flamingo Scraps Facebook page here and their online store here.

I hope you have fun making this too.

HAPPY SCRAPPIN!


Monday, September 9, 2013

Ustream - Tonight Sept. 9 at 8:30 pm est.

Flamingo Scraps presents Tonya Gibbs live tonight on Ustream as she creates with the new Basic Grey Persimmon Line availble now in the store!

Class begins at 8:30 est at http://www.ustream.tv/channel/gibbst.  Join the crowd early!

We will be celebrating our 1 year anniversary on Ustream, and promise lots of fun.

We will do our best to record the class, but are at the mercy of Ustream.


Saturday, September 7, 2013

3-D Tissue Box

I am so ready for fall, cooler weather, and college football. Our Grands started school the end of August, but we are still having a few days with temperatures in the triple digits. As kids in Michigan, when we started school, we normally had long sleeves or a light sweater on. Not here in Fort Worth. This is my first summer living here, but I have heard the heat doesn't give us a break until October. I am ready for some open windows and a cool breeze.

My allergies have gone nutty since living here too. One day as I was reaching for a tissue, I stopped and looked at the box, and tons of ideas went racing through my scrappin' brain. Grabbing a ruler, paper, and pencil, within minutes I made some vague measurements and a trial run template. After a few tweaks to my measurements, I was ready to start my projet.

I again used the "Winter Fun" paper collection from Flamingo Scraps. This is a heavy designer cardstock and I thought a 3D project would be perfect. This month you can get a fantastic deal on these papers, dozens of other papers, and embellishments during the Warehouse Sale

After cutting my papers to size, I used two Spellbinder dies to create the openings in my top layers.


I inked all my edges on each layer using Prima's Dark Rust ink, and then scored and assembled the box


I  covered all four sides of the tissue box and then used a lace border punch to cut out a strip to add under the lid over the top of the side panels.


I was really pleased with how quickly the box came together. Other than my estimated measurements, matching the lace trim to meet on the sides was the most time consuming. I chose not to add any embellishments on the box. I thought the pretty paper and lace trim spoke for themselves. This was a very easy and quick project - definitely one I will make again. This would be adorable too, for a teachers desk using school papers. Hmmmmm... might have to make two of these for my Grands as teacher's gifts! 


Here is the finished project. I really love how it turned out. Enjoy!


To follow the Flamingo Scraps Blog please click here.
For the Facebook group click here, and to shop please click here.

Happy Scrappin!!


Friday, September 6, 2013

Kids' Summer Fun Mini Album & Sneak Peek At My Warehouse Grab Box!

I was SO excited when I peered into my Flamingo Scraps Warehouse Sale Box , that I actually squealed with joy. Never had I gotten so many yummy scrappy goodies for such a great price! This is just some of what I received. There is a box for everyone! You have a choice of boxes containing only embellies, or paper, OR a combination of both. How could you possibly go wrong? Products from great companies such as Maya RoadTim Holtz, Heidi Swapp, Prima, Pink Paislee, Studio Calico, Teresa Collins and many more, make up these awesome boxes Follow this feathery link to the embellishments box:  http://flamingoscraps.com/product/flamingo-scraps-warehouse-sale-box-embellishment-box/


I didn't know what I should create first until my grandson told me that he needed some of that "stuff " I got in the big box because he wanted to make his own vacation scrapbook. I always said Gabriel was a genius. (He obviously takes after me.) I combined goodies from my grab box with some of the latest items from CHA to help Gabe make his little album. I got a wonderful pack of TH grunge sheets and luckily for Gabe I have a HUGE stash of TH so I allowed him to use the "leather paper" he calls it for his album.


For the cover we used the  Ranger Claudine Hellmuth Sticky Back Canvas,  a new CHA item that can be found in  the store and comes in 12 x 12 sheets. I am totally in love with this product! To hold it all together, I used the Tim Holtz ruler binder. You could also use rings in place of this. The title and year are Maya Road chipboard from "The Box." Letters and numbers are from my stash. 


Heidi Swapp journal tag envelope let's us journal "FUN" things about our camping trips while our grunge page is painted camo (G said he needed more macho here) , using Tim Holtz paints. I like the Pink Paislee Destinations paper with the schematics for the pages of building models. 


Nothing says summer like being in or on the water, especially here in the state of Florida.The word "Swim" was made using the new Cosmo Cricket Glitter Sheets  from the Crystal Lake collection. You get all the shimmery goodness of glitter without finding it on everything six months later. The Prima scalloped paper worked well for the waves. New to Flamingo Scraps from CHA are really cute cork hearts with sticky backs  from Fancy Pants. These also come in arrows and various shapes.

Well, that's all for now. Of course we'll be adding more to the album with the goodies from "THE BOX". But, as those of you with young children in your lives know, for the most part they have "gnat" span for attention spans so we'll put this aside until next weekend. Below is a list of all the links for the GREAT items used in this project as well as links for each Flamingo Scraps Warehouse Box. BE sure to get your Grab Boxes while you can. They make great gifts for those scrappers in your life, and grab one for yourself while you're at it!

Don't forget Monday is Tonya Gibbs and her AWESOME Ustream show on Monday, September 9th at 8:30 p.m. EDT. 


Have a great weekend !

Kathleen

Follow these links to the great items used in this project :  *If you don't see an item I used in the store, it might be in a grab box !!
___________________________________________________
Fancy Pants Cork Arrows
http://flamingoscraps.com/product/fancy-pants-cork-shapes-arrows/
http://flamingoscraps.com/product/fancy-pants-cork-shapes-hearts/

Cosmo Cricket Glitter Sheets
http://flamingoscraps.com/product/cosmo-cricket-glitter-sheets/

Claudine Hellmuth Studio Sticky Back 12x12 Canvas
http://flamingoscraps.com/product/ranger-claudine-hellmuth-studio-sticky-back-canvas-natural-12x12

Flamingo Scraps Warehouse Box - Paper Only
http://flamingoscraps.com/product/flamingo-scraps-warehouse-sale-box-paper-box/

Flamingo Scraps Warehouse Box - Embellishments Only
http://flamingoscraps.com/product/flamingo-scraps-warehouse-sale-box-embellishment-box/

Flamingo Scraps Warehouse Box -  Combination 
http://flamingoscraps.com/product/flamingo-scraps-warehouse-sale-box/


Thursday, September 5, 2013

Remembering Loved ones Journal Pages

I used the Echo Park Beautiful Life collection and just to show you that you do not have to only use your paper on Scrapbook pages and cards: you can also use it in your journaling. I also used one of the Prima Julie Nutting Mixed Media Doll stamps. I so love these doll stamps and you can use them for many different medias. I have done many canvas using the doll stamps and each one takes on her own personality. I also used on this Journal pages Claudine Hellmuth Studio Kit: Mediums. I love the multi-medium matte, gesso, and black gesso. Make sure you stop by Flamingo Scraps to pick up these awesome sets.

Here are both pages together. I used the Multi-Medium Matte to adhere all papers to the journal page, including the poem that I cut out from the Cameo, that way, when using the Medium, it will secure them down really well. I have tried others but always go back to Claudine's.


I used a Camera Clip from Prima and used a black sharpie marker to color it the color that would show up. The silver would not show up.

Here are some of the flower stickers from the kit that I used popped them up and glittered them. Then, I tucked a clock from the Prima Wood Icons in a Box – Typewriters & Clocksand and some Prima Vintage finds metals.

Here is the Prima Girl that I stamped the dress and hair 3 times and added layers to make her hair fuller and dress longer. I just love playing with these stamps...there are so many things that you can do to make them look different.

This last month was a difficult month for me to go through every year. I lost my father and my brother 26 years apart but they were the same age in August. I have not written what I want to on it yet, because I think that should be personal. But, feelings this last year on the Death dates has kinda made me remember all the positive influences that these two men instilled in me forever.


Other products used

Prima Tiny Junkyard Findings Vintage Trinkets — Sampler
Prima Chalk Ink Edgers — Set of 40 Original Colors
Grid Acrylic Stamp Blocks — Tim Holtz Collection
Seam Binding – Rose Petal
Prima SIIC Classic Clear Swirl
Maya Road Wood — You’ve Been Framed Pieces
Maya Road Metal Antique Music Box Keys
Maya Road Trinket Pins Crystals
Maya Road Rhinestone Trim – Iridescent Diamond
Maya Road Trim — Small Organza Rose Sky Blue
Tim Holtz Distressed Paint
Heidi Swapp Color Shine Sweet Cherry
Multi Medium Heavy Gel
Stencils

Thanks so much for looking and remember to go to Flamingo Scraps for all of the new releases and the Warehouse Sale going on right now. She has 3 different boxes to choose from
Flamingo Scraps Warehouse Sale Box — Combination Box
Flamingo Scraps Warehouse Sale Box — Embellishment Box
Flamingo Scraps Warehouse Sale Box — Paper Box
I know these boxes are going to be jam packed full of goodies.

Designs~By~Ramona

Wednesday, September 4, 2013

Birthday Hat

When we got the party supplies for my daughter's first birthday I came across the cutest party hat, it had a flower and feathers and it was all in pink with party girl written on it.  My mother looked at me and said I could so make that, so I did, but in my own way.


I first used a store-bought party hat as my template, so I opened it up and traced the hat shape on cute patterned paper and cut it out. I then glued it to the original hat for more support, plus it already had the chin band on it to keep it on your head.


I then layered on tons of different trims from Maya Road and Websters.  I loved the hot pink idea, not soft pinks, so I just played with the fun pinks, white, and black.


I started at the bottom and placed a Maya Road Tutu tulle in Hibiscus Pink and added the Websters Ruffled Bloomers on top to add more pop along the bottom of the hat.


I added a filter paper doily that I misted to match the colors of the trim under the Maya road Organza flower trim in the middle (in both pink and white).  I then added a Prima flower on top and added more Maya Road tulle under it.  I then added in a bunch of little gems, a couple of Maya Road pins I colored in black Bic Mark its over the original white pin so they would pop, and then added a #1 on the front for her age, but you could put any number you want. :)


My little model was not too happy to show off her new party hat, as it was dinner time, not that she did not like her hat! Hehe.


She finally let me take a picture without her crying by distracting her with the grass. 

Don't be afraid to think outside the box with your scrappy stuff to make fun things you would have bought anyway.  The hat that gave me inspiration cost $10 at the party store and there was only 1 option to choose from and no age on it just happy birthday.  My hat cost me $6 or less depending on if you used scraps or new ribbons, plus I got to pick the colors I wanted and put her age on it.  I can also pull the little #1 off and replace it with a #2 next year!!

So head on over to Flamingo Scraps they have tons of flowers and trims in lots of colors to pick from to create a little had just like this.

Supplies Used

Enjoy!!

Tuesday, September 3, 2013

It's all about me!

Well, my project is, this week, anyway. I was a little stumped on what to make. I mean, I've done pages and home decor projects and canvases and cards. I've done a December Daily and sketches and everything I can think of. So, I scoured around for inspiration and found this tutorial by Misty Rushlow on the Moxxie blog and decided that would be the way to go. So, I made a file folder mini. It's not exactly a card, and it's not exactly a mini book. It's sort of in between, and I really was excited about how it turned out!


To complete this project, I used a few goodies from the Flamingo Scraps store, and maybe even a few you will find in the Flamingo Scraps warehouse box! I specifically used Pink Paislee Mistables paper (which I am addicted to lately), Websters Pages Coral Chevron Trim, some random Prima flowers, a Melissa Frances Oval Frame, some Maya Road envelopes and alphabets, Heidi Swapp Color Shine in Tropicana Teal, Primrose, Sweet Cherry, Black Velvet, and Georgia Peach, and some other random alphas that I had lying around, plus some Jenni Bowlin pearl flowers. 


I don't know if this is complete, as I find it pretty difficult to scrapbook about myself in a journaling aspect, but I was able to get it most of the way done. I love that this album has pockets on the inside that I can add ephemera and other things that I've collected over the years to. I haven't done that yet, but I just may!

Here's a peek at the inside:


I added photos of myself as a baby, a child, my engagement photo with my then-fiancee-now-husband, and a recent family photo. Each of the envelopes has a bit of journaling on paper that follows prompts, like "My Favorite Things," "My Fears," "When I Grow Up..." and "If I knew then what I knew now..."

When's the last time you scrapbooked yourself? This week, I challenge you to do just that, and make sure you include a recent photo, as well! I know, personally, I don't get out from behind the camera often enough, and I'm sure many of you don't, either! 

Until next time,
Keep scrappin'!
Melissa

Monday, September 2, 2013

Meet the Flamingo Scaps Design Team!!!!!


Flamingo Scraps is so pleased and proud to announce our new Design Team!!!  We are so very sorry to bid adieu to three DT members -- Cindy DeRosier, Alicia Flick and Abigail Stoops -- all of whom are moving on to other crafty and family endeavors.   We do have 4 new (almost) fresh faces and  5 continuing designers who have new fresh titles & duties!!!  So, without further ado, the  2013-2014 Flamingo Scraps Design Team!!!!!

Tonya Gibbs - Lead Educator


Tonya is also known as Psychomom - for all the right reasons!  A Florida Native, she hails from Keystone Heights; she is married and has two children, who, along with her neices and nephews are the frequent subjects of her scrapping.  Innovative techniques and inspired details are the hallmark of Tonya's style.  She has been designing for Flamingo Scraps for three years and for a year has been broadcasting live Ustream shows sponsored by Flamingo Scraps.  Tonya is also a member of Marion Smith Designs Design Team!!


Kathleen Natale -- Flamingo 4 Coordinator


Kathleen Natale previously served as the Design Team Coordinator, but is now in charge of our popular monthly feature Flamingo 4!  She is a native of Palatka, FL and lives just up the road from Suzanne.  Kathleen is a wife, mother, avid fur-parent, and Gammy to the lights of her life, grandsons  Gabriel 7 and brand new baby Ethan!  In this capacity, she will be contributing on a regular basis to the blog and we know her lively personality and beautiful crafting style will shine through.


Erin Reed -- Design Team Coordinator

Erin Reed is a stay at home mom (my children give me wonderful pictures to scrap with), a former high school science teacher, and she loves to scrapbook!!  Her first love is family - they mean everything - her second love is crafting, especially scrapbooking.  Erin started scrapping in 2006 when her oldest child was 10 months old.  But she really fell in love with the craft when it became her emotional release during a painful time in her life.  In her new role as DT Coordinator, Erin will be coordinating all aspects of the Design Team.

Melissa Williams -- Blog Coordinator

Melissa Williams is a mother of 2 boys living in Michigan. She is an all-around crafty-type person, and loves, REALLY loves, color.  She is especially drawn to primaries, turquoise, and pink. She puts all of this into her designs and loves to try new things, so her style is always evolving.  Melissa really likes using techniques on her pages - from sewing to painting to inking and grunging it up.  Melissa says,  "My designs are fairly uncomplicated - I try not to put too much on a page so that the focus still rests with my photos, yet I try to add small touches to give my pages interest. But, that's pretty much what I try to be: uncomplicated, bold, and dynamic." Melissa's new duties include reviewing, editing and scheduling blog posts.


Ramona Downing -- Social Media Coordinator

Ramona Downing loves scrapbooking and mixed media!!  She loves making old memories new, from pictures of her family’s heritage to new pictures taken.  Right now, she is into Mini Books and altered items and  loves using Prima and Graphic 45.   Ramona is always up for new crafting adventures at retreats and classes.  Ramona says, "I love watching new papercrafting tutorials  on Youtube and Ustream.  I want to share with Flamingo's friends and customers what I have learned by watching YouTube and Ustream."  Ramona is in charge of maintaining Facebook, Pinterest, and other social media outlets.


Design Team Members

Flamingo Scraps was so very fortunate to have four Guest Designers for our Christmas in July Blog features, and we are thrilled to welcome them as full time designers!!

Luann Ostrom

Hi my name is Luann Ostrom.  I live in Seabrook, TX (near Galveston) with my wonderful and supportive husband (Carl) and our dog babies – Maisie Grace, Torrie Belle, and Teager Woods.  I was brought up in Southern Illinois to journey to Texas via St. Louis, MO and Atlanta, GA. The last 4 years we have been full time caregivers for my mom and dad.  I have to say that I really love being able to be with my parents.  I have been crafting all my life.  I like to say that I grew up during the “using your imagination” era and thanks to my mom for inspiring me to use my talents, as she did hers.   I enjoy working with all types of media.  I have tried my hand in just about everything that has to do with crafts.  I love to make cards, tags, and projects for family and friends.  This will be my first adventure as a guest designer.  Hope you enjoy my imagination.

 Genie Smith

 I have always been drawn to creative pursuits, it just took me a while to find my outlet. I sew, needlepoint, and draw. I also enjoy cooking and baking. I have dabbled in scrapbooking since high school by adding memorabilia to my pictures, but something was still missing.
I found modern scrapbooking after our first daughter was born and I have not looked back. I really do hope that someday, my children look at my scrapbooks and really get who I am and how much I love them. Within the last few years, I've been introduced to mixed media and well, the world will never be the same.
My husband of 12 years and I have two sweet little girls, aged 9 and 3. They are funny, sassy, sometimes naughty, silly, gorgeous, loving, bright, often cheerful, diva-esque little princesses, and they are the lights of my life. I am lucky to be married to my best friend; I swear, I love him more every day. In real life, I am a portrait and wedding photographer, but my true loves are all at home.

Cheryl Arbo

I am married to my best friend for thirty-six years. We have two daughters, two precious Grand girls that call me Gamma, and we yell “Roll Tide” every Saturday during the college football season.  I have been scrapbooking around fifteen years. Around three years ago I made the expensive mistake of catching Jennifer McGuire on YouTube making a few cards and I was hooked. It was at that point that I realized I liked my cardstock, inks, and ribbons all to color coordinate. I also had to have all of the pretty stamps and dies to make those pretty cards. I still have a deep love for scrapbooking, but as the years have passed by, I have realized our journaling is more important than the pictures. I am a little bit Yankee, a lot Southern, and since last September, living in the Wild West of  Fort Worth Texas.

Donna Jaked-Sullivan


Donna is a long time Flamingo Friend!  She and Tonya and I took a class from Marion Smith together and cemented our online friendships!!  Donna is just getting back into papercrafting after a long illness and we are so excited she is doing it with us!  I know you will all love seeing her projects!  Donna and hubby Tim are in the process of moving back to Florida -- I think they had to have one moving truck just for her craft room!!
Welcome to all these FABULOUS ladies!!!  Flamingo Scraps is so fortunate to have attracted this incredible group of talented and FUN paper crafters!!!!  I have a feeling the next 6 months are going to be a wild ride!!!!!


Related Posts with Thumbnails