
Melissa here, with a project that I hope will knock your socks off. Personally, I’ve been wanting to make a thankful box for years, and the new Graphic 45 boxes really gave me the push to finally check it off my “To Do” list! I love what I came up with, and I thought I would share with you my step-by-step process so you can make one, too.
First, I started with a small Graphic 45 Matchbook Box, and I painted it with a base of gesso.
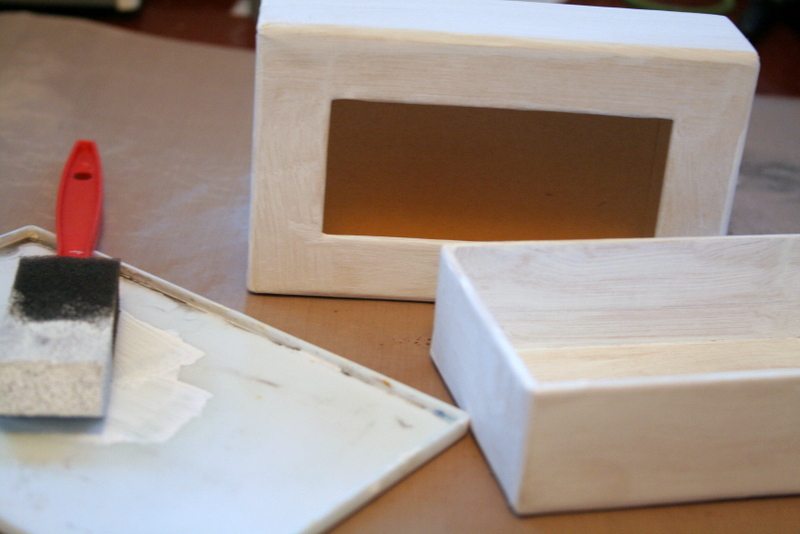
Make sure you use gesso and not white paint because gesso is a preparation medium and white acrylic paint is a finishing medium. White acrylic paint will not accept the following steps as well and your final product will look a lot different!
Next, I poured some Glimmer Mist onto my tray and painted it on. I used Raven on the inside and Chocolate Covered Cherries on the outside. Don’t worry about the coverage being too terribly even, as you will end up covering most of it later.

I let the Glimmer Mist dry for about 30 minutes, and then went back to gave it a second coat, just because I had some smearing that I wanted to take care of on the top (you can see it in my photo above) and I didn’t want it to be that much of a difference. I also sprayed Iridescent Gold mist on the inside, over the Raven, to give it a fun glimmer on the inside.
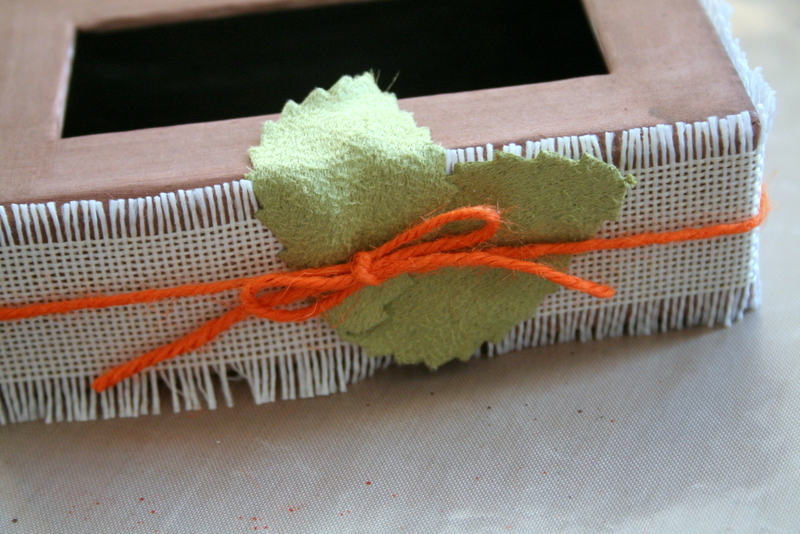
I allowed the second coat to dry for another 30 minutes, and then wrapped the entire box edge in white Maya Road burlap, a piece of orange jute, and used a couple of leaves as decoration. In the next few photos, it will look like the leaves were glued down, and they were, but in the end I decided I liked them sticking up instead, so redid that.
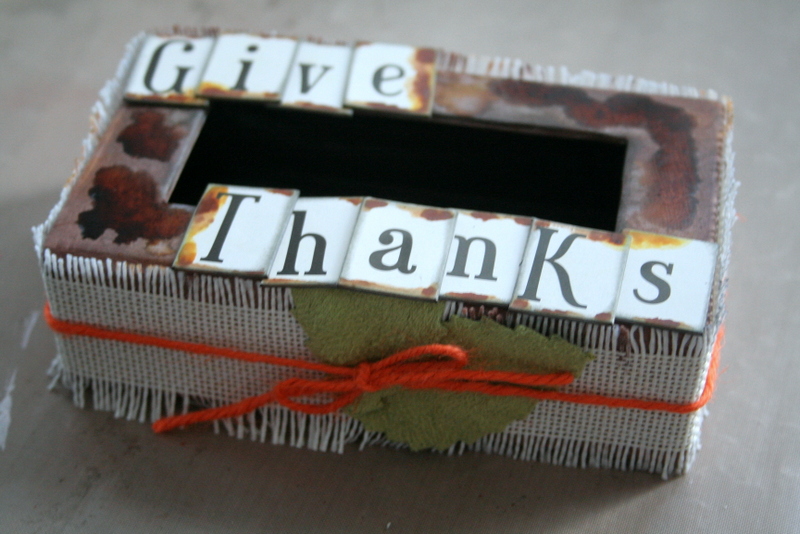
I added some Distress Stain and alphas that I had also inked to the top. Be careful not to overwork the ink on the box edges because it will create a muddy look on the top of the box, since each of those items are water-based. Because they’re water based, all of the layers before it reactivate and you get a lot of blending. I knew this, but didn’t follow my own advice .You can see that my box is overworked, but that’s alright. You can always go back and fix it... you’ll see!
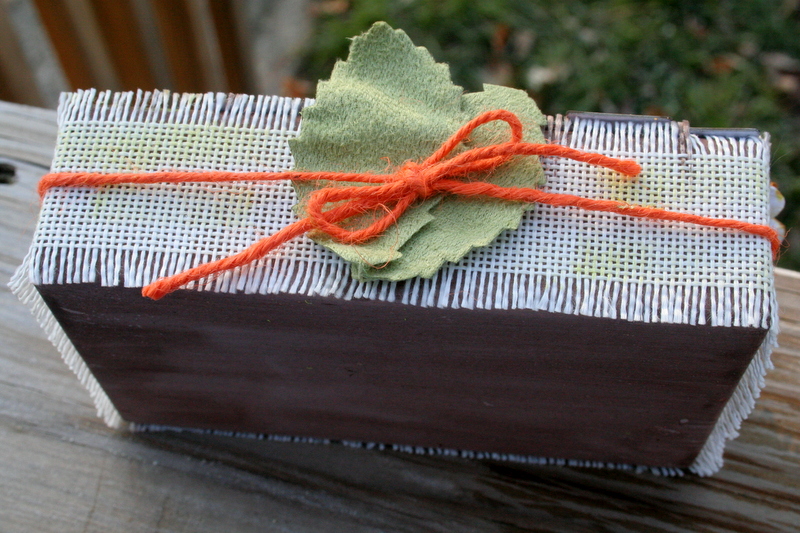
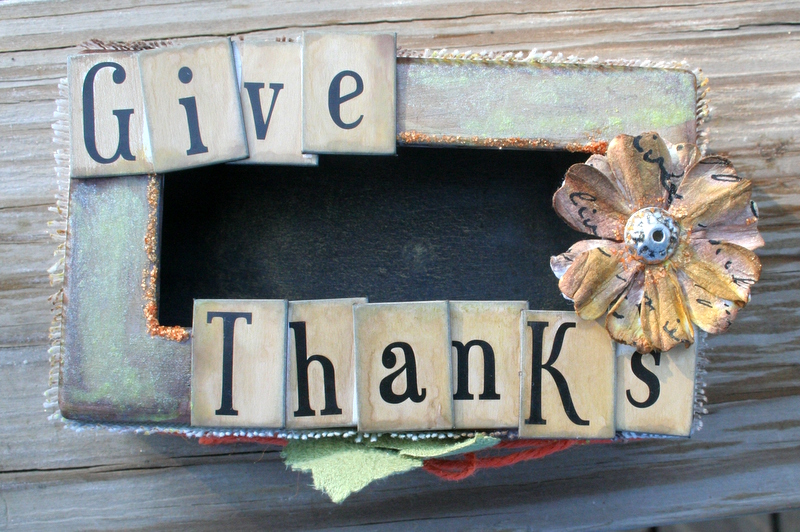
Above is the finished product, with the bottom of the box and the sides showing. I decided to let the leaves stand up. I also put some subtle inking and paint on the burlap just to give it some variation.
This is the view from the top. I added an Artisan Flower from Pink Paislee that I treated with Chocolate Covered Cherries Glimmer Mist, Wild Honey Distress Stain, and a hint of Distress Stickles. I added some translucent paint over the ink and Glimmer Mist to fix the muddy look and painted the alphabets with Chocolate Covered Cherries Glimmer Mist. You can see the hint of sparkle, but it isn’t overwhelming.
From the Flamingo Scraps store: Graphic 45: Small Matchbook; Pink Paislee: Artisan Flowers; Maya Road: White Burlap Ribbon; Tattered Angels: Glimmer Mist.
Other: Paint, Alphabet, Ink, Stickles.
The plan with this box is to have everyone write what they’re thankful for before dinner on Thanksgiving Day, and then read them at the dinner table before eating. I had thought about doing one for every day of November, as well, although keeping up with anything for that long is nearly impossible for me. That’s an idea for those of you who might want to use one of the larger Graphic 45 boxes!
Thanks for reading along, and if you create your own thankful box, please feel free to share via a link in the comments, or on the Flamingo Scraps Facebook wall! Until next time!
Keep scrappin’!
Melissa


Very cool! The layered paints and mists look great.
ReplyDeleteVery cool! The layered paints and mists look great.
ReplyDeleteSuch a lovely idea Melissa and beautifully realized!!!!! Suzanne
ReplyDeleteVery nice! I like the shine and the colors are so pretty.
ReplyDeleteThis is really neat!! I love this and thanks so much for sharing!!!
ReplyDelete