Wednesday, July 31, 2013

On The Last Day Of Christmas.....Snowman Cards and LayOut

Today is my last post as a Guest Designer with Flamingo Scraps. I have had a blast and I thank Suzanne so much for the invite and privilege to create along with her Design Team for the "Flamingo Scrap Christmas In July." Once I got started creating, I could not stop! Here are my three last projects.
CHRISTMAS CARDS

 
For my first project I used the "Winter Fun" collection from Carta Bella. I love the unexpected cranberry being used along with the pretty blues and creams. Really pretty winter colors.

 
 These papers reminded me of frost and snow and I knew when I received my kit that I wanted to do something with a snowman. I started off by stamping the three snowmen
. Using an aqua pen and ink I lightly colored in the head ware, scarf's, and stick arms. Using the Spellbinders Heirloom Ornament Dies. If you need these or any other dies contact Suzanne and she'll do her best to get them for you !!

 I cut each snowman using the 4th largest die. Before removing it from the die, I lightly shadow inked all the area around the snowman leaving a pretty white framed border.

 
 I then used a liquid glue and marble glitter to fill in the snowman's head and body and let it dry.


From there I cut three small rectangles of the coordinating papers and attempted to have a slightly different template using the same sized papers for each card.

 
 I also placed the solid blue paper in an embossing folder for extra texture and interest

 
 To finish the outside of each card I added three different sweet winter verses and matted them using a punch and more of the coordinating designer papers.


To finish the card I used a stamp called "Snow Friends" and stamped both a verse and another snowman to complete the card. This was "snow" much fun! lol


 I hope you enjoyed my cards!


 Don't forget the most important part. Always sign and date the back of your creations.
 
 
Well, this closes out Flamingo Scraps "Christmas in July."
Suzanne, the Designer Team, and guest Designer Team all hope
you have found some needed inspiration to get you started on your Holiday projects.
 
Don't forget to look for our monthly challenge, F4, where four of our designers make their takes on four like products they are given, and feature them in a post on the fourth Friday of every month, and it's awesome ! Also brighten up your Monday evenings with LIVE USTREAM with TONYA GIBBS,the first Monday of every month at 8:30 p.m. EDT. Guaranteed to be the most fun Monday you've had in awhile. Unless you've recently been out with Tatum Channing or Brad Pitt !
Happy Scrappin'
 

Tuesday, July 30, 2013


Donna Sullivan back again for my second Guest Designer project. I can't believe we have had a full month of such awesome projects from the Flamingo Design team. I am honored to have been a part of this awesome endeavor !

 I have chosen to make a magnetic memo board, with a December Daily Tag Book, a pocket to store it in and clothespins to hang any special photos or notes you want to add to the book as the month flies by! The tag book consists of over 30 tags, journal spots, recipe cards and lots of spaces for photos and my favorite, one just for Christmas Eve! Our family does a lot of celebrating between Christmas and New Year's so I wanted to be able to have enough tags to cover ALL the days of December, not just until the 25th.  I also thought about this memo board being used year round, once the December Daily is removed, the memo board can be used during the remainder of the year. All papers used came from the Christmas In July Kit -Traditional Christmas  ON SALE in the Big Pink Bargain Bin. (Original frame before altering will be at the end of this post). Be sure to scroll all the way down for a bonus 12 x 12 layout.


Frame is 16 x 20, front pocket measures 4" x 10" x 1/2" deep
sheet metal (magnetic area), covered in patterned paper, is about 10" x 16".


Close up of the pocket (paper has been doubled for added strength). You can paint or mist the original mat that comes in the frame any color that compliments your project.


 Monday through Friday are magnetic, as are the cute little balls I found while shopping . They reminded me of little Christmas tree balls.
The Saturday and Sunday clothespins are adhered with glue since they wouldn't stick to the metal through the thicker photo mat around it. (Learning lesson, there are different strength magnetic strips).


This is the tag book, turned sideways to read the tag, it opens at the green border measures
approximately 6" x 4", spine has been reinforced with Tim Holtz grunge paper inside.
All the red dots are done with Stickles and each snowflake has a little bling!


                   I really like the selection of tags, and the quantity, that you get in this kit.
 

There are MANY tags to add photos and journaling. This is the busy person's answer to a December Daily! Add your tags to the book ring, adorned by hand dyed seam binding, tucked inside it's own book cover shown below. I flipped some to the back and spread them out to show front and back.
 

BONUS!
Included in this kit is a beautiful sheet of paper just waiting to add your photo, journaling and embellies!


MIA and Grammy visit Santa Claus 2012 and go to shop! (shopping wouldn't fit!)


I love this felt Prima flower, holding it for just the right project, and this was it! The green leaves on the layout are stickers from the sticker sheet included in your kit, as are all the journaling stickers on the page.


Now why would they add a brad, (yes, a pack of those in your kit too!) with just one HO on it? Thought it very strange, until I looked again and noticed it's HO 3 (cubed) ! I had to add that cute brad ! It's adhered to a scalloped circle with a spiral design, think old spirograph with thread!

I can't say enough about the value you get for your money with this kit. I still have paper left over to do a few more projects!

This is what the frame looked likewhen I bought it. I think it looks a lot nicer now! Thanks for looking. Hope you all have enjoyed our month of gifts to you with our ideas, and hope that we have inspired you to try them and put your own spin on them!!! HO cubed!!!


Donna Sullivan/paperfusionarts


Monday, July 29, 2013

 
Tis the season for angels, Christmas trees, presents, and snow! It's Luann again for a fun gift that anyone can make from the heart and give as Christmas present.

I used a combination of the Christmas in July Kits in Traditional and Bright. I also used one of the awesome Prima – Julie Nutting Mix Media Doll Stamps with the Wings that I paper pieced with the Christmas in July Kits. You can get the Julie Nutting Mix Media Doll Stamps from Flamingo Scraps Shop….you will love them!


I stamped the doll on a neutral colored paper from the Bright Kit and chipboard (1 each) and cut out. Stamp the pair of wings three times from the paper (I used Bright) and cut out. I did paint translucent media on the wings to make them sparkle. Now, select how you want to dress the doll and paper piece. I used Copic Markers to color her hair and cheeks. When the doll was dressed I scanned her into my computer as a picture, mirror imaged the picture, printed on to white cardstock and cut out (this is the back).


 Glue the wings to each doll. I made a doll sandwich with the chipboard in the center using pop dots. On the bottom I folded a small piece of chipboard around the center doll’s shoes and glued for the binder clip to attach. I did put a dab of glue on the binder clip and chipboard piece on the doll to hold in place. 


I scanned and made two mirror images of the Christmas tree sticker from the Traditional Kit on card stock. After fussy cutting the trees I folded each down the center (including the sticker) and glued together at the sides. Then I decorated with the light string and presents stickers from the Traditional Kit. I did the same for the rocking horse sticker (only one mirror image) .


I separated the top from the bottom of the small box. I glued the box lids to the middle of the lid of the jar (flat surface up) with E6000 glue and glued the rocking horse between the lids. Then I glued the Christmas tree to the thread spool and glued to one of the boxes. I glued the binder clip with the doll on the other box lid. Glue the fluffy snow to the lid of the jar and let all this dry over night. (Note: You could use the Melissa Frances Frogs that are available atFlamingo Scraps) .


Assemble by putting the glitter into the jar and very carefully placing the lid on the jar. Tie or glue a ribbon around the bottom and turn the jar on the lid. What a wonderful gift to give. I’m thinking about using this as a centerpiece on a table for Christmas.

I hope you enjoyed my Noel Angel Globe and will make a globe for Christmas this year. Let your imagination be your guide.

Merry Christmas in July,

Luann
Clean glass jar (I got a gallon jar from Wal-Mart because of the wings and the height of the doll) with lid
Flamingo Scraps’ Christmas in July Kits ( I used both Traditional and Bright)
Prima-Julie Nutting Mix Media Doll and Wing Stamps or a stamp of your choice
Fluffy Snow
Glitter
Binder clips
Chipboard or heavy cardboard
White card stock
Ink pad
Pop Dots
Small box (like a gift box for a Christmas Pin)
Small thread spool

Friday, July 26, 2013

July Flamingo Four

It's time for July's Flamingo Four!  This month, three other designers and I worked with these items:
 

                               1) Pink Paislee Mistables patterned paper
                               2) Pink Paislee Mistables die cut card
                               3) Empty Maya Road spool
                               4) Pink Paislee "Nantucket" wood shapes


Erin's Take

This past April I got both of my boys a scooter and they LOVED them.  In the pictures you can see my boys, Morgan in front in orange and Brandon in the back, scooting down the sidewalk in front of our house as I sit in the front yard grass with Catherine enjoying a beautiful spring day.

I used the resist paper as my background, adding in orange and teal mist to pop out the colors.  Then I layered the cut-off tops of the trim reel (painted with gesso and misted orange) along with some of the wooden parts and the journaling tag under the pictures with a few added flowers.  I used the wooden words and arrow and misted them in the same teal color to match the paper.  I then wrote the journaling on the same teal color in cardstock to bring it all together.  The journaling says "Bruised hands, scraped knees, falling off, running into stuff, the wind in this face, laughter, and endless moments of fun with their first scooters.  They played until the heat of Texas summer set in, then they moved to scooting indoors in our hallways.  What fun these scooters have been in 2013."


Ramona's Take

This month’s supplies really stumped me.  After throwing several ideas around I decided on a old film canister.  First, I applied gesso to the spool and then painted it black.  I cut the filmstrip on the Silhouette.  I added 24 black and white pictures, sized 2 inches.  Over the photos I put pieces of sheet protector (also cut to 2 inches) and applied with score tape before adding the photos so it would actually look like film itself.


Here is a picture of the film canister closed with magnets.   I used the wood pieces from Pink Paislee to close it up.


Here is how the film rolls out of the canister to reveal the photos.  This could easily taken 48 pictures, but I wanted to save the back to add my other nephew Chase’s pictures to it.


This picture shows the fourth item from the Flamingo Four kit, the journaling card.


This shows the canister open from the top.  You just pull the filmstrip out and then have to roll it back up when done looking at the pictures.

Other products I used not included in the kit are: black cardstock, Tim Holtz Distress Paint Honey Mustard, sheet protectors, Dot Magnets and washi tape.


Melissa's Take

I spray painted the spool silver to start, and drilled holes into the saucer part of the spool. From there, I strung beading twine to create the hanging portion of the mobile and then glued the same twine, wrapped up the middle of the spool. I inked the resist tag and paper with Prima chalk inks in beachy colors. Then, I glued the tag over the wrapped twine in the middle and affixed the "explore" portion of the wood embellishment, along with the wooden star and some regular miniature seashells. Next, I colored all of the wood pieces with the same colors of Prima chalk inks and tied them to the twine, at the bottom. They needed more weight, so I took complimentary colored beach glass, wrapped it in twine and glued it above each of the wooden pieces. For the paper, I used my Silhouette Cameo to cut seashells, glued them back-to-back, and tied them to the remaining two twine strings. To space out the twine a bit more, I took heavy gauge beading wire and made a woven circle with it. 


Cindy's Take

When I saw these four items, the old Sesame Street song ran through my head: "One of these things is not like the others...."  Clearly, the tricky items this month would be the empty spool. I set it aside.  I dug through my extra photos looking for something summery and beachy.  I found a picture from 2010 of my husband and our son holding hands at the beach.  Perfect!  
I picked a sea star from the wood shapes and sprayed it with the last of my Clam Bake Glimmer Mist from the November Flamingo Four.  The color and the shimmer were just what I'd hoped for.  While it was drying, I used my hands to smear gesso on the patterned paper, then wiped it with a sandy brown paint and let it dry.  Next, I mixed light blue paint with some glittery paint and dipped the end of the spool in the mixture and stamped it onto the paper repeatedly.  It turned out exactly as I'd envisioned!  I tore the die cut card and layered it with a scrap of dark blue vellum and some grayish handmade (by someone else) paper and put the photo on top.   
After adhering everything, the final step was to add a title and an additional embellishment.  I found a Mrs. Grossman's "love" sticker and inked it to match the sea star, then paired it with a Scenic Route rub-on.  I added a second Scenic Route rub-on, a heart, to the left of the photo.


That wraps up another fun Flamingo Four! We'd love to see your take. If you make something using the same four supplies as our designers, send us a picture and we'll feature it here on the blog. To find the materials we used (and so much more!) visit the Flamingo Scraps store!

Thursday, July 25, 2013

Christmas in July Cards

Merry Christmas in July Flockette's!! For this Design Team project I decided to get a jump start on my Christmas Cards. I know it is early but I got 10 done!! So, now maybe I will mail out some cards this year. LOL!   I used the Christmas in July Kit — Bright. I know this kit might scare you all with the pinks, reds, lime green and blues. But, with the chipboard pieces and all the papers I just love it!!! I really the way my cards turned out!! I used some Fantasy Snow, some texture snow, Stickles in many colors, my Silhouette Cameo and some glitter!! Plus a few other things from Flamingo Scraps Store Hope you like my creations as much I had making them.

On this card I used the snowman from the sheet of tags from the paper and one of the stickers from the sheet for the banners.
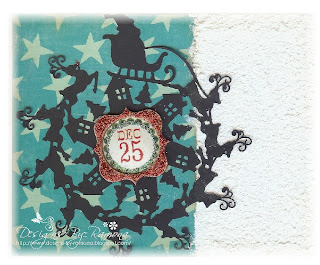
This file come from the Silhouette Store....I just loved the design and thought I would make one to and add Stickles and liven it up...Using the PP from the kit was just a plus on this one!!!
On this card I also used another file...I also added stitching from the Pink Paislee She Art — Rubons Doodle Stitches Studio Calico Wood Veneers — Sampler 2 (the star) and the Pink Paislee She Art — Rubons Doilies
Here is a penny slider card. If you have not made one of these they are so easy and fun to play with....try one and see!!

This card was made with another file and the paper from the Christmas in July Kit — Bright
On this card I used the Tim Holtz Lamp Post die and added some glossy accents on the yellow paper and used 3 rhinestones for the holly.
This card I used Studio Calico Wood Veneers — Sampler 1 and used a chipboard sticker under popped up with a pop dot and then Stickles on the Wood Veneers.

On this card I used a sheet protector to make the snowman look like he was inside the globe. Then used Fantasy Snow to give it the look that the snow had fallen to the bottom.
This card is a Mustache Snowman....Just thought I would throw that one in there for fun!!
Here is another file that I used...Love my Cameo if you can not tell.

Hope you enjoyed Flamingo Scraps Christmas in July!!! Hope you enjoyed my creations and go to the store and check out all the goodies that Suzanne has in the store.

Designs~By~Ramona


Related Posts with Thumbnails